

When you prepare for tape-in hair extensions, you need the right tools for a safe and flawless result. The essential tools for tape-in hair extensions include a sectioning comb, hair extension pliers, tape tabs or tape rolls, a tape-in extension remover, and clips or hair grippers.
Using the wrong tools can cause problems like pulling, scalp irritation, and even hair loss due to tension. Alpha’s Tape-in Hair Extensions work best when you use the proper tools. You will learn what tools are needed for tape-in hair extensions and why they matter for your comfort and hair health.
Key Takeaways
Use a sectioning comb to create neat parts in your hair. This tool helps you apply extensions evenly and prevents tangling.
Hair extension pliers are crucial for securing tape tabs. They apply even pressure, ensuring a strong bond and reducing slippage.
Always use a tape-in extension remover for safe removal. This prevents damage to your natural hair and ensures a gentle process.
Clips and hair grippers keep your hair organized during application. They help prevent mistakes and make the process smoother.
Regularly check and maintain your tools. Clean them after each use to ensure effective application and prolong their lifespan.
What Tools Are Needed for Tape-in Hair Extensions?
When you start your tape-in hair extension journey, you need to know what tools are needed for tape-in hair extensions. Using the right tape in hair extension tools ensures a smooth process and protects your hair. Here is a clear list of the essential tools you will need:
Sectioning Comb
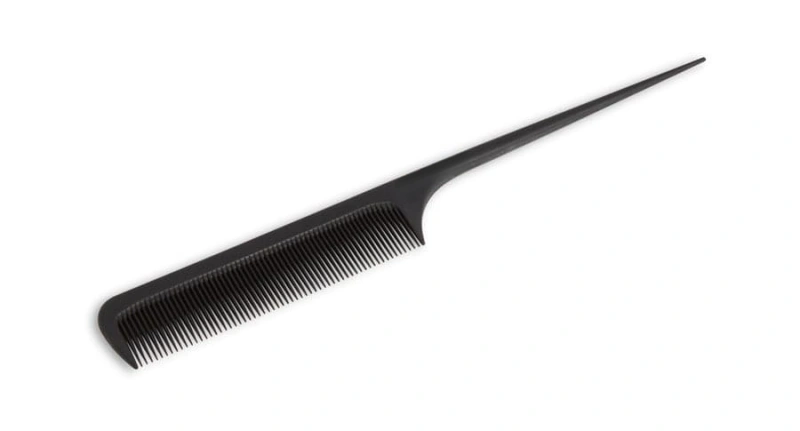
A sectioning comb helps you create neat and precise parts in your hair. You use this tool to separate your hair into sections, making it easier to apply tape-in extensions evenly. The comb prevents tangling and helps you keep your work organized.
Hair Extension Pliers
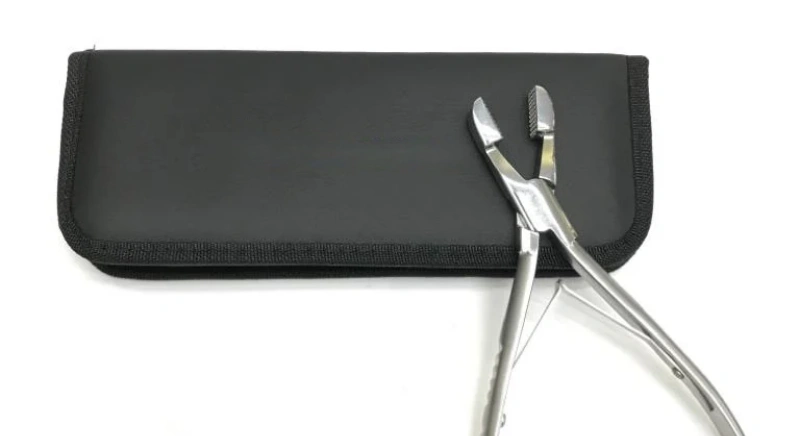
Hair extension pliers are important tape-in hair extension tools. You use these pliers to press the tape tabs firmly onto your natural hair. The flat, wide surface of the pliers applies even pressure, which helps secure the bond and reduces the risk of slippage.
Tape Tabs and Tape Rolls
Tape tabs and tape rolls are the adhesive strips that attach the extensions to your hair. Medical-grade adhesive panels create a flat, seamless connection close to your scalp. These tape-in hair extension tools help distribute the weight of the extensions evenly, which protects your hair and allows for multiple uses.
Tape-in Extension Remover
A tape-in extension remover is a must-have tool for safe removal. You use this remover to dissolve the adhesive and release the extensions without damaging your hair. Most removers contain ingredients like isopropyl alcohol or specialized tape removers, which gently break down the adhesive.
Ingredient | Effect on the Removal Process |
|---|---|
Acetone | Strong solvent that dissolves adhesive; can dry hair. |
Isopropyl alcohol | Strong solvent; less drying than acetone, but may be less effective. |
Tape remover | Specifically designed for tape extensions, less drying and often more effective. |
Clips and Hair Grippers
Clips and hair grippers keep your hair sections in place while you work. These tools prevent tangling and make the application process easier. You use them to hold back hair and keep your workspace neat.
Using the right tape in hair extension tools with Alpha’s Tape in Hair Extensions supports easy application and removal. You achieve a comfortable, secure fit and protect your natural hair. Knowing what tools are needed for tape-in hair extensions helps you get the best results every time.
Tape in Hair Extension Tools Explained
Sectioning Comb Use
A sectioning comb helps you create clean, straight parts in your hair. You use this tool to separate your natural hair into small, even sections before you start the tape-in extensions installation. This step makes the process easier and helps you avoid tangling.
Hold the comb firmly and glide it through your hair to make precise lines. Always work with dry, tangle-free hair for the best results. A sectioning comb keeps your work neat and helps you achieve a seamless blend with Alpha tape-in extensions.
Tip: Start at the nape of your neck and work upward. This method gives you better control during installation.
How to Use Hair Extension, Pliers
Hair extension pliers play a key role in the installation and removal process. You use these pliers to press the tape panels together after you sandwich your natural hair between two tape-in extensions. The flat surface of the pliers applies even pressure, which helps the medical-grade adhesive bond securely.
Hold the pliers and squeeze gently but firmly for a few seconds. This action ensures the extensions stay in place and do not slip.
For removal, you may use the pliers to gently help separate the tape panels after applying the remover. Always avoid using too much force to prevent damage to your natural hair.
Safety Note: Clean your pliers before each use to prevent product buildup and ensure a smooth installation and removal process.
Applying Tape Tabs and Rolls
Tape tabs and tape rolls are the adhesive strips that attach the extensions to your hair. Alpha tape-in extensions use medical-grade adhesive for a strong, comfortable hold. To install, peel the backing off the tape tab or cut a piece from the tape roll. Place the sticky side against a thin section of your natural hair.
Then, press another extension on top, sandwiching your hair between the two panels. Use your fingers or pliers to press the panels together.
Make sure you do not touch the adhesive with your fingers, as oils can weaken the bond. Always use fresh tape for reinstallation to keep your extensions secure.
Tip: Use small, even sections of hair for each tape-in extension. This method prevents tension and helps the extensions last longer.
Using Tape-in Extension Remover
A tape-in extension remover is essential for safe and gentle removal. Alpha recommends using an alcohol-based remover, which dissolves the medical-grade adhesive without leaving residue. Spray or apply the remover directly onto the tape area. Wait a few seconds for the adhesive to break down.
Gently peel the tape-in extensions apart, starting at the edge. If you feel resistance, add more remover and wait a bit longer.
Never pull or tug on the extensions during removal. This step protects your natural hair from breakage. After removal, comb out any leftover adhesive and wash your hair before reinstalling new extensions.
Safety Tip: Always use a remover designed for tape-in extensions. Avoid harsh chemicals that can dry out your hair or scalp.
Role of Clips and Grippers
Clips and hair grippers help you keep your hair sections organized during installation and removal. Use these tools to hold back the hair you are not working on. This step keeps your workspace tidy and prevents stray hairs from sticking to the adhesive.
Choose clips that grip firmly but do not pull on your hair. Hair grippers work well for fine or short hair, as they hold sections flat against your scalp.
Clips and grippers make the installation and removal process faster and more efficient. They also help you avoid mistakes, such as taping in stray hairs or creating uneven sections.
Pro Tip: Use multiple clips to secure all loose hair. This habit helps you focus on one section at a time and achieve a flawless finish with your Alpha tape-in extensions.
By using these tools correctly, you support the health of your natural hair and get the best results from your tape-in extensions. Alpha’s high-quality products work seamlessly with these tools, making the installation and removal process smooth and safe.
Tips for Safe Tape-in Extensions Application
Avoiding Hair Damage
You can protect your hair and extensions by following a few simple habits. Always go to bed with dry hair. Wet tape-ins can weaken the adhesive and cause matting. Secure your hair in a loose braid or bun before sleeping to reduce friction.
Choose a silk or satin pillowcase to help maintain hair health. Brush your hair gently before bed with a soft-bristle brush. Make sure you do not install extensions too close to your scalp. This prevents tension and discomfort. Use a special remover, such as an alcohol-based solution, to dissolve the adhesive before taking out your extensions.
Check for any signs of tension or discomfort and address them right away. Brush your hair twice a day and wash it every two to three days with a sulfate-free shampoo.
Tip: Never pull or tug on your extensions during removal. This keeps your natural hair safe from breakage.
Maintenance and Cleaning Tools
Proper upkeep helps your tape-in hair extensions last longer. Wait at least 48 hours after installation before washing your hair. This allows the tape bonds to set. Wash your extensions gently and use silicone-free, sulfate-free products. Keep oils and conditioners away from the tape bonds.
Brush your hair daily from the ends to the roots. Schedule regular maintenance every six to eight weeks with your stylist. This keeps your extensions in top condition and prevents tangling or slipping.
Do’s | Don’ts |
|---|---|
Use a gentle shampoo | Wash hair too soon |
Brush daily | Scrub the tape bonds |
Schedule check-ups | Apply oils near the tape area |
When to Replace Tools?
You should check your tools often to make sure they work well. Replace your sectioning comb if the teeth break or bend. Get new pliers if they become rusty or hard to use. Change your clips and grippers if they lose grip or break. Clean your tools after each use to prevent product buildup.
Schedule regular maintenance appointments every six to eight weeks. This helps you keep your extensions and tools in the best shape.
Note: Using clean, well-maintained tools ensures a smooth application and removal process every time.
Conclusion
You need the right tools for tape-in hair extensions to achieve safe, lasting results. Sectioning combs, pliers, tape tabs, removers, and clips all play a key role. Using proper tools helps you avoid damage and keeps your extensions secure. Follow these steps for a seamless, damage-free experience:
Choose high-quality, full cuticle Remy hair.
Ask a professional stylist to apply your extensions.
Use sulfate-free shampoos and conditioners.
Keep extensions away from the scalp to reduce tension.
Remove extensions gently with a special solution.
Check for tension or discomfort regularly.
Essential Product Characteristics | Impact on Tape Extensions |
|---|---|
Sulfate-free shampoo | Prevents adhesive bond degradation and moisture loss |
Silicone-free near roots | Avoids slippery buildup that weakens adhesion |
Alcohol-free formulas | Prevents breakdown of adhesive, reducing slipping |
Oil-free near tapes | Maintains bond integrity by avoiding oil interference |
You protect your hair and enjoy the best results with Alpha Tape in Hair Extensions when you use these tools and follow these tips.
FAQ
How long do tape-in hair extensions last?
You can expect tape-in hair extensions to last 1 to 2 years with proper care. Regular maintenance and gentle handling help extend their lifespan. Always follow the recommended care instructions for best results.
Can I wash my hair with tape in hair extensions installed?
Yes, you can wash your hair with tape in hair extensions. Use sulfate-free shampoo and avoid scrubbing the tape area. Gently wash and rinse to keep the adhesive strong and your extensions looking fresh.
Will tape-in hair extensions damage my natural hair?
Tape-in hair extensions do not damage your natural hair when you apply and remove them correctly. Use the right tools and follow safety tips. Avoid pulling or using harsh chemicals to keep your hair healthy.
Can I style tape-in hair extensions with heat tools?
You can style tape in hair extensions with curling irons or straighteners. Always use a heat protectant spray. Avoid applying heat directly to the tape area to maintain a secure bond and prevent slippage.
How do I remove tape in hair extensions safely?
Always use an alcohol-based remover for tape in hair extensions. Apply the remover to the tape area, wait a few seconds, and gently peel the extensions apart. Never pull or force them out to avoid damaging your natural hair.



