

Halo hair extensions are a versatile way to instantly add length and volume to your hair. To achieve a natural, seamless look, cutting and layering them correctly is essential. Proper trimming ensures the extensions blend perfectly with your own hair, enhancing style without compromising the extension’s quality or integrity.
Cutting halo extensions allows you to customize length, shape, and layers to suit your hairstyle. Learning the right techniques prevents uneven cuts, choppy edges, or damage. With careful trimming and blending, you can maintain the extensions’ softness and natural appearance while achieving a polished, professional look.
Why Cutting Halo Hair Extensions
Halo hair extensions are designed to provide instant length and volume without permanent commitment. However, sometimes the pre-made length or layering does not perfectly match your natural hair. Cutting them allows for a more customized, natural look that blends seamlessly with your hairstyle. Proper trimming can transform your halo extensions from generic to perfectly tailored.
- Achieve a natural blend with your hair
- Customize length to fit your style
- Remove uneven ends or tangles
- Create layers for a soft, voluminous look
- Enhance comfort and manageability
Cutting halo extensions ensures that they sit closer to your scalp and conform to your head shape. By trimming the ends, you eliminate bulkiness and prevent the extensions from looking artificial. Layering or shaping them can also add movement and dimension to your overall hairstyle.
Trimming halo extensions is a simple yet effective way to upgrade your look. Even small adjustments, such as cutting a few inches or adding subtle layers, can dramatically improve how your extensions integrate with your natural hair. This customization gives you a polished, professional finish every time.
How to Cut Halo Extensions?
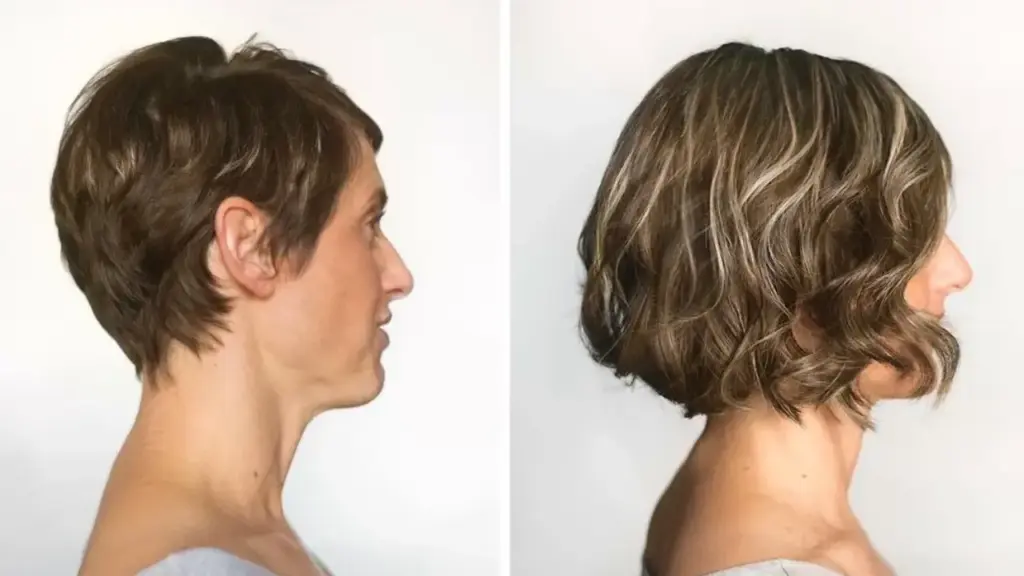
Cutting halo extensions allows you to customize length and shape, ensuring a natural, seamless blend with your own hair. With careful trimming, you can remove bulk, add layers, and achieve a flattering style that enhances volume and movement. Proper technique ensures your extensions remain smooth and healthy-looking.
Tools Needed
- Sharp hair-cutting scissors
- Comb
- Hair clips
- Spray bottle with water
- Mirror
Step 1: Prepare the Extensions
Before cutting, lay your halo extensions flat on a clean surface. Comb through carefully to remove any tangles and ensure even strands. Wetting the hair lightly can help control the cut and prevent uneven snipping. Proper preparation is essential for precise and professional-looking results.
Work slowly and section the hair to avoid cutting too much at once. Using clips to hold sections separate ensures each layer is evenly trimmed. Taking your time at this stage prevents mistakes and maintains the natural flow and thickness of the extensions.
Step 2: Determine the Desired Length
Decide how much length you want to remove and mark a visual guideline with your fingers or a comb. Consider the style of your hair and how the extensions will sit when worn. Start by cutting small amounts to avoid taking off too much at once.
Compare the extensions to your natural hair before finalizing the cut. This helps ensure a seamless blend and prevents abrupt or uneven ends. Gradually adjust the length to achieve a soft, layered finish that enhances volume and movement without looking artificial.
Step 3: Cut in Layers for a Natural Look
To create a natural, blended appearance, trim the extensions in layers. Lift small sections and cut at an angle to avoid blunt lines. Layering adds movement and helps the extensions blend effortlessly with your own hair for a polished, professional finish.
Layering also reduces bulk and allows the extensions to fall naturally around your face. Work section by section, checking the overall balance frequently. Angled cuts ensure the hair flows smoothly, creating a soft, voluminous effect that looks like part of your natural hairstyle.
Step 4: Final Touches
After cutting, comb through the extensions again to check for uneven ends. Make minor adjustments as needed to perfect the shape. Ensure the extensions are soft, smooth, and ready to wear. This finishing step guarantees a polished and natural result.
Test the extensions by placing them on your head to ensure they match your hair and sit comfortably. Trim any stray or uneven strands, and style as desired. Proper finishing enhances the extensions’ longevity and helps maintain a seamless, natural look every time.
How to Cut Layers Into Halo Hair Extensions?
Adding layers to halo hair extensions gives them a natural, flowing look that blends seamlessly with your own hair. Layering reduces bulk, adds dimension, and creates movement, making the extensions appear more realistic. Proper technique ensures the layers are even and flattering for any hairstyle.
Tools Needed
- Sharp hair-cutting scissors
- Comb
- Hair clips
- Spray bottle with water
- Mirror
Step 1: Prepare the Extensions
Lay your halo extensions flat on a clean surface. Comb through gently to remove any tangles and lightly mist with water for better control. Separating the hair into sections ensures that each layer is cut accurately, preventing uneven or jagged edges that can affect the final look.
Take your time while combing and sectioning the hair. Proper preparation makes cutting easier and more precise. Ensuring the hair is tangle-free allows each snip to be clean, resulting in smooth, natural-looking layers that blend effortlessly with your own hair when worn.
Step 2: Determine Layer Placement
Decide where you want the layers to start and how long each layer should be. Visualize how the layers will fall on your natural hair to ensure a seamless blend. Start by cutting a small amount and gradually work toward the desired length.
Use a comb to guide your cuts and maintain consistency. Cutting gradually prevents removing too much hair at once and allows you to create soft, flowing layers. Checking frequently helps achieve balance and ensures the extensions look natural from every angle.
Step 3: Cut Layers at an Angle
Take small sections of hair and hold them at an angle before trimming. Angled cuts create softer layers that fall naturally, avoiding blunt lines. Continue working through the sections, cutting gradually to build depth and dimension across the extensions.
Cutting at an angle also helps reduce bulk and adds movement, giving the extensions a more professional, polished look. Work slowly, checking the overall shape as you go. Consistency in angle and section size ensures that layers appear even and natural.
Step 4: Final Touches
Comb through the extensions again to inspect the layers and remove any uneven strands. Make minor adjustments as needed to perfect the shape and blend. Proper finishing ensures the extensions maintain a natural flow and look seamless when worn.
Test the extensions on your head to check for balance and blending with your hair. Trim any stray ends and style as desired. Proper finishing increases comfort, improves appearance, and ensures that the halo extensions sit naturally while enhancing your hairstyle.
Is It Better to Cut Hair Extensions Wet or Dry?
Deciding whether to cut hair extensions wet or dry depends on the desired outcome. Wet cutting provides precise lines and control, while dry cutting allows you to see how the hair naturally falls. Each method has advantages that can affect texture, layering, and overall blend with your natural hair.
- Wet cutting ensures even and straight lines
- Dry cutting shows natural hair movement
- Reduces the risk of uneven ends
- Helps create layers that blend naturally
- Allows for precise customization of length
Cutting extensions wet helps maintain control and accuracy. The hair lies flat, making it easier to trim straight lines and even out lengths. Wet cutting is particularly useful for blunt cuts and when working with thick or dense hair extensions that require precision shaping.
Dry cutting allows you to see the extensions’ natural flow and how they will sit once styled. It’s ideal for creating layers, soft edges, and texture, as the hair’s movement is visible. This method minimizes surprises after styling, ensuring the cut looks natural and blends seamlessly with your hair.
Conclusion
Properly cutting halo extensions ensures a natural, seamless integration with your own hair. By following careful trimming and layering techniques, you can create a polished, customized look that enhances your style while preserving the extensions’ softness, length, and longevity.
Using the right tools and techniques prevents damage to the extensions. Always blend the layers carefully with your natural hair, trimming gradually to achieve the desired shape. This careful approach ensures your extensions remain smooth, manageable, and natural-looking for repeated use.
For wholesale halo hair extensions, Alphahair provides high-quality, durable options. Their extensions are perfect for personal use or resale, offering soft, natural hair that blends effortlessly. Stocking up with Alphahair ensures professional-quality extensions that can be customized, styled, and cut safely for every hairstyle.



