

Yes, you can cut clip-in hair extensions at home and get a natural looking finish that blends perfectly with your own hair. People love customizing their extensions because you get instant volume and length without waiting for your hair to grow.
You avoid damage since clip-ins are easy to apply and remove. Alpha’s high-quality Remy human hair extensions feel soft and natural, making cutting hair extensions simple and safe. Try this step-by-step guide and enjoy a fresh look with confidence!
Key Takeaways
Use professional hair scissors for precise cuts. Regular scissors can lead to uneven results.
Always install extensions before cutting. This helps you see how they blend with your natural hair.
Cut small amounts at a time for better control. This prevents mistakes and ensures a natural look.
Use a comb as a guide while cutting. It helps achieve straight lines and a seamless blend.
Regularly maintain your extensions with trims and proper care to keep them looking fresh and healthy.
Cutting Clip in Extensions: Essential Tools and Preparation
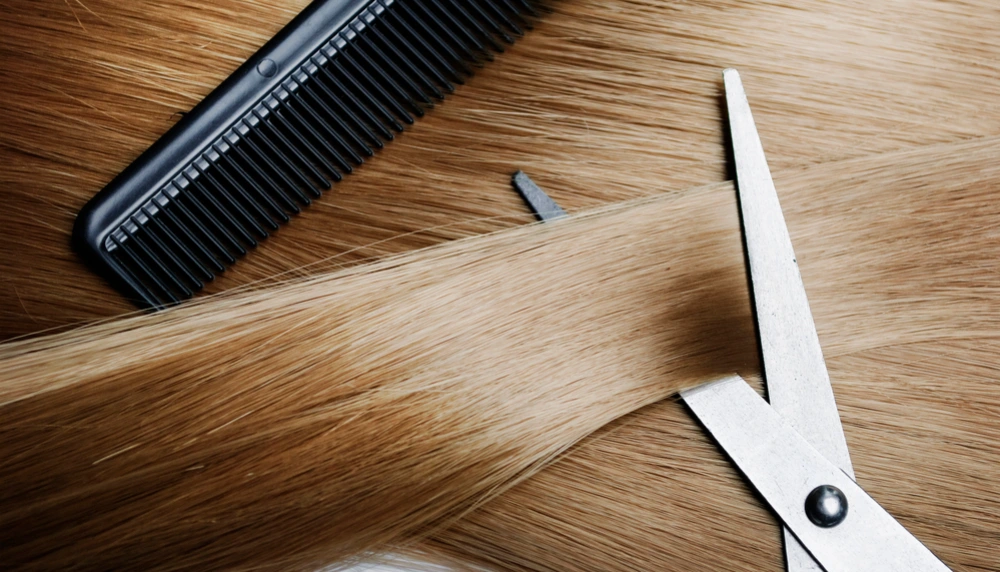
Tools for Cutting Hair Extensions
Before you start cutting hair extensions, you need the right tools. Using the proper equipment helps you get a clean, natural finish and keeps your extensions looking their best. Here’s a quick checklist of essential tools:
Professional hair scissors (never use regular scissors)
Fine-tooth comb
Sectioning clips
Wide-tooth comb for detangling
Spray bottle with water (for light misting)
Mirror with good lighting
Professional hair scissors give you sharp, precise cuts. Sectioning clips help you organize your hair and extensions, so you can work in small, manageable sections. A fine-tooth comb lets you guide each cut for accuracy.
Preparing Alpha Clip in Hair Extensions
Set up your workspace before you cut extensions. Lay out all your tools on a clean, flat surface. Make sure your Alpha Clip in Hair Extensions are clean, dry, and tangle-free. Brush them gently with a wide-tooth comb to remove any knots. Good lighting helps you see every detail, so you don’t miss a spot.
Alpha’s extensions use Remy human hair, which means the cuticles stay intact for a smooth, natural look. Many stylists and clients love the quality.
I’ve been ordering Alpha’s tape-in extensions for a while, and the quality never disappoints. They look so natural, and my salon clients keep coming back for them. I’ve even had customers say these are the best extensions they’ve ever worn.
The silicone-lined clips on Alpha’s extensions make application easy and secure. These clips hold tight all day and protect your hair from pulling or breakage.
Installing Extensions Before Cutting
Always install your extensions before you cut hair extensions. Clip them in as you would for daily wear. This step helps you see how the extensions blend with your natural hair and lets you cut extensions to the perfect length and shape. If you cut them before installing, you might end up with uneven layers or a choppy look.
Take your time and check your work in the mirror. If you need tips, try working in small sections and use a comb to guide each snip. This method works well for both beginners and those with experience using professional hair extensions.
How to Cut Clip in Hair Extensions: Step-by-Step Guide
Sectioning and Applying Extensions
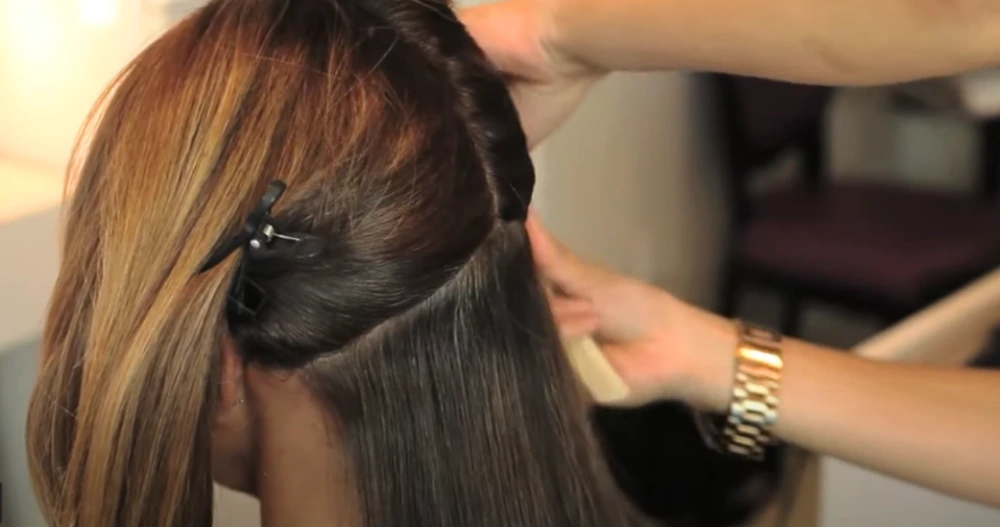
Ready to start cutting hair extensions? Begin by installing your Alpha clip in hair extensions just as you would for a regular day. This step helps you see how the extensions blend with your natural hair and lets you cut hair for extensions with accuracy. Here’s a simple process to follow:
Prepare your hair. Wash and dry it, then brush out any tangles.
Use a comb to create a horizontal parting at the nape of your neck. Clip up the rest of your hair.
Open the clips on your Alpha extensions. Place the weft against your scalp and secure the middle clip first.
Release another section of hair, moving up your head. Repeat the process, using smaller wefts for the sides.
For extra volume, create smaller sections at the crown. If you have fine hair, use slightly thicker sections to hide the clips.
Brush through your hair and extensions to blend everything together. Check in the mirror to make sure you have a flawless blend.
Tip: Always leave a small gap between the extensions and your scalp. This helps with comfort and allows for natural movement.
Cutting Extensions Dry
You want to cut clip-in hair extensions while they’re dry. Wet hair stretches and shrinks as it dries, which can lead to uneven results. Dry extensions show their true length and texture, so you get a more natural finish. Use professional hair scissors for the best results.
These scissors give you sharp, clean lines and help you avoid split ends.
Work slowly. Take your time and check your progress after each snip. Rushing can lead to mistakes, especially if you cut hair extensions at home for the first time.
Using a Comb for Guidance
A comb is your best friend when you cut hair extensions. Hold the comb under the section you want to trim. This gives you a straight guide and keeps the hair steady. Slide the comb down to the desired length, then cut just above the teeth.
This method helps you achieve a flawless blend between your natural hair and the extensions.
You can use the back end of a rat tail comb to create straight partings. This technique works well for layering hair extensions and makes the process easier.
Cutting Small Amounts for Precision
Cutting small amounts at a time gives you control and precision. You avoid big mistakes and keep the extensions looking natural. Make tiny snips with the tips of your scissors. This technique helps you blend the extensions with your own hair and prevents harsh lines.
If you want a textured look, try point cutting. Snip into the ends with the tips of your scissors. This removes bulk without losing length and creates a soft, piece-y texture. Always check your work as you go. Small adjustments make a big difference in the final result.
Tips for cutting hair extensions:
Never cut large chunks at once.
Always check the blend after each snip.
Use layering hair extensions techniques for a seamless finish.
Mistakes can happen, but working slowly and cutting small amounts helps you avoid uneven results. You’ll get a flawless blend and a style that looks professional, even if you cut hair extensions at home.
Cutting Techniques for Clip-In Extensions
When you want your extensions to look like your own hair, the right cutting techniques make all the difference. Let’s break down the most popular ways to cut extensions so you can get a flawless blend every time.
Blunt Cutting for Thickness
Blunt cutting means you cut straight across the ends of your extensions. This technique works best if you want a thick, bold finish. You’ll love this method if you want to remove wispy or uneven ends. It’s also great for tidying up after you layer or shape your extensions.
Cut straight across for a clean, full look.
Use this method to remove split or thin ends.
Works well with Alpha’s double-drawn, super-thick extensions because the hair stays thick from top to bottom.
Tip: Always check the length on both sides before you finish. Blunt cutting gives you a strong line, so evenness matters.
Point Cutting for Soft Ends
Point cutting gives your extensions a soft, feathered finish. Instead of cutting straight across, you angle your scissors into the ends. This technique removes bulk and blends the extensions with your natural hair. You get a more natural, lived-in look.
Hold the scissors vertically and snip into the ends.
Use this method to soften harsh lines and add texture.
Perfect for blending extensions with layers in your own hair.
If you want your extensions to move and flow like real hair, point cutting is your go-to.
Slicing and Layering for Blending
Slicing and layering help you shape your extensions so they blend perfectly with your natural hair. Slicing means you cut diagonally from the center out to the ends. Layering adds movement and helps the extensions fall naturally.
Slicing adds shape around your face and tapers the ends.
Layering removes bulk and creates a seamless transition between your hair and the extensions.
Both techniques work best when you want a flawless blend, especially if you have thick or double-drawn extensions.
Note: Alpha’s extensions are thick from root to tip, so you can slice and layer without losing volume.
Cutting Weft Hair Extensions
Cutting weft hair extensions takes a little extra care. Always measure and mark where you want to cut before you start. Use sharp scissors to avoid fraying. If you need to cut extensions to fit your head shape, cut between the stitches, not through them.
Measure twice, cut once.
Seal the ends with a drop of clear glue if you notice any shedding.
Cutting weft hair extensions lets you customize the fit for a natural look.
Cutting Clip-In Extensions Shorter
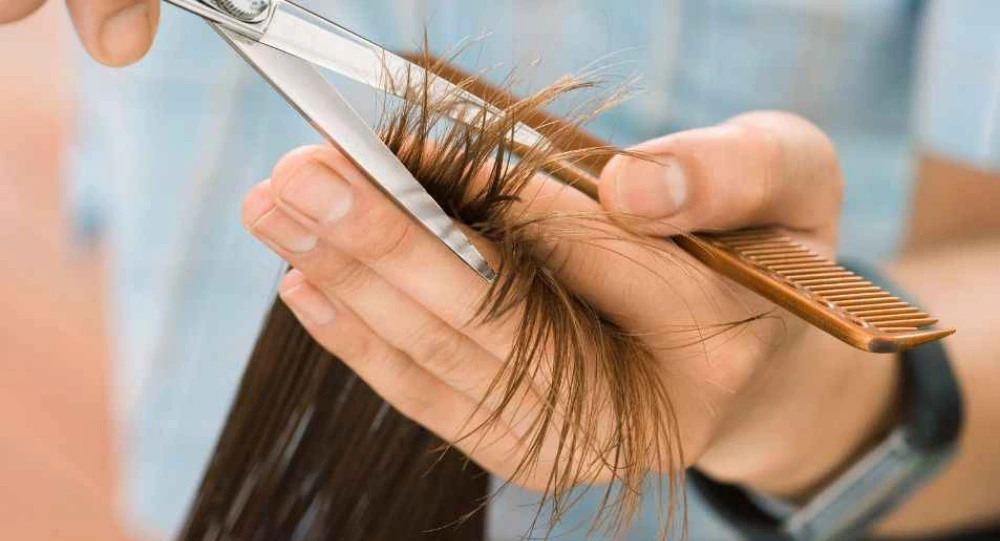
Sometimes you want to cut the clip in hair extensions shorter for a new style or to match your haircut. Always install the extensions first, then trim them while they’re clipped in. This way, you see exactly how they blend with your own hair.
Start by cutting small amounts.
Use a comb to guide your scissors.
Check the blend after each snip for a smooth finish.
Pro Tip: Alpha’s professional hair extensions are easy to cut and style, so you can experiment with different looks at home.
When you use these cutting techniques, you get a flawless blend that looks and feels natural. Alpha’s double-drawn, super-thick extensions give you plenty of hair to work with, so you can layer, slice, or blunt cut without losing fullness.
If you want to cut hair for extensions and get salon results, just take your time and trust the process.
Achieving a Natural Look: Blending Methods
Blending Extensions with Natural Hair
You want your extensions to look like your own hair. Start by applying a leave-in conditioner to both your natural hair and the extensions. This step keeps everything soft and manageable. Gently scrunch your hair to encourage waves or curls. Use a blow dryer on low heat with a diffuser, moving from roots to ends.
If you prefer, let your hair air-dry in a loose style. Once dry, use your fingers to separate the strands and add volume. This approach helps you achieve a seamless blend and a natural look.
Tip: Detangle with a wide-tooth comb or your fingers, starting at the ends and working up. Regular detangling on damp hair keeps your extensions looking fresh and prevents matting.
Styling Tips for Seamless Results
Layering makes a big difference when you blend hair extensions. Layers help your extensions fall naturally and avoid a blunt or bulky finish. You get more movement and dimension, which creates a seamless look. Try curling or waving your hair and extensions together.
Use a curling iron or wand for soft waves, or braid your hair overnight for heatless texture. Curls and waves help the extensions mix with your own hair, making the blend look effortless.
For extra protection, gather your hair in a loose ponytail with a silk scrunchie before bed. Cover with a satin bonnet or sleep on a silk pillowcase to keep everything smooth.
Texturizing and Coloring Alpha Extensions
Alpha extensions give you plenty of options for achieving a natural look. You can layer and texturize them for a feathered appearance. If you want to match your hair color, try these steps:
Mix it up by choosing extensions in different shades to mimic natural highlights.
Pick the shade that matches your dominant hair color. Check it in different lighting.
Add lighter colors for a fresh, summer vibe—think platinum blonde or caramel highlights.
Alpha extensions are made from Remy human hair, so you can style and dye them for a perfect match. Always test a small section first or ask a professional for help if you want to color your extensions.
Aftercare for Alpha Clip in Hair Extensions
Taking care of your Alpha clip-in extensions keeps them looking fresh and helps them last longer. You want your investment to stay soft, shiny, and tangle-free. Let’s walk through some easy aftercare tips so you get the most out of your hair extension maintenance routine.
Washing and Conditioning
You should always brush your extensions before washing. Use a wide-tooth comb or a soft-bristle brush to gently detangle. Wash with a sulfate-free shampoo and conditioner.
Focus on the hair, not the clips, and rinse with cold water. Pat dry with a towel. Let the extensions air dry or use a blow dryer on a low setting. Apply a little hair oil or serum to the ends for extra softness.
Pro tip: Never rub or twist the extensions when drying. This keeps the cuticles smooth and prevents frizz.
Heat Protection and Styling
If you love styling your extensions, always use a heat protectant spray. This simple step shields the hair from damage and keeps it vibrant. Here’s a quick look at some top heat protectant products:
Product Name | Key Feature | Best for Hair Type |
|---|---|---|
SilkShield Strength | Antioxidant-rich formula | All types |
ThermalShield Spray | Heat Defense up to 450°F | Thick |
StyleGuard Mist | Lightweight Formula | Fine |
IronArmor Serum | Fortifying Nutrients | All Types |
Keep your styling tools below 180°C (356°F). You’ll notice your extensions stay shiny and healthy even after curling or straightening.
Regular Trims and Maintenance
Trimming hair extensions every few months helps prevent split ends and keeps the style looking fresh. You don’t need to cut much—just snip the tips to maintain the shape. Regular maintenance makes your extensions last up to two years, which is the typical lifespan for Alpha’s Remy human hair.
Storing Extensions Properly
Storing your extensions the right way protects them from tangling and dust. Try these methods:
Use silk or satin pouches to reduce friction.
Hang extensions to keep their natural flow.
Store in breathable bags to avoid moisture buildup.
Detangle before storage and fold flat.
Roll or coil gently to maintain shape.
You’ll find your extensions stay smooth and ready for your next style.
Troubleshooting and Common Mistakes
Cutting clip-in hair extensions at home can feel tricky, but you can fix most mistakes with a few smart moves. Let’s look at the most common issues and how you can solve them for a flawless finish.
Fixing Uneven Cuts
Uneven cuts happen to everyone, especially if you rush or cut too much at once. You can fix this by using a few simple techniques:
Point Cutting: Hold your scissors vertically and snip into the ends. This softens harsh lines and helps blend the extensions with your natural hair.
Slicing and Slithering: Slide your scissors gently down the hair, shaping around your face and connecting layers. This creates a smooth transition.
Blunt Cutting: If you notice jagged ends, pull the hair forward and cut straight across for a sharp, clean look.
Tip: Always cut a little at a time. You can always take off more, but you can’t put hair back!
Using Extensions to Hide Errors
Sometimes, you make a mistake and need a quick fix. Clip-in extensions can help you hide small errors:
Proper Placement: Move the wefts slightly lower or higher to cover uneven spots.
Blending Techniques: Tease your natural hair at the roots to help the extensions blend in and cover any choppy areas.
Styling Methods: Match the texture of your extensions and natural hair. Curl or wave both together for a seamless look.
If you blend and style carefully, most small mistakes disappear!
When to Seek Professional Help?
You might run into problems that feel too big to fix at home. If you struggle to blend extensions with short hair, can’t match the color, or worry about damaging your natural hair, it’s time to visit a stylist.
Professionals know how to create a seamless blend and can fix tricky mistakes. Don’t hesitate to ask for help if you want the best results.
Conclusion
Cutting and blending Alpha Clip in Hair Extensions at home is simple when you follow these steps:
Section your hair for a clean base.
Apply extensions close to the roots.
Trim and blend for a seamless look.
Style both your hair and extensions together.
Finish with a touch of shine.
Advantage | Why It Matters |
|---|---|
Easy to use | Quick to apply and remove |
Versatile | Many lengths, colors, and textures |
Cost-effective | More affordable than salon extensions |
Try new styles with confidence. Keep up with aftercare and trims. If you feel unsure, a professional can help you get the perfect finish.
FAQ
Can I cut Alpha Clip in Hair Extensions myself?
Yes, you can! Alpha Clip in Hair Extensions are designed for easy DIY cutting. Just use sharp scissors, work slowly, and follow the guide. You’ll get a natural look at home.
Will cutting extensions damage them?
No, cutting won’t damage your extensions if you use professional scissors and cut small amounts at a time. Always trim when dry and avoid tugging near the clips.
How often should I trim my clip-in extensions?
You should trim your extensions every few months. Regular trims keep the ends healthy and help your style look fresh. If you style often, check for split ends more frequently.
Can I dye Alpha Clip in Hair Extensions after cutting?
Absolutely! Alpha extensions use 100% Remy human hair. You can dye or tone them after cutting. Always test a small section first or ask a professional colorist for help.
What if I make a mistake while cutting?
Don’t worry! You can fix uneven cuts by blending with point cutting or layering. If you’re unsure, visit a stylist for help. Extensions can also hide small errors with clever placement.



