

You can easily transform your style with diy clip-in hair extensions right at home. You save money, get a natural look, and choose every detail to match your personality. No matter your hair type, you can craft them yourself.
Professional stylists agree—diy clip-ins work for thick, fine, and all hair types. Check out this quick guide:
Hair Type | Clip-In Extension Type |
|---|---|
Thick Hair | Classic Lace Clip Ins |
Fine Hair | Seamless Clip Ins |
All Hair Types | Halo Hair Extensions |
Instant Volume | Ponytail Clip Ins |
You don’t need experience to start diy hair extensions. With expert tips, you’ll feel confident and creative every step of the way.
Key Takeaways
DIY clip-in hair extensions offer a cost-effective way to change your look without salon visits. You can customize every detail to match your style.
Choose between human hair for a natural look and synthetic hair for affordability. Each type has its own benefits depending on your needs.
Follow simple methods like sew-in, hot glue, or no-sew techniques to create your extensions. Pick the method that suits your skills and desired durability.
Proper care is essential for maintaining your extensions. Wash them every 7-10 wears and store them correctly to keep them looking fresh.
Alpha clip-in hair extensions provide high-quality options that are easy to customize and apply, making them a great choice for both beginners and experienced users.
Materials for DIY Clip-In Hair Extensions
Choosing Human or Synthetic Hair
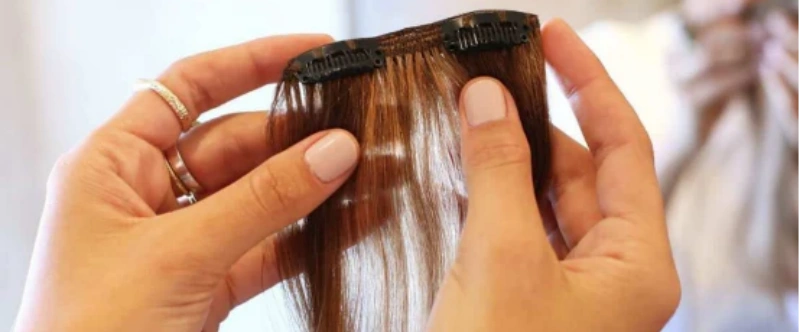
When you start your clip-in journey, choosing the hair is the first big step. You can pick between premium human hair and synthetic hair. Each has its own perks. Human hair gives you a natural look and feel. You can style it with heat tools and even dye it.
Synthetic hair is more affordable and keeps its style, but you can’t use heat or dye on it as much.
Here’s a quick comparison to help you decide:
Type of Hair | Lifespan | Maintenance Needs |
|---|---|---|
Human Hair | 1 year or more | Needs regular washing and styling |
Synthetic Hair | Few months | Easy care, keeps its shape |
If you want seamless clip-in hair extensions that last, premium human hair is the way to go. Synthetic clip-ins work well for short-term changes or special events.
Essential Tools and Supplies
You don’t need a salon to make your own clip-in hair extensions. Grab these supplies before you start:
Wefts of premium human hair or synthetic hair
Small, sturdy clips (silicone-lined clips are best for comfort)
Needle and thread (for sew-in methods)
Hot glue gun (for glue methods)
Sectioning clips to keep hair neat
Scissors for cutting wefts
Tape extension tabs (if you want extra hold)
Micro beads for extra support
Most clip-in hair extensions cost between $50 and $300, depending on the quality and brand. Investing in good tools makes your clip-in extensions last longer and look better.
Why Choose Alpha Clip in Hair Extensions?
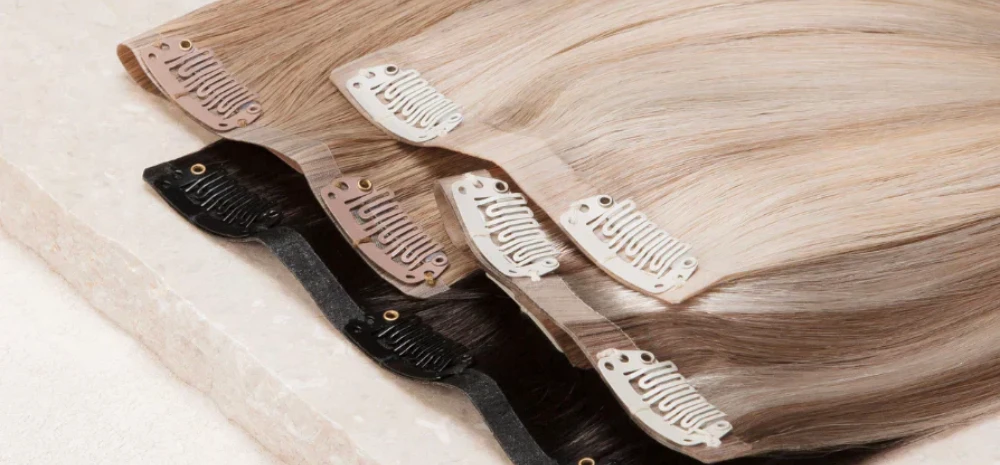
Alpha clip-in hair extensions make your DIY project easier and more rewarding. You get premium human hair with intact cuticles, so your seamless clip-in hair extensions blend perfectly. The silicone-lined clips hold tight but feel gentle on your scalp.
Alpha offers a wide range of shades and lengths, so you can match your style. The extensions are double-drawn and super thick, giving you natural volume. You can curl, straighten, or dye them just like your own hair. Alpha clip-ins are affordable, durable, and easy to use—perfect for anyone who wants salon-quality results at home.
Tip: Alpha’s clip-in hair extensions come ready to customize, making them a top pick for beginners and pros alike.
How to Make Clip In Hair Extensions: Methods
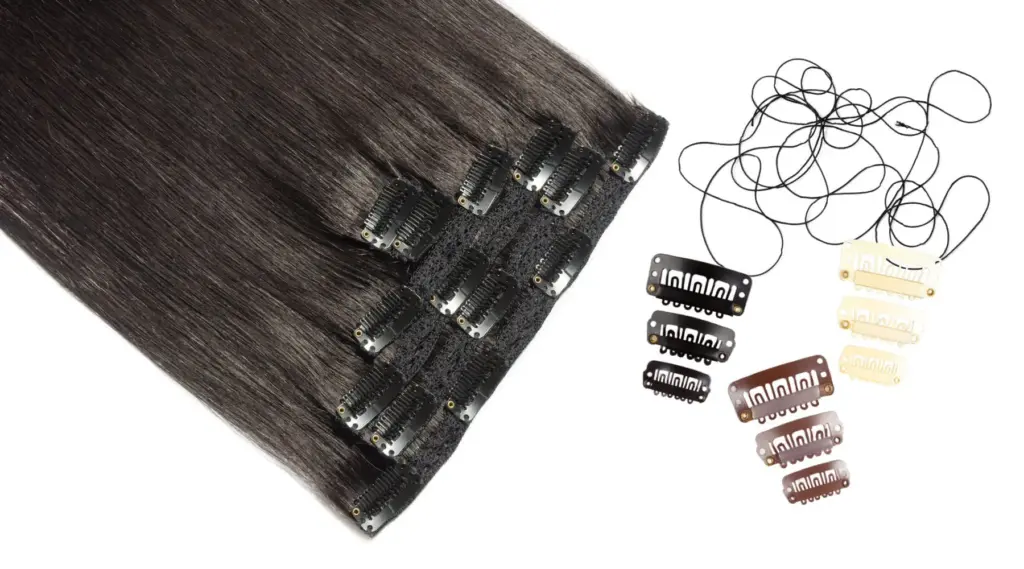
Ready to dive into how to make clip-in hair extensions? You have several methods to choose from, each with its own steps and benefits. Let’s walk through the most popular techniques so you can pick the one that fits your style and skill level.
Sew-In Method
If you want sturdy, long-lasting extensions, the sew-in method is a classic choice. You’ll need a needle, thread, wefts of hair, and clips.
Steps:
Lay out your hair wefts and measure them to fit your head.
Thread your needle and knot the end.
Place a clip at the edge of the weft.
Sew through the holes in the clip and the weft, making tight stitches.
Repeat for each clip you need.
Trim any extra thread and check that the clips are secure.
Pros:
Strong hold
Lasts through many wears
Works well with Alpha’s double-drawn wefts
Cons:
Takes more time
Requires basic sewing skills
Tip: Alpha’s silicone-lined clips make sewing easier and more comfortable for your scalp.
Hot Glue Gun Method
Looking for a quick way to make clip-in hair extensions? The hot glue gun method saves time and works well for beginners.
Steps:
Cut your hair wefts to size.
Heat your glue gun.
Place a small line of glue on the top edge of the weft.
Press the clip onto the glue and hold for a few seconds.
Let the glue cool before using the extension.
Pros:
Fast and simple
No sewing needed
Good for temporary styles
Cons:
Glue can weaken over time
Not as durable as sewing
Note: Alpha’s wefts are thick and sturdy, so they hold up well with glue, but always check the clips before each use.
Tape and Glue Method
You can combine tape and glue for extra hold. This method works best if you want your clip-in hair extensions to stay put during busy days.
Steps:
Cut your wefts and tape tabs to size.
Attach tape tabs to the top of the weft.
Add a small amount of glue for extra strength.
Press the clip onto the taped area.
Wait for everything to set before clipping in.
Pros:
Extra secure
Good for fine hair
Easy to adjust
Cons:
Tape can leave residue
Takes a bit longer to prepare
Tip: Alpha’s extensions come with strong wefts that work well with tape and glue methods.
No-Sew, No-Glue Method
Want a method that’s gentle and easy? The no-sew, no-glue method lets you make clip-in hair extensions without any mess.
Steps:
Choose wefts with pre-attached clips or use micro beads.
Slide the clip or bead onto the weft.
Clamp the bead with pliers if needed.
Check that everything feels secure.
Pros:
Easy to apply and remove
No long-term commitment
Minimal damage to natural hair
Versatile styling options
Cost-effective compared to other extension types
Cons:
Daily installation can take 15-30 minutes
Clips may show if not placed carefully
May not suit busy schedules
Note: Alpha’s clip-in hair extensions are designed for easy attachment, making this method perfect for beginners.
Method Comparison
Let’s compare the main methods for making clip-in hair extensions. This table shows cost and durability so you can choose what works best for you.
Method | Cost | Durability |
|---|---|---|
Clip-in | Budget-friendly | Reusable for months with care |
Sew-in | More expensive | Varies, requires professional care |
Fusion | Higher cost | Varies, longer application time |
You can see that clip-in hair extensions offer a budget-friendly way to get reusable extensions. Sew-in methods cost more but last longer with proper care. Fusion methods take more time and money, but you get a professional finish.
If you want a balance of cost, durability, and easy customization, Alpha’s clip-in hair extensions work with all these methods. You get salon-quality results at home, no matter which technique you choose.
Now you know how to make clip-in hair extensions using different methods. Pick the one that matches your skills and schedule, and enjoy your new look!
Customizing Clip-In Hair Extensions
Measuring and Cutting Wefts
You want your clip-in extensions to fit perfectly, so measuring and cutting wefts is a key step. Start by measuring each section of your head where you plan to place the extensions. Mark the length with a water-soluble pencil. Lay the weft flat on a clean surface and use sharp shears for a smooth cut.
Make sure you cut in one firm motion to avoid ragged edges. Apply a sealant or fabric glue to the ends right after cutting. Let it dry before you move on. This helps prevent shedding and keeps your extensions looking fresh.
Tip: Never use dull scissors or cut wefts while holding them in your hand. Always work on a flat surface for best results.
Doubling for Fullness
If you want extra volume, try doubling your wefts. This means you stack two wefts together before attaching the clips. Double weft extensions give you a thicker look with fewer pieces. You’ll notice the hair feels denser and the weight spreads evenly across your scalp.
This method works especially well if you have fine or thin hair. Fewer pieces also make installation quicker and more comfortable.
Double wefts create a fuller appearance.
You need fewer pieces for a complete look.
Even weight distribution makes wearing extensions all day easy.
Color and Texture Matching
Getting a seamless blend is all about matching color and texture. Use color swatches or virtual try-on tools to pick the right shade. Check the color in natural and indoor lighting to avoid mismatched undertones. Style your natural hair and extensions together for a unified look.
Lightweight serums and leave-in conditioners help match the texture. Always use sulfate-free, color-safe products to keep your extensions vibrant.
Block out time to style both your hair and extensions together. This helps you achieve a flawless finish.
Using Alpha for Customization
Alpha makes customizing your extensions simple. You can choose from a wide range of lengths, colors, and textures. If you want a custom shade, Alpha offers professional dyeing options. The flexible clip design lets you pick what feels most secure. Here’s a quick look at what Alpha provides:
Feature | Options Available |
|---|---|
Length | Various lengths, custom available |
Color | Multiple colors, custom dye options |
Texture | Straight, wavy, curly |
Clip Design | Flexible, silicone-lined |
With Alpha, you get extensions tailored to your style. You can create a custom look that matches your personality and hair goals.
How to Install Clip-In Hair Extensions?
Ready to change your look in minutes? You can master how to install clip in hair extensions with just a few easy steps. Let’s break down the process so you get a flawless finish every time.
Sectioning and Placement
Start with clean, dry hair. Brush out any tangles so your extensions sit smoothly. Use a tail comb for sharp, even sections. Here’s a step-by-step guide for installation:
Wash and blow-dry your hair. Brush from root to tip until it feels smooth.
Divide the back of your hair into 4 to 6 horizontal sections, starting at the neck and working up to the crown. This helps with attaching the back pieces evenly.
For the sides, create 4 to 6 vertical sections from your ears to your temples. This makes attaching the sides simple and neat.
Open the clips on your extensions. Position each piece along the sectioned hairline, close to the roots.
Snap the silicone-lined clips shut. They grip your hair gently but securely, so you can wear them all day without discomfort.
Repeat the process until you reach your desired volume.
Tip: Always start with the largest weft at the bottom and work your way up. This gives you a natural, layered look.
Blending for a Natural Look
You want your extensions to blend in so no one can tell you’re wearing them. Here are some tips to help you get that seamless finish:
Match the color and texture of your extensions to your natural hair. Alpha offers a wide range of shades and textures, so you can find your perfect match.
Layer the extensions strategically. Place thicker pieces at the bottom and lighter ones near the top for natural volume.
Use a lightweight serum or leave-in conditioner to smooth out any frizz. This helps your hair and extensions move together.
Comb through your hair and extensions after installation. This mixes the strands and hides any visible clips.
Maintain your extensions with regular washing and gentle styling. This keeps the blend looking fresh every time you apply clip-in extensions.
Pro Tip: If you notice any bumps or uneven spots, gently tease your natural hair over the clips to hide them.
Quick Styling Tips
Once your extensions are in, you can style them for any occasion. Check out these quick ideas from professional stylists:
Technique | Tools Needed | Duration | Best For |
|---|---|---|---|
Halo Curls | Curling wand, heat protectant | 20 min | Weddings |
Braided Updo | Bobby pins, teasing comb | 15 min | Parties |
Half-Up Twist | Hair ties, loop brush | 10 min | Dates |
Heatless Waves | Flexi rods, setting spray | Overnight | Casual events |
Sleek Ponytail | Gel, flat iron | 10 min | Formal dinners |
You can try halo curls for soft, romantic waves or go for a sleek ponytail for a polished look. Always use a heat protectant before styling the extensions with hot tools. If you want a quick change, a half-up twist or braided updo works great for busy mornings.
Remember: Alpha’s silicone-lined clips keep your extensions secure, so you can style with confidence. You don’t have to worry about slipping or discomfort during installation or while styling the extensions.
Now you know how to install clip-in hair extensions like a pro. With the right sectioning, blending, and styling tips, you’ll get a natural, beautiful look every time.
Caring for Clip-In Hair Extensions
Taking care of your clip-in hair extensions keeps them looking fresh and beautiful. With proper care, you can enjoy soft, shiny hair for months. Here’s how you can keep your extensions in top shape.
Washing and Conditioning
You don’t need to wash your extensions after every use. Try to wash them every 7-10 wears. Use a gentle, sulfate-free shampoo and conditioner. Focus on cleaning the hair, not the clips.
Rinse with cold water to lock in moisture. After washing, pat the extensions dry with a towel. Let them air dry or use a blow dryer on a low setting. Add a drop of hair oil or serum to the ends for extra shine.
Use sulfate-free products
Wash every 7-10 wears
Avoid soaking the clips
Air dry for best results
Tip: Always detangle before washing to prevent knots.
Heat Styling and Protection
You can style your extensions with heat tools, but be careful. High heat can damage Remy hair, causing dryness and fading. Keep your tools under 250°F. Always use a heat protectant spray before curling or straightening. This helps your extensions last longer and keeps them looking healthy.
Use heat tools under 250°F
Spray heat protectant before styling
Avoid daily heat styling
Storage and Longevity
Storing your extensions the right way helps them last. Brush them out before putting them away. You can hang them on a velvet or extension hanger to keep them smooth. A silk or satin bag or box works well to prevent tangles and keep moisture in. Lay them flat if you use a box, and make sure they are dry before storing.
Hang on a velvet or extension hanger
Store in a silk or satin bag or box
Keep them tangle-free and dry
Alpha Product Care Tips
Alpha recommends a few simple steps for the best results:
Wash with sulfate-free shampoo and lukewarm water.
Condition from mid-lengths to ends, avoiding the clips.
Let your extensions air dry fully.
Brush gently from the ends up with a soft-bristle brush.
Store in a breathable bag or box after brushing.
Following these tips will help your clip in hair extensions stay soft, shiny, and ready to wear whenever you want a new look.
Alternatives to DIY Clip-In Hair Extensions
Ready-Made Options
You might want a quick solution instead of making your own clip-in hair extensions. Ready-made options give you instant results with almost no effort. You can find these extensions in stores or online, and they come in many styles, lengths, and colors. You just pick the set that matches your hair and snap them in.
Here’s what you get with ready-made clip-in hair extensions:
Fast application—no sewing, gluing, or measuring.
Choices for length and color, but less room for full customization.
Prices range from $10 to $1,000, depending on quality and brand.
No need for special skills or tools.
If you want a new look for a special event or just want to try something different, ready-made extensions make it easy. You don’t have to spend hours crafting or worry about getting every detail perfect.
Ready-made extensions save time and let you experiment with style whenever you want.
Why Choose Alpha?
Alpha’s ready-made clip-in hair extensions stand out for their quality and comfort. You get 100% Remy human hair, so your extensions look and feel natural. The silicone-lined clips keep everything secure and gentle on your scalp. You can apply and remove these extensions in minutes, which means you can change your style for any occasion.
Here’s why Alpha is a top choice:
Easy to apply and remove—no professional help needed.
Flexible for temporary changes, perfect for parties or daily wear.
Minimal impact on your natural hair health.
Style extensions off your head for more control.
Silicone-lined clips add comfort and prevent slipping.
No long appointments or complicated fittings.
You can enjoy added volume and length without worrying about damage. Alpha’s extensions let you switch up your look while keeping your hair healthy. If you want versatility, comfort, and a natural finish, Alpha’s ready-made clip-in hair extensions are a smart pick.
With Alpha, you get salon-quality results at home. You can trust your extensions to blend seamlessly and stay secure all day.
Conclusion
You hold the power to transform your look with DIY clip-in hair extensions. Many people love DIY because it’s cost-effective, easy to install, and lets you experiment with styles for special occasions. You can pick your favorite colors and lengths, then switch things up whenever you want—no salon needed.
Most choose DIY for:
Quick changes without commitment
Customization for every event
Budget-friendly beauty
Proper care makes your extensions last and keeps them looking gorgeous. Check out this quick guide:
Maintenance Aspect | Impact on Longevity and Appearance |
|---|---|
Regular Washing and Conditioning | Maintains softness and manageability, preventing damage. |
Frequency of Use | Occasional use allows extensions to rest, extending their lifespan. |
Application and Removal Techniques | Gentle handling minimizes damage, preserving clips and hair strands. |
Proper Storage | Prevents tangling and damage, maintaining overall integrity. |
Regular Inspections | Identifies wear and tear early, allowing for timely treatments. |
Ready to get started? Try making your own extensions for full control, or pick Alpha’s ready-made sets for instant style. You can do this—enjoy your new hair journey with confidence!
FAQ
How long can you wear clip-in hair extensions each day?
You can wear clip-in extensions for up to 12 hours. Remove them before sleeping to avoid tangling and scalp stress. This keeps your hair healthy and your extensions looking great.
Can you style clip-in hair extensions with heat tools?
Yes, you can use curling irons or straighteners on human hair extensions. Always spray a heat protectant first. Keep the temperature below 250°F for best results.
Do clip-in hair extensions damage your natural hair?
Clip-ins are gentle when you install and remove them carefully. Avoid tugging or pulling near the roots. Silicone-lined clips from Alpha help prevent breakage and keep your scalp comfortable.
How do you store clip-in hair extensions?
Brush out tangles.
Lay extensions flat in a silk or satin bag.
Keep them dry and away from sunlight.
Tip: Proper storage helps your extensions last longer and stay soft.
Can you dye or tone clip-in hair extensions?
You can dye or tone 100% human hair extensions. Test a small section first. For best results, ask a professional colorist to help you match your shade.



