

Installing tape-in hair extensions is a simple, effective way to add length, volume, and style to your hair. With the right tools and techniques, you can achieve a seamless, natural look that blends perfectly with your own hair, enhancing your overall appearance in just a short time.
Proper preparation and careful application are key to maximizing the lifespan of tape-in extensions. By following step-by-step instructions, you can ensure secure placement, smooth blending, and long-lasting results, whether doing it at home or with a professional stylist. Maintenance also plays a crucial role in keeping hair healthy.
What are Tape in Hair Extensions?
Tape-in hair extensions are semi-permanent hairpieces attached to natural hair using double-sided adhesive tape. They lie flat against the scalp, providing a seamless, natural look while adding length, volume, and thickness. Lightweight and reusable, tape-ins are a popular, low-damage option for quick and versatile hair transformations.
- Quick and Easy Application: Tape-in extensions can be applied in under an hour. The adhesive strips attach securely to small sections of hair, allowing instant volume and length without complex installation or professional tools. They are ideal for those seeking fast hair transformations.
- Natural Appearance: The extensions lie flat against the scalp, blending seamlessly with natural hair. This ensures a smooth, undetectable finish, even with updos or ponytails. Proper placement and sectioning create a natural look that enhances your overall hairstyle.
- Reusable and Cost-Effective: With careful handling and proper maintenance, tape-in extensions can be removed and reapplied multiple times. This reusability makes them a budget-friendly option, providing long-lasting style without frequently purchasing new extensions.
- Low-Damage Option: Tape-ins do not require heat or sewing for installation. Gentle removal preserves the natural hair’s health, reducing breakage and stress on hair strands, while allowing you to enjoy longer, thicker hair safely.
- Versatile Styling: Tape-in extensions allow a variety of hairstyles, including curls, waves, braids, and straightened styles. Their flexibility ensures you can change your look frequently while maintaining a natural, voluminous appearance.
How to Install Tape in Hair Extensions?
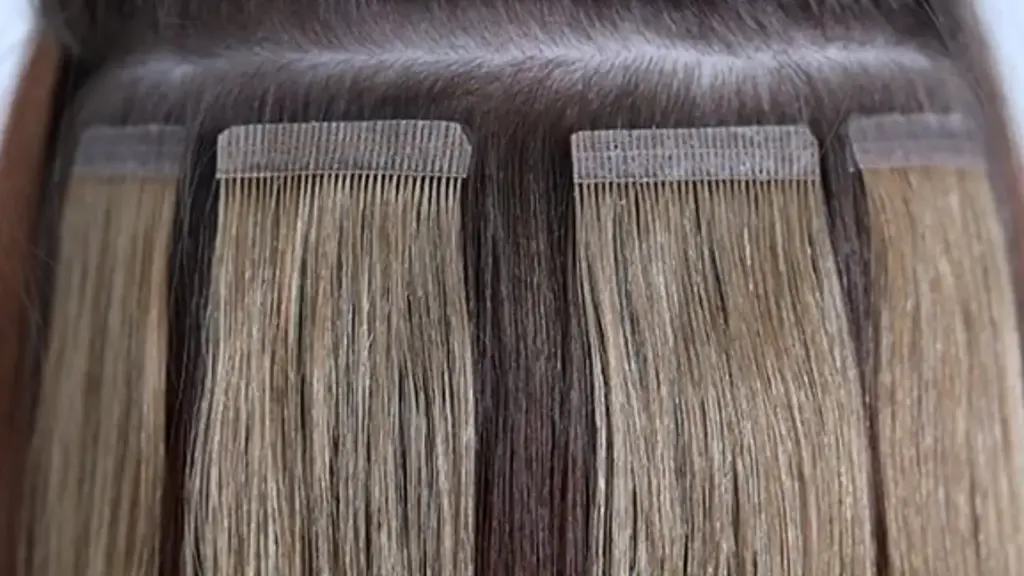
Installing tape-in hair extensions properly ensures a natural, long-lasting look while protecting your natural hair. Following the correct steps, using the right tools, and maintaining your extensions carefully will help you achieve seamless volume, length, and style for both everyday wear and special occasions.
Here is the comprehensive guide about how are tape in hair extensions applied:
Tools Needed
- Tape-in hair extensions
- Comb and hairbrush
- Sectioning clips
- Scissors (for trimming, if needed)
- Heat tool (optional, for styling)
- Sulfate-free shampoo and conditioner
Step 1: Prepare Your Hair
Begin by washing and thoroughly drying your hair to remove oils and residue, which helps the adhesive stick better. Comb through to remove tangles, creating a smooth base. Properly prepared hair ensures the extensions lay flat and remain secure, blending seamlessly with your natural hair.
Sectioning your hair carefully allows even placement of extensions and prevents overlap. Dividing hair into horizontal layers from the nape upward makes it easier to apply each weft accurately. This preparation sets the foundation for a professional, polished result that lasts longer.
Step 2: Section Hair for Application
Use clips to divide hair into small, manageable sections. Working in horizontal layers ensures that extensions are evenly distributed, providing uniform volume and length. Proper sectioning also helps prevent tangling, making it easier to apply extensions quickly and accurately while achieving a natural look.
Sectioning also helps maintain control during application, ensuring each tape-in weft is applied at the correct height and orientation. This attention to detail prevents unevenness, creates a seamless blend with natural hair, and reduces stress on both the extensions and your natural strands.
Step 3: Apply the Tape-in Extensions
Peel the protective backing from the adhesive strip and sandwich a thin layer of natural hair between two tape-in pieces. Press firmly to secure. Each weft should lie flat against the scalp, providing a smooth, undetectable attachment that ensures long-lasting hold and a natural appearance.
Be careful not to overlap or place extensions too close to the scalp to avoid discomfort. Proper alignment ensures the extensions blend with your natural hair, remain secure, and maintain a consistent, voluminous look throughout wear. Repeat until all sections are completed.
Step 4: Blend and Style
Once all extensions are applied, gently comb through your hair to blend natural strands with the tape-ins. Trim or layer if needed to create a cohesive look. Styling with curling or straightening tools helps achieve a polished finish that looks natural and full.
Blending is key to achieving seamless results. Ensure that the extensions integrate smoothly with your natural hair by adjusting layers and using heat carefully. This step enhances volume, movement, and length, giving a flawless overall appearance that is both stylish and natural.
Step 5: Maintain the Hair Extensions
Maintain tape-in extensions by washing with sulfate-free shampoos, avoiding oil-based products near the adhesive, and gently brushing to prevent tangling. Regular touch-ups every 6–8 weeks help keep them secure, ensuring your hair remains healthy and the extensions continue to look natural and full.
Proper care extends the life of your extensions, preventing premature slipping, matting, or damage. Following recommended maintenance routines preserves the adhesive strength and overall appearance, allowing you to enjoy beautiful, voluminous hair for longer periods while keeping your natural hair protected.
How to Apply Tape in Extensions for Thin Hair?
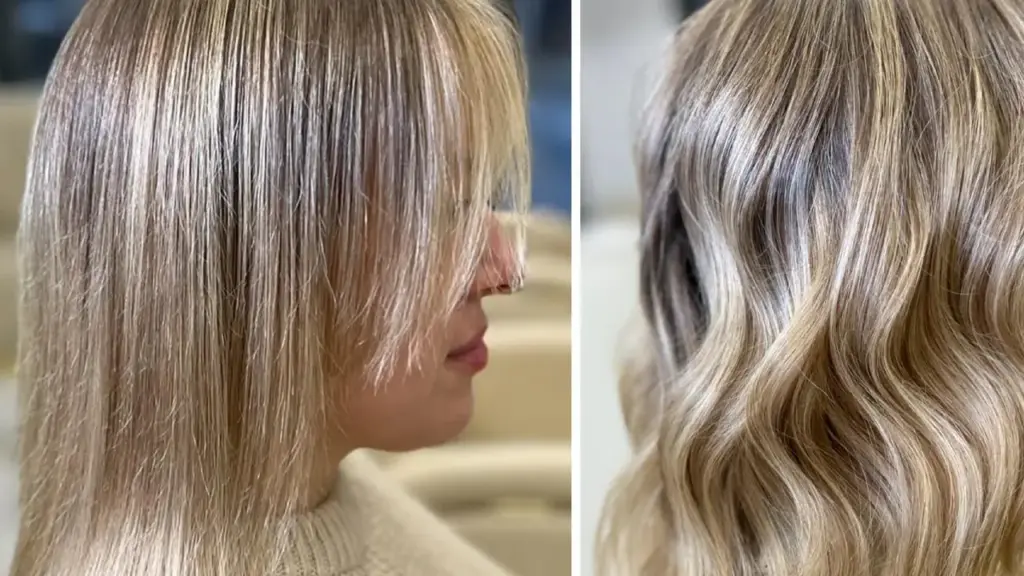
Applying tape-in hair extensions to thin hair requires extra care to ensure a natural, seamless look. Proper placement, sectioning, and maintenance prevent damage and create the illusion of fuller, thicker hair. Choosing the right extensions and technique helps enhance volume without stressing delicate strands.
- Choose Lightweight Extensions: Use lightweight tape-in extensions specifically designed for thin hair. They reduce tension on fragile strands, prevent breakage, and provide natural volume without weighing down your hair, ensuring a comfortable and safe application that maintains hair health.
- Section Hair Carefully: Section hair into very thin layers when applying extensions. Precise sectioning prevents bulkiness, ensures even distribution, and allows each tape-in weft to blend seamlessly with natural hair, creating a fuller, natural appearance without overloading delicate areas.
- Avoid Scalp Placement: Position tape-in extensions slightly away from the scalp. This prevents visible tape lines and reduces stress on fragile roots, ensuring the extensions lay flat and maintain a natural, undetectable look while preserving thin hair integrity.
- Use Professional Adhesive Removal: When removing or repositioning extensions, use a professional-grade adhesive remover. Gentle removal prevents pulling, breakage, and damage to thin hair, allowing extensions to be reused safely and your natural hair to remain healthy.
- Blend and Style Carefully: After application, blend extensions with natural hair using gentle styling techniques. Light layering, subtle curls, or straightening can create a voluminous, natural finish. Avoid excessive heat or tension to protect thin strands and prolong extension life.
Can You Reuse Tape in Hair Extensions?
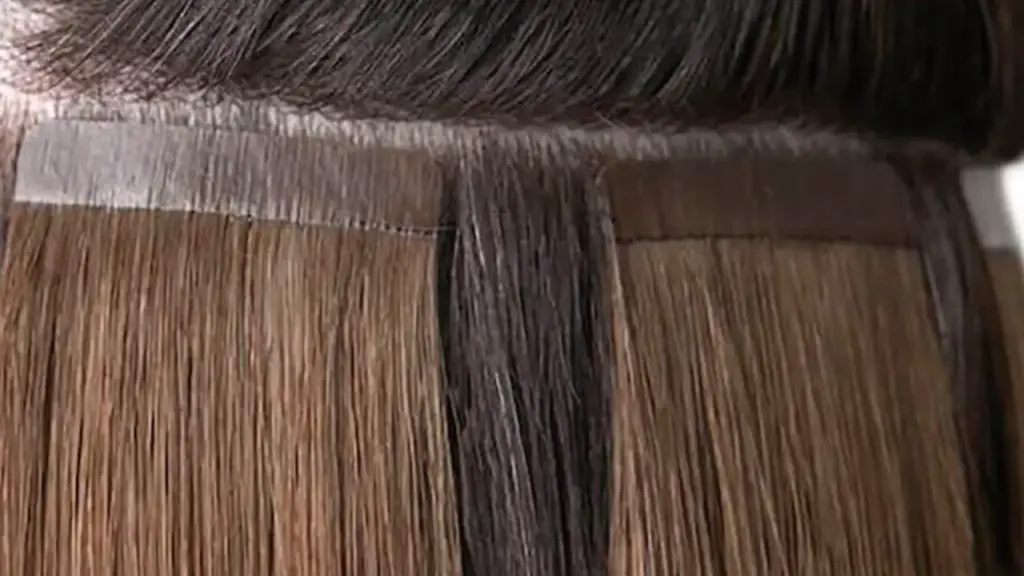
How Many Times Can You Use Tape in Hair Extensions?
Tape-in hair extensions are semi-permanent and reusable with proper care. Their longevity depends on hair quality, adhesive condition, and maintenance routines. Understanding how often tape-ins can be reused helps you maximize value, maintain a natural look, and keep your hair healthy while enjoying long-lasting volume and length.
- Reusability of Tape-in Extensions: High-quality tape-in extensions can typically be reused 2–3 times. Carefully removing and storing them after use prevents damage, allowing you to enjoy multiple applications while maintaining their smooth texture and natural appearance.
- Proper Removal Technique: To extend reuse, always have extensions removed gently, ideally by a professional. Using adhesive remover ensures the tape releases cleanly without damaging hair strands, preserving the integrity of both the extensions and your natural hair.
- Storage for Reuse: After removal, store tape-in extensions flat in a clean, dry place. Keeping the adhesive protected and the hair untangled ensures they maintain their quality, making them ready for a second or third application without compromising appearance.
- Maintenance Between Uses: Before reapplication, cleanse extensions with gentle, sulfate-free products to remove residue or oils. Proper maintenance keeps hair soft, shiny, and tangle-free, ensuring a natural look when reused and extending the overall lifespan of the extensions.
- Factors Affecting Reuse: The number of times extensions can be reused depends on adhesive quality, hair type, and styling habits. Proper care, minimal heat exposure, and gentle handling maximize reuse, allowing you to enjoy long-lasting hair extensions multiple times.
How Long Do Tape in Hair Extensions Last?
Tape-in hair extensions typically last between 6–8 weeks before needing reapplication. Their lifespan depends on hair growth, the quality of the adhesive, and how well they are maintained. Proper installation ensures the extensions stay secure, blend seamlessly, and provide a natural, voluminous look throughout this period.
With regular care, such as gentle brushing, washing with sulfate-free shampoos, and avoiding oil-based products near the adhesive, tape-in extensions can maintain their appearance for several weeks. Proper handling prevents slippage, tangling, and damage to both the extensions and natural hair, extending their usability.
Extensions can also be reused multiple times when removed carefully. High-quality tape-ins can be reapplied 2–3 times, allowing users to enjoy long-lasting style while saving on costs. Following proper maintenance routines ensures that both natural hair and extensions remain healthy and visually flawless.
Conclusion
Proper installation of tape-in hair extensions ensures a flawless, natural look while maintaining the health of your hair. Following step-by-step instructions and using the right tools guarantees secure placement, seamless blending, and long-lasting volume and length, making them ideal for both everyday wear and special occasions.
Maintaining your tape-in extensions is essential for longevity. Gentle brushing, sulfate-free washing, and avoiding excessive heat help prevent slippage, tangling, and damage. Regular check-ups or reapplication every 6–8 weeks keep the extensions looking fresh and naturally blended with your hair.
For long-lasting tape-in hair extensions, get wholesale tape-in hair extensions from Alphahair. Our premium products provide natural-looking results, durability, and easy maintenance. Alphahair offers a wide selection of extensions to suit every style and need, helping you achieve the perfect hair transformation with confidence.



