

Making hair wefts is a valuable skill for anyone interested in hair extensions, DIY styling, or professional salon services. By learning proper techniques, you can create high-quality, durable wefts that blend seamlessly with natural hair. This guide covers the essential tools, materials, and step-by-step instructions for successful results.
Understanding the process of making hair wefts allows you to customize length, volume, and texture to meet individual needs. Whether for personal use or commercial purposes, mastering these techniques ensures consistent, professional-quality extensions. With practice, you can achieve natural-looking, versatile wefts suitable for a variety of hairstyles and occasions.
What are Weft Extensions?
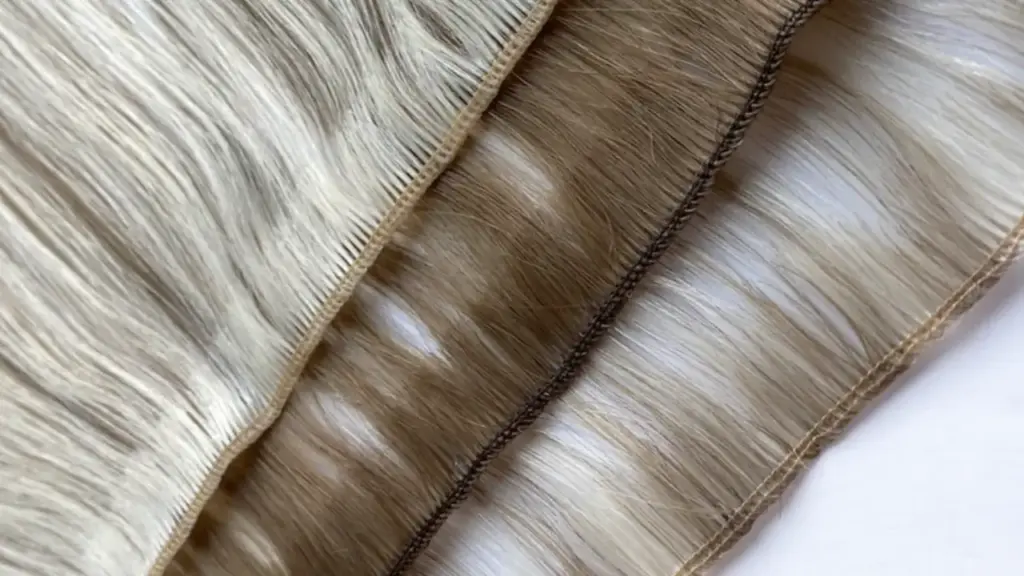
Weft extensions are sections of hair that are sewn, glued, or taped together at the top to create a “weft,” which can then be attached to natural hair. They provide added length, volume, and thickness, offering a versatile solution for creating a variety of hairstyles, from casual to glamorous.
Wefts can be made from 100% human hair or synthetic fibers and are available in different textures, colors, and lengths. They can be applied temporarily or semi-permanently, making them suitable for personal use, professional salons, or special occasions, while blending seamlessly with natural hair for a polished, natural look.
How to Make Hair Wefts?
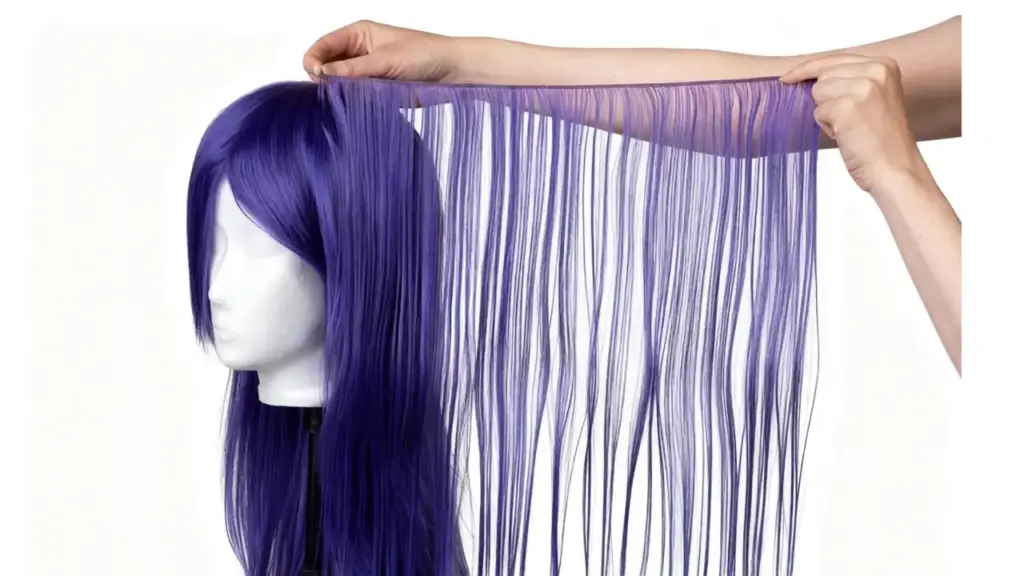
Making your own hair wefts allows for complete control over quality, length, and style. With the right tools and techniques, you can create smooth, durable, and natural-looking wefts that last. Whether for personal use or professional styling, understanding the process from measuring and aligning hair to sewing and finishing ensures a polished, tangle-free, and long-lasting result.
Tools Needed
Before starting your hair weft, gather all essential tools to ensure a smooth, efficient, and professional process. Having the right materials improves precision and reduces mistakes.
- High-quality hair extensions – Choose smooth, tangle-free hair to create durable and natural-looking wefts that maintain shine, thickness, and texture over repeated use and styling sessions.
- Wefting needle – A sharp, sturdy needle allows easy stitching without damaging hair strands, ensuring even tension and secure attachment for long-lasting weft construction.
- Strong thread – Use nylon or polyester thread to reinforce the weft, preventing shedding, maintaining durability, and keeping hair securely fastened along the base.
- Scissors – Precision scissors help trim excess hair and thread accurately, creating a neat, professional finish while avoiding fraying or uneven edges.
- Combs and clips – Sectioning tools like combs and clips make alignment easier, preventing tangles and ensuring even distribution of hair for consistent, smooth wefts.
- Clean workspace – A tidy, well-lit area protects hair from dust and tangling, allowing precise handling, proper measuring, and efficient stitching throughout the weft-making process.
Step 1: Gather Your Materials
Before making a hair weft, collect all necessary materials. You will need high-quality hair extensions, a wefting needle, strong thread, scissors, combs, clips, and a clean workspace. Organizing everything ahead reduces mistakes and keeps hair strands undamaged.
Having a well-prepared setup ensures smooth workflow. Ensure the hair is tangle-free and the thread is durable. Adequate lighting and a clean surface allow precise handling. Small tools like clips and combs help section the hair efficiently for uniform weft construction.
Step 2: Measure and Align Hair
Measure the length and thickness of hair needed for each weft. Lay the hair flat on a clean surface, aligning all strands so the cuticles face the same direction. Proper alignment ensures smooth, shiny, and natural-looking wefts.
Accurate measurement prevents uneven wefts that shed or look unnatural. Check that strands are evenly distributed, avoiding bulky or thin areas. Properly aligned hair makes sewing easier, reduces tangling, and ensures the finished weft maintains consistent thickness and texture throughout.
Step 3: Prepare the Thread and Needle
Select a high-quality, strong thread that matches the hair color. Cut a generous length and thread your needle, doubling it for extra strength. Secure the end with a tight knot to prevent slippage while stitching the hair onto the base.
The right thread is critical for long-lasting wefts. Nylon or polyester threads offer excellent durability, while a sharp needle ensures smooth stitching. Using double thread improves reinforcement, keeping the hair strands secure and preventing premature shedding or loose ends in your finished product.
Step 4: Start Sewing the Hair
Take small sections of hair and place them along the edge of the weft base. Use even, tight stitches to attach the hair securely. Work slowly to maintain uniform tension and avoid gaps, ensuring the hair stays flat against the weft.
Consistent stitching ensures a professional and durable weft. Avoid pulling too tightly, which can damage hair cuticles. Carefully stitch each section, checking alignment frequently. Properly sewn hair retains its natural movement and softness, enhancing the final appearance and longevity of the weft.
Step 5: Fold and Reinforce the Weft
After sewing, fold the weft edge over and sew again for reinforcement. This prevents shedding and strengthens the base, giving it a professional finish. Reinforcement ensures the weft holds together under repeated styling and handling.
Even stitches along the folded edge enhance durability. Reinforced wefts are less prone to hair loss and maintain their shape longer. This step improves both aesthetic and functional quality, producing wefts that can be reused multiple times while keeping hair smooth and tangle-free.
Step 6: Trim and Inspect the Weft
Once the sewing is complete, trim excess threads and uneven hair tips. Inspect the weft carefully, ensuring no strands are loose and that thickness and length are consistent. A clean, precise finish reflects professional craftsmanship.
Thorough inspection allows you to correct weak spots and resew areas if necessary. Ensuring uniform hair distribution reduces shedding and creates a natural look. Carefully trimmed wefts are easier to apply, style, and sell, making them ready for professional or personal use.
Step 7: Store or Package the Weft
Proper storage preserves hair quality. Keep wefts flat in a cool, dry place, avoiding moisture and direct sunlight. For shipping or sale, use protective packaging to prevent tangling, dirt, or deformation, maintaining the weft’s natural texture and shine.
Label each weft with length, color, and style for easy organization. Avoid over-compressing wefts to prevent misshaping. Thoughtful storage and packaging extend the lifespan of hair extensions, ensuring they remain soft, manageable, and ready for professional use without additional preparation.
How to Make Clip in Extensions From Weft?
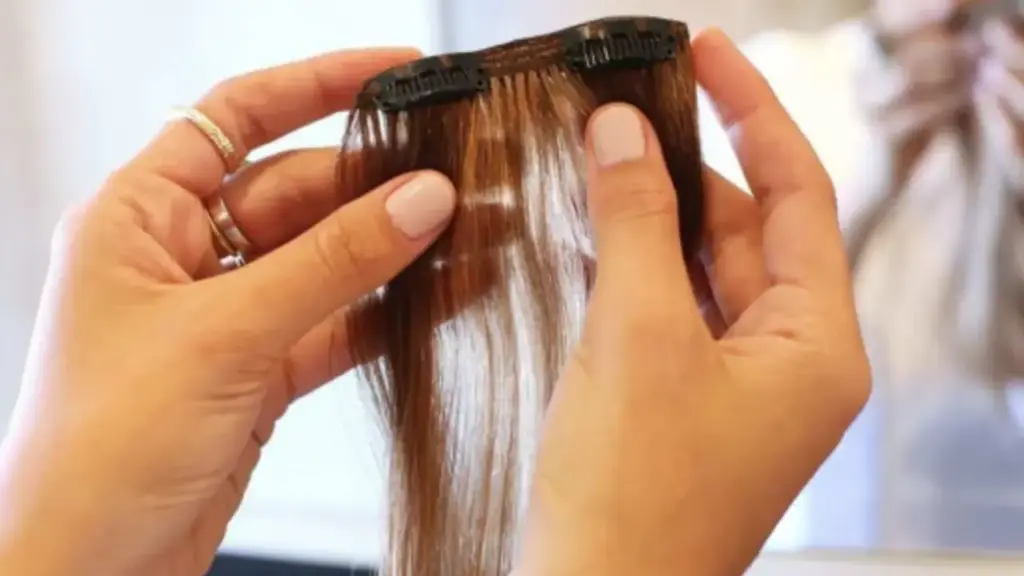
Before starting, gather all necessary tools to ensure smooth, professional results. Proper preparation prevents mistakes and keeps hair in excellent condition.
- Weft hair extensions – Choose high-quality, tangle-free hair for smooth, natural-looking clip-ins that maintain shine and volume.
- Hair clips – Strong, small clip-in clips secure hair to natural hair safely and comfortably without damage.
- Thread and needle – Durable thread (nylon or polyester) and a sharp needle allow secure stitching and prevent shedding.
- Scissors – Precise scissors trim excess hair or thread for a clean, professional finish.
- Comb or brush – Helps detangle hair and section wefts evenly for accurate attachment.
- Ruler or measuring tape – Measures hair and clip placement to ensure uniformity and balance.
Step 1: Measure and Cut the Weft
Measure the desired width of your clip-in weft extension according to your hair section size. Trim the weft to match, ensuring even lengths for a professional result.
Proper measurement prevents oversized or uneven clip-ins that look unnatural. Cutting carefully ensures the hair stays smooth and aligned, which makes sewing clips easier and the final result more comfortable.
Step 2: Align Hair Strands
Lay the trimmed weft flat and align all hair strands in the same direction. Smooth tangles using a comb to prepare the hair for sewing.
Even alignment creates uniform clip-ins that blend naturally. This step prevents uneven thickness, ensures the hair lays flat, and simplifies sewing, resulting in clip-ins that are durable, smooth, and tangle-free.
Step 3: Position the Clips
Mark clip placement along the weft using a ruler for balance. Space clips evenly to provide secure hold and prevent the weft from pulling on natural hair.
Correct clip positioning ensures the extension stays firmly in place. Balanced spacing distributes weight evenly, avoids discomfort, and maintains a natural appearance when worn, giving your clip-ins a professional, salon-quality finish.
Step 4: Sew Clips Onto Weft
Thread a needle with durable thread and securely stitch each clip to the weft base. Make multiple stitches to ensure clips are tightly attached.
Consistent stitching prevents clips from loosening over time. Reinforced attachment enhances durability and prevents shedding, while careful sewing maintains smooth hair alignment, resulting in long-lasting, safe-to-wear clip-in extensions.
Step 5: Reinforce the Weft
Fold the weft edge slightly over the stitching and sew again to reinforce. This strengthens the base and prevents hair from slipping or clips detaching.
Reinforcement increases durability and keeps the weft neat. Well-reinforced clip-ins resist repeated wear, maintain hair alignment, and ensure that the extensions remain smooth and secure during daily styling or removal.
Step 6: Trim and Inspect
Trim excess thread and uneven hair tips. Inspect each clip to ensure secure attachment and check the weft for evenness, thickness, and smoothness.
Thorough inspection prevents weak spots and uneven sections. Proper finishing ensures the clip-in extensions look natural, feel comfortable, and are ready to wear immediately without additional adjustments.
Step 7: Style and Store
Style the clip-ins as desired using heat tools if necessary. Store flat or in a protective case to prevent tangling, damage, or dirt.
Proper storage maintains hair quality, shine, and texture. Keeping clip-ins organized by length and color ensures they remain ready for reuse, retaining their smooth, natural look and professional finish.
How to Make Double Weft Hair Extensions?

Double weft hair extensions provide extra thickness and volume compared to single wefts, making them ideal for fuller, luxurious styles. By sewing two layers of hair together, you can create durable, long-lasting extensions that look natural and professional, enhancing both personal use and salon-quality applications.
Tools Needed
Before starting, gather all essential tools to ensure a smooth, precise process. Proper preparation keeps hair strands aligned and prevents tangling or damage during weft construction.
- High-quality hair extensions – Smooth, tangle-free hair ensures the wefts remain durable, natural-looking, and easy to style after sewing.
- Wefting needle – A strong, sharp needle allows for precise stitching, securing both hair layers without damaging strands.
- Durable thread – Nylon or polyester thread ensures long-lasting double wefts, preventing shedding or loosening over time.
- Scissors – Used to trim excess hair and thread for a neat, professional finish.
- Comb or brush – Helps detangle and align hair strands evenly for smoother sewing and consistent thickness.
- Clips or hair ties – Section hair effectively, keeping it organized and preventing tangles during the sewing process.
Step 1: Prepare the Hair
Select high-quality hair and detangle it thoroughly. Ensure all strands are smooth and aligned in the same direction for a polished, professional weft.
Proper preparation avoids tangling and uneven distribution when sewing. Smooth, aligned hair creates a natural, silky finish that is easier to work with and ensures consistent thickness across the weft.
Step 2: Layer the Hair
Lay one section of hair flat as the first layer. Place a second section on top, aligning the tips and roots carefully to avoid gaps or uneven thickness.
Layering evenly ensures both wefts blend seamlessly. Proper alignment of strands prevents bulkiness in some areas while maintaining uniform density, creating a natural, luxurious double weft with smooth, flowing movement.
Step 3: Thread the Needle
Cut a strong, durable thread and thread your needle, doubling it for reinforcement. Tie a secure knot at the end to prevent slippage during stitching.
Using durable thread strengthens the double weft. A sharp, sturdy needle makes it easier to sew through both layers without damaging hair, ensuring longevity and professional-quality attachment for each strand.
Step 4: Sew the Wefts Together
Carefully stitch the two layers along the top edge, maintaining even tension. Use tight, consistent stitches to secure the layers firmly without gaps or loose sections.
Even stitching is crucial for durability. Proper sewing prevents shedding and keeps both layers flat and aligned, resulting in double wefts that are strong, smooth, and ready for professional styling or sale.
Step 5: Reinforce the Weft Edge
Fold the stitched edge slightly and sew again for reinforcement. This strengthens the double weft and prevents hair from slipping out or weakening over time.
Reinforcing the edge increases durability and maintains neatness. Tight, even stitches ensure the double weft holds together under styling, washing, or repeated wear, producing a long-lasting, salon-quality extension.
Step 6: Trim and Inspect
Trim any excess threads and uneven tips. Inspect the double weft carefully for consistency in thickness, smoothness, and stitch security before final use.
Careful inspection ensures a polished, professional result. Checking for gaps, loose threads, or uneven hair ensures your double wefts are ready for application, providing volume, durability, and a natural appearance.
Step 7: Store or Package
Store completed double wefts flat in a dry, clean area or package them for sale. Avoid folding or compressing to maintain smoothness and prevent tangling.
Proper storage preserves hair quality and shine. Organized wefts remain tangle-free, easy to style, and ready for reuse, keeping them professional-looking and ensuring long-lasting wear for clients or personal use.
How to Make Hand Tied Hair Wefts?
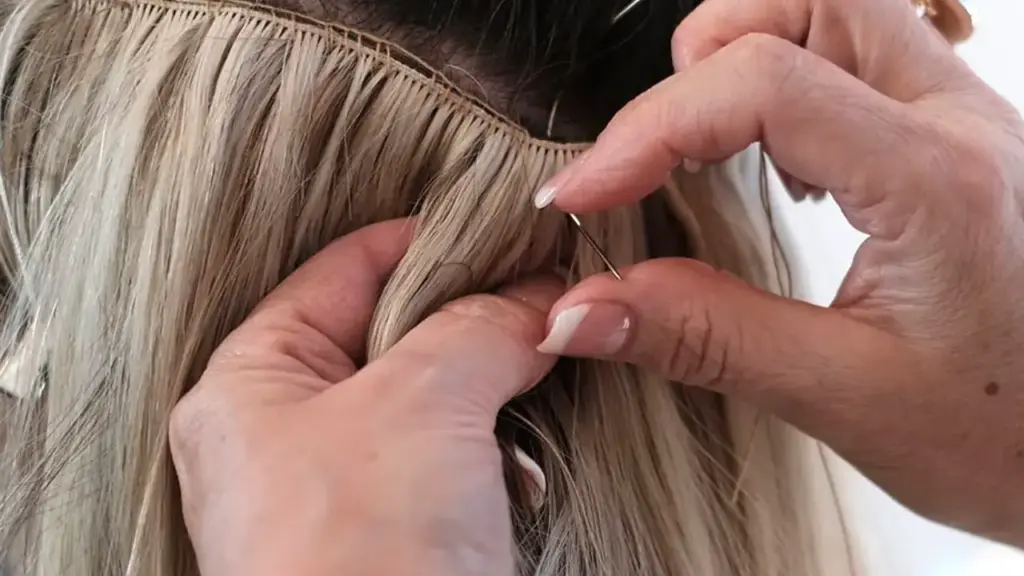
Hand tied hair wefts are thin, flexible, and lightweight, offering a natural look with minimal bulk. By carefully sewing hair by hand onto a weft base, you can create extensions that are smooth, durable, and easy to apply for both personal use and professional styling.
Tools Needed
Before starting, gather all necessary tools to ensure precision and efficiency. Proper preparation reduces mistakes and keeps hair smooth, aligned, and tangle-free throughout the hand-tying process.
- High-quality hair extensions – Smooth, tangle-free hair ensures the wefts are silky, durable, and easy to style for a natural finish.
- Hand-tied weft base or fabric strip – Provides a foundation to attach hair securely while maintaining flexibility and comfort when worn.
- Needle and strong thread – Durable thread (nylon or polyester) allows secure hand sewing, preventing shedding or loosening over time.
- Scissors – Precision scissors trim excess thread or uneven hair tips for a clean, professional appearance.
- Comb or brush – Helps detangle hair and section strands evenly for smooth, uniform wefts.
- Clips or hair ties – Keep hair organized and separated during the hand-tying process, preventing tangling or mistakes.
Step 1: Prepare the Hair
Select smooth, high-quality hair and detangle it carefully. Ensure all strands are aligned in the same direction to create a silky, professional-looking hand-tied weft.
Proper preparation prevents tangling and uneven thickness during sewing. Aligned, smooth hair is easier to handle, produces a consistent weft, and ensures the finished hand-tied extensions lie naturally when applied.
Step 2: Position the Hair on Base
Place small sections of hair evenly along the weft base. Distribute the hair uniformly to avoid bulkiness in any section and maintain a natural thickness.
Even placement ensures the weft blends seamlessly with natural hair. Proper distribution prevents gaps, makes sewing easier, and guarantees the finished extensions look smooth, lightweight, and professional in appearance.
Step 3: Thread the Needle
Cut a strong, durable thread and thread your needle. Double the thread for reinforcement and tie a secure knot at the end to prevent slippage while sewing.
Durable thread keeps the weft strong and long-lasting. A securely knotted, doubled thread allows for tight, even stitches that hold hair firmly without damaging strands or causing shedding over time.
Step 4: Sew the Hair to the Base
Use tight, consistent stitches to attach hair to the weft base. Work slowly, sewing small sections at a time for precision and even tension.
Consistent sewing prevents hair from loosening and ensures the weft lies flat. Evenly stitched hair maintains alignment and smoothness, producing professional-quality hand-tied extensions that are durable and natural-looking.
Step 5: Reinforce the Weft
Fold the edge slightly and sew again to reinforce the attachment. Reinforcement strengthens the weft and prevents hair from slipping or the base from fraying.
Reinforcing the weft increases durability and stability. Strong, even stitches maintain alignment and protect the hair from shedding, creating hand-tied extensions that remain smooth and functional over repeated use.
Step 6: Trim and Inspect
Trim any excess thread and uneven hair tips. Inspect the weft for secure stitching, even thickness, and smoothness, making adjustments if necessary.
Thorough inspection ensures a polished, professional finish. Checking for gaps, loose threads, or uneven hair prevents shedding and guarantees the hand-tied wefts are ready for immediate use or sale.
Step 7: Store or Package
Store hand-tied wefts flat in a clean, dry area or package them for sale. Avoid folding or compressing to maintain smoothness and prevent tangling.
Proper storage preserves hair quality, shine, and texture. Organized wefts remain tangle-free, ready for styling, and maintain their natural, lightweight appearance for professional or personal use.
Conclusion
Creating your own hair wefts empowers you to achieve customized, high-quality extensions at home or for your clients. By following proper techniques and using the right materials, you can produce wefts that are durable, seamless, and easy to style, enhancing any hair type effortlessly. For consistent quality, always source premium hair.
Learning to make hair wefts also offers cost-effective solutions for salons and stylists. By producing your own extensions, you gain control over hair selection, length, and thickness, ensuring client satisfaction. This skill enhances your services, providing professional, salon-quality results while reducing dependency on pre-made extensions.
For those seeking wholesale weft extensions, Alphahair provides premium options that meet professional standards. Our weft extensions are available in various lengths, textures, and colors, perfect for retail, salon use, or personal projects. Partner with Alphahair to access reliable, beautiful hair wefts that elevate your styling capabilities and business offerings.



