

Learning how to remove K tip hair extensions is less about strength and more about patience. You need to soften or weaken each keratin bond with the correct remover, break the bond into small pieces with removal pliers, and slide the extension away only when there is no resistance. If you pull before the bond is ready, your natural hair takes the force.
Professional removal is the safest choice, especially when you have a full head of extensions, fine or fragile hair, matting at the roots, scalp irritation, or bonds you cannot see clearly. If you are a trained stylist—or you have your installer’s guidance, the correct products, and a capable helper—this guide shows you the process and the warning signs that tell you to stop.
Quick Answer: How Do You Remove K-Tip Extensions?
You remove K-tip extensions by working on dry, detangled hair in small sections. Apply a professional keratin bond remover as directed, use K-tip removal pliers to crack the bond, and gently slide the extension down the natural hair. If the bond catches, stop. Add more remover, break the bond again, and retest it.
Once every extension is out, separate trapped shed hair, comb away residue, clarify the hair, and condition the lengths.
The critical rule is simple: a released K-tip should slide. It should never need to be yanked.
What Happens During K-Tip Hair Extension Removal?
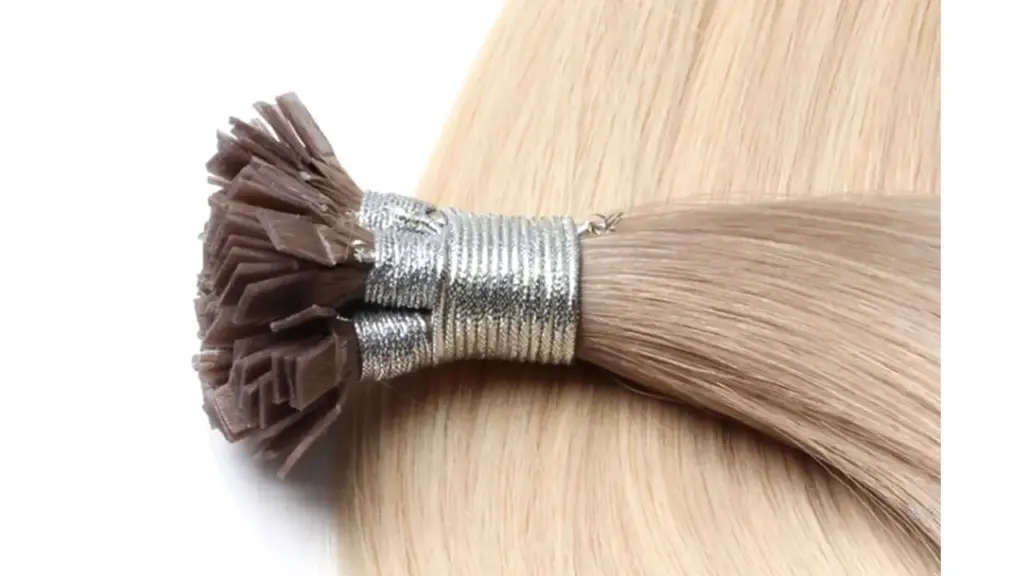
K-tip hair extensions are individual strands attached to small sections of natural hair with heat-softened keratin bonds. During removal, you are not melting those bonds again. You are using a compatible remover and a grooved removal tool to make the hardened keratin brittle enough to break apart and release the enclosed hairs.
Products and bond formulas vary. Many systems tell you to apply remover first and then squeeze the bond. Some professional systems instruct you to pre-crack the bond, apply remover, wait, and crack it again. Follow the instructions supplied with the remover and extension system you are using instead of mixing methods from different brands.
You should also expect to see natural shed hair held inside the bond. You normally shed hairs every day, but bonded strands cannot fall away while the K-tips are installed. Those hairs collect near the attachment point and become visible during removal.
That is not automatically breakage. Short snapped pieces, thin patches, scalp soreness, or bald areas are different and should be assessed by a professional.
Should You Remove K-Tip Hair Extensions at Home?
If you are searching for how to remove K tip hair extensions at home, first decide whether the job is genuinely safe for you to attempt. Removing a few visible bonds with professional guidance is very different from removing a dense full-head installation by touch.
Book a trained extension stylist if:
- You cannot clearly see or reach the bonds at the back of your head.
- Your roots are matted, compacted, or tangled between several bonds.
- Your natural hair is fine, bleached, chemically treated, or already breaking.
- Your scalp is sore, inflamed, bleeding, or showing signs of infection.
- Several bonds have fused together or spread into a thin “keratin trail.”
- The remover causes burning, swelling, or persistent irritation.
- You have applied the correct remover twice and a bond still will not release.
If you proceed at home, ask your installer which remover matches the bond, request written product instructions, and have another person handle the areas you cannot see. Do not rely on mirrors alone while squeezing pliers close to your natural hair.
When Is It Time to Take K-Tips Out?
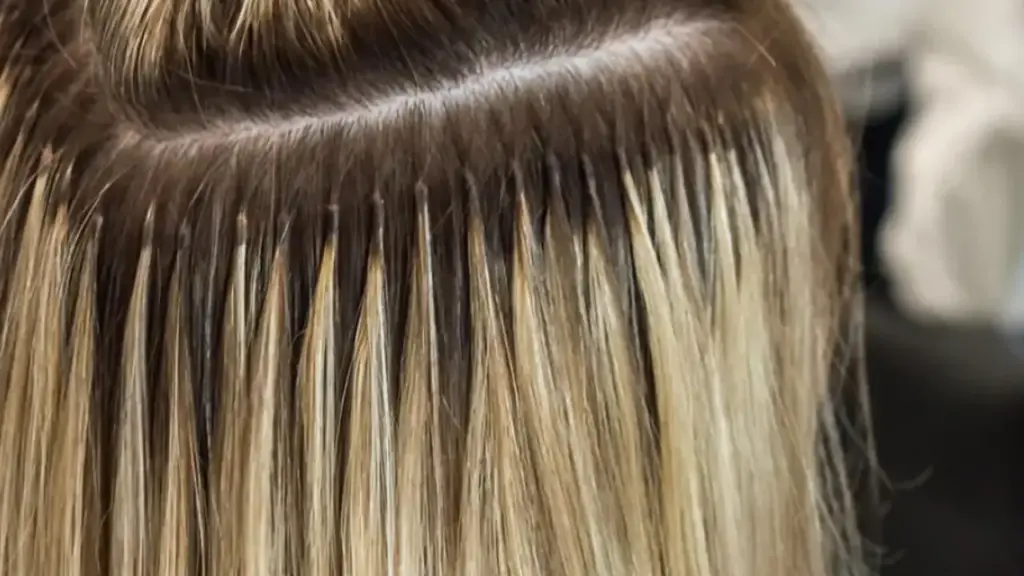
Many K-tip installations are worn for roughly 12 to 16 weeks, but your schedule should come from the stylist who assessed your hair, growth rate, shedding, density, and bond placement. A longer advertised lifespan is not permission to ignore new growth or matting.
Arrange removal sooner if you notice:
- Bonds sitting far from the scalp because of new growth
- Repeated slipping or rotating bonds
- Tangling that returns soon after careful detangling
- Several bonds sticking together
- Pain, persistent tightness, itching, or scalp sensitivity
- Visible breakage around the attachment points
- Keratin that has cracked, flattened, spread, or turned unusually sticky
Late removal can leave shed hairs tangled around the new growth and make the service slower. If you are concerned about hair loss, read Do K Tips Damage Your Hair? before deciding whether to wait.
Tools You Need for Safe K-Tip Removal
Gather everything before you open the first bond:
- A professional keratin bond remover approved for your extension system
- Grooved K-tip or fusion-bond removal pliers
- Sectioning clips
- A tail comb for clean partings
- A fine-tooth comb for residue and trapped shed hair
- An extension-safe detangling brush or wide-tooth comb
- A white towel or cape to protect clothing and help you see residue
- A small tray or labeled bundles if you plan to assess the hair for reuse
- Gloves and eye protection if the remover’s instructions call for them
Use a targeted bottle tip, dropper, or gel formula when possible. Better control keeps the remover on the keratin instead of saturating the scalp and lengths.
How to Remove K Tip Hair Extensions: Step by Step Guide
1. Read the Remover Instructions and Check the Bond Type
Confirm that you are working with hot-fusion K-tips or another keratin-bond system—not I-tips, micro rings, tape-ins, or a different adhesive method. Each attachment requires a different removal process.
Read the remover label for the waiting time, ventilation requirements, ingredient warnings, and whether the bond should be cracked before application. Patch-test the product as directed. Do not assume that all removers work at the same speed.
2. Start with Completely Dry, Detangled Hair
Your hair should be dry so you can distinguish the natural strands from the extension hair and control the bond. Wet hair stretches more easily and can be harder to evaluate while you are pulling or combing.
Detangle the lengths first, starting at the ends and working upward. Support the hair above each tangle so you are not transferring tension to the roots. If there is heavy product buildup, wash the hair ahead of the appointment and dry it fully before removal. Do not coat the bonds with conditioner or oil unless the bond manufacturer specifically instructs you to do so.
3. Section from the Nape Upward
Clip most of the hair out of the way and expose the lowest row. Work in a consistent pattern from one side to the other. Clean sectioning prevents you from catching neighboring hairs in the pliers and makes it easier to confirm that every bond has been removed.
Isolate one bond at a time. Move loose natural hair away from the jaws of the tool before you squeeze.
4. Apply Keratin Bond Remover Precisely
Place the remover directly on the keratin bond, not across the scalp or down the extension lengths. Use the quantity and waiting time on the product label. Depending on the formula, that may be only a few seconds.
If your system calls for pre-cracking, use the grooved pliers as directed before applying the remover. Otherwise, let the remover penetrate first. More liquid is not always better; controlled application is easier to manage than soaking a whole row.
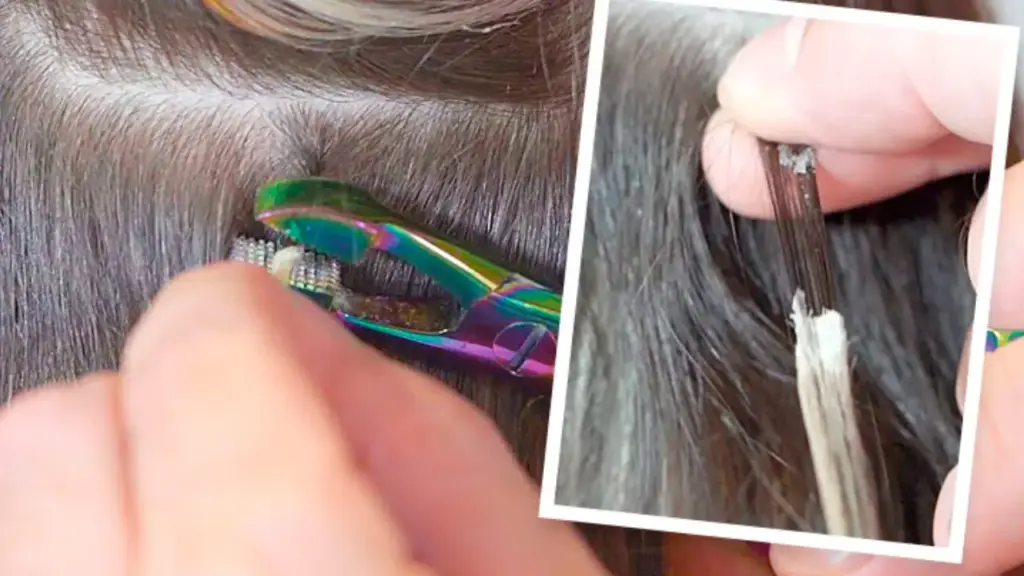
5. Crack the Bond with Removal Pliers
Position the grooved part of the pliers around the keratin only. Apply short, controlled squeezes from different sides of the bond. You are trying to fracture the keratin into small pieces, not flatten it into a hard plate.
Watch and feel for the bond to become chalky, crumbly, or visibly split. Keep your fingers above the bond to support the natural hair. Never twist the extension or use the pliers to pull it downward.
6. Test the Bond, Then Slide the Extension Out
Hold the natural hair steady just above the attachment. With your other hand, guide the extension in the direction the hair grows. A ready bond should begin to slide with very light pressure.
If you feel a catch, stop immediately. Apply more remover if the instructions allow it, wait, and squeeze the bond again. Resistance means some keratin is still gripping the hair. Pulling harder does not solve that problem; it transfers the load to your natural strands.
Place the removed extension in order if you may reuse the hair. Keeping rows and color blends organized saves time during a professional rebonding assessment.
7. Separate Shed Hair and Remove Residue
After the extension slides out, you may see a compact cluster of shed hairs and product residue. Hold the section near the root and gently loosen that cluster with your fingers. Then use a fine-tooth comb in short, careful strokes, working below the knot before moving closer to the scalp.
Do not rake a comb from the root through a tight cluster. Add a small amount of approved remover or detangling product only where appropriate, and keep supporting the section. If several bonds share one matted area, stop separating them individually and let a stylist work through the mat without sacrificing healthy hair.
8. Repeat in Small Sections
Continue row by row, checking your work as you go. Count the removed strands and compare the number with the installation record when one is available. This helps you avoid leaving a hidden bond near the crown or behind the ears.
Take breaks if your hands become tired. Fatigue makes it easier to catch natural hair in the tool or rush a stubborn bond. A careful K-tip hair extension removal is rarely a five-minute job.
9. Cleanse and Condition After Every Bond Is Out
Once the hair is completely free of bonds and residue, wash according to the remover manufacturer’s directions. A clarifying shampoo can help clear remaining product and buildup, but follow with moisture on the mid-lengths and ends because removal solutions can feel drying.
If you plan to reinstall extensions immediately, follow your stylist’s preparation protocol. Conditioner, oils, and masks near the new attachment area can affect how fresh keratin bonds hold. If you are not reinstalling, use a hydrating conditioner or mask, detangle gently, and limit high heat for a few days if the hair feels dry.
For ongoing maintenance advice, see How to Care for Keratin Hair Extensions.
What Not to Do When Removing K-Tip Extensions?
Avoid these shortcuts, even when a bond seems stubborn:
- Do not pull, yank, or peel a bond from the hair.
- Do not remelt the keratin with a flat iron or fusion tool.
- Do not cut near a bond unless a trained professional has isolated every natural strand.
- Do not crush blindly at the back of your head.
- Do not work on wet hair.
- Do not use tape-in remover on keratin unless the manufacturer states it is compatible.
- Do not mix solvents or use a remover without reading its safety instructions.
- Do not scrub a fresh, irritated scalp with clarifying shampoo.
You may see rubbing alcohol, acetone, hand sanitizer, coconut oil, or olive oil suggested online. Results vary because keratin formulas vary. Straight alcohol or acetone can dry the hair and irritate the skin, while oils may fail to break down a hard keratin bond and can complicate a same-day reinstall. A system-approved keratin bond remover is the more predictable choice.
How to Handle Stubborn Bonds, Matting, and Residue?
If the Bond Will Not Crack
Check that you have the correct remover and that it has had the required contact time. Rotate the pliers and squeeze from another side rather than applying more force in one place. Some oversized or over-melted bonds need several remover-and-plier cycles.
If the Bond Cracks but Will Not Slide
Keratin fragments may still be wrapped around a few natural hairs. Support the section, add remover as directed, and break the fragments smaller. Do not twist the extension; twisting can wrap loose hairs around the remaining keratin.
If You Find a Root Mat
Do not pull individual extensions through the mat. A stylist may need to remove the surrounding bonds first, soften residue, and release the tangle from the outer edges inward. Severe matting is a professional-removal situation.
If the Scalp Burns or Becomes Red
Stop using the product, follow its rinse and first-aid instructions, and seek medical advice if symptoms are strong or persistent. A solvent should not be treated as harmless simply because it is sold for hair extensions.
Will K-Tip Removal Damage Your Natural Hair?
Correct removal should not require enough force to break healthy hair, but no extension service is risk-free. Damage becomes more likely when bonds are removed late, several attachments have matted together, the wrong solvent is used, natural hairs are caught in the pliers, or the extension is pulled before the bond releases.
Some shedding after removal is normal because shed hairs were held inside the bonds during wear. What deserves attention is a change in density, clusters of short broken hairs, scalp tenderness, or visible gaps. If you see those signs, pause before reinstalling and ask a qualified stylist or hair-loss professional to assess your hair and scalp.
Can You Reuse K-Tip Hair Extensions?
You may be able to reuse the hair, but you cannot simply melt and reapply a cracked old bond. A stylist must remove the remaining keratin, inspect the hair, trim or clean the top, and form a fresh keratin tip before reinstalling it.
Reuse makes the most sense when the extension hair is high-quality human hair, the cuticle remains smooth, the lengths are not excessively dry or tangled, and the strands have enough density left for another wear. Store removed hair in aligned, labeled bundles and keep it dry. Do not wash a mixed pile and expect to reconstruct the original color placement later.
If you are comparing a rebondable K-tip system with a bead method that is easier to reposition, read K Tip vs I Tip Hair Extensions.
K-Tip Removal FAQs
Can You Remove K-Tip Extensions Without Pliers?
Not reliably. The remover weakens the bond, but grooved removal pliers create the controlled fractures that let the keratin release. Trying to massage or pull off a hard bond with your fingers can place unnecessary tension on your hair.
Can You Use Alcohol to Remove K-Tip Extensions?
Many professional bond removers contain isopropyl alcohol along with other ingredients that control application or reduce dryness. That does not make household alcohol an equal substitute. Use a product made for your keratin bond and follow its label.
Can You Use Acetone on Keratin Bonds?
Some removers may contain strong solvents, but applying pure acetone to your hair or scalp can be very drying and irritating. Do not improvise with it. Use the remover recommended for the bond system.
Should You Wash Your Hair Before K-Tip Removal?
You need dry, detangled hair. If buildup is heavy, wash and completely dry the hair beforehand. Do not begin while the hair is wet, and do not coat the bonds with conditioner unless the product instructions tell you to.
How Long Does K-Tip Removal Take?
Timing depends on the number and size of the bonds, their age, the remover, the installer’s sectioning, new growth, and matting. A full-head removal can take one to several hours. Give yourself enough time to work slowly and stop if fatigue affects your control.
Why Does So Much Hair Come Out After K-Tip Removal?
You naturally shed hair during the weeks you wear K-tips. Those loose hairs stay trapped inside the bonds and appear all at once during removal. Some shedding is expected; short broken hairs, bald areas, or a clear loss of density are not.
Can You Reinstall K-Tips the Same Day?
Sometimes, but only after the natural hair and scalp have been checked and the extension strands have been professionally rebonded or replaced. If your hair is irritated, matted, or breaking, give it time to recover and follow your stylist’s advice.
Final Takeaway
The safest answer to how to remove K tip hair extensions is to release every bond before you ask it to move. Work on dry hair, use a compatible keratin remover, crack the bond with the right pliers, and stop at the first sign of resistance. Then take time to clear trapped shedding and residue without dragging a comb through the roots.
If you supply salons or build a professional extension line, removal performance begins with consistent keratin, controlled tip size, and clear aftercare instructions. Explore Alpha‘s fusion hair extensions, pre-bonded hair extensions, and best K-tip extensions guide to compare product options for your market.



