

You can learn how to remove nano ring hair extensions at home with a little patience and the right approach. You need proper tools for safe removal, like nano bead pliers and sectioning clips. Using the right method keeps your hair healthy and allows you to reuse your extensions.
Alpha’s high-quality extensions make this process smoother and safer. If you feel unsure or notice tangles you cannot handle, you should reach out to a professional. Always give your hair some aftercare after removal for the best results.
Key Takeaways
Gather the right tools before starting. Use nano bead pliers, sectioning clips, and a gentle detangling brush to ensure safe removal.
Section your hair into small parts for easier access. This method prevents tangling and helps you focus on one area at a time.
Open each nano ring carefully with pliers. Squeeze gently to avoid damaging your hair or the extensions during removal.
After removal, detangle your natural hair gently. Use a wide-tooth comb and start from the tips to prevent breakage.
Consider professional help if you experience discomfort or excessive tangling. A stylist can ensure safe removal and protect your natural hair.
Tools and Prep for Nano-Ring Hair Extensions
Before you start taking out your nano-ring hair extensions, you need to get ready. Good prep makes the process smoother and keeps your hair safe. Alpha’s premium extensions help a lot here. They use 100% Remy human hair, so you can expect less tangling and easier removal.
If you have used nano tip hair extensions or micro ring hair extensions before, you know that quality matters. High-quality extensions like Alpha’s hold up better during the process.
What You Need for Removal?
Start by gathering the necessary tools. You do not want to stop halfway because you forgot something. Here is what you need:
Nano bead pliers (these are special pliers for opening the tiny rings)
A tail comb (for sectioning your hair)
Sectioning clips (to keep hair out of the way)
A mirror (so you can see what you are doing)
A gentle detangling brush
Tip: Never use regular pliers or tools not made for hair extensions. You could damage your hair or the extensions.
Using the right tools is important for both nano-ring hair extensions and micro-ring hair extensions. The correct tools help you avoid pulling or breaking your hair. If you plan to reuse your nano tip hair extensions, careful handling is key.
Sectioning and Workspace Setup
Set up your workspace before you begin. Find a spot with good lighting and a comfortable chair. Place your tools within easy reach. Use your tail comb to part your hair into small sections.
Clip each section up with your sectioning clips. This keeps your nano-ring hair extensions and micro-ring hair extensions organized and easy to find.
Work on one section at a time. This method helps you stay neat and prevents tangling. If you rush or skip sectioning, you might miss some rings or pull on your hair. Take your time and check your progress in the mirror. With the right prep, you make the removal process much easier and safer.
How to Remove Nano Ring Hair Extensions?

Removing nano-ring hair extensions at home can feel intimidating, but you can do it safely with the right approach. This step-by-step tutorial will walk you through the removal process, making sure you protect your natural hair and keep your extensions in great shape for reuse.
Let’s break down how to remove nano ring hair extensions with confidence.
Opening the Nano Rings
Start by focusing on one small section of your hair. You want to see and feel each nano ring clearly. Here’s how to remove nano ring hair extensions by opening the rings:
Hold the hair strand with one hand to keep it steady.
Use your nano bead pliers to gently squeeze the nano ring in the opposite direction from how it was closed. This action opens the ring without damaging your hair.
If a ring feels stubborn, wiggle the pliers gently until the ring loosens. Never force it open, as this can harm your hair or the extension.
Move on to the next ring, repeating the process for each nano-ring hair extension.
Take your time during this part of the removal process. Alpha’s nano-ring hair extensions use high-quality materials, so the rings open smoothly and the hair stays intact. Proper removal techniques help you avoid breakage and make it easier to reuse your extensions.
Sliding Out the Extensions
Once you have opened the nano rings, you can start sliding out the extensions. Here’s how to remove nano ring hair extensions without causing damage:
Section your hair to expose the nano rings. Use clips to keep the rest of your hair out of the way.
After opening a ring, gently hold the extension tip and slide it out of your hair. Do not tug or pull. The extension should glide out easily if the ring is fully open.
Continue this process for each nano-ring hair extension. Work methodically, one section at a time.
After you remove nano-ring hair extensions from a section, use a wide-tooth comb to detangle your natural hair before moving on.
This careful removal process keeps your natural hair healthy and allows you to reuse your Alpha extensions. When you remove nano-ring hair extensions properly, you protect both your hair and the extensions themselves.
Handling Tangles and Snags
Sometimes, you might run into tangles or snags during the removal process. Don’t worry—here’s how to handle them:
Always support the bond with one hand while you work on the tangle. This prevents pulling on your roots.
Start brushing at the tips of your hair and slowly work your way up to the roots. Use gentle, slow strokes to ease through any knots.
If you find a stubborn tangle, pause and use your fingers or a detangling brush to work it out. Never yank or rush this step.
Alpha’s nano-ring hair extensions are designed for easy removal, but tangles can still happen. Staying patient and gentle during this part of the removal process helps you avoid breakage and keeps your extensions in top condition for future use.
By following this step-by-step tutorial, you can remove nano-ring hair extensions safely at home. Remember, using proper removal techniques and taking your time ensures you can reuse your Alpha extensions again and again. If you ever feel stuck or unsure, don’t hesitate to reach out to a professional for help.
Nano Ring Hair Extensions Aftercare
Taking care of your hair after removing nano-ring hair extensions is just as important as the removal itself. Alpha’s 100% Remy human hair makes aftercare and reinstallation much easier. You want your natural hair and extensions to stay healthy and beautiful, so let’s walk through the best aftercare steps.
Detangling and Brushing
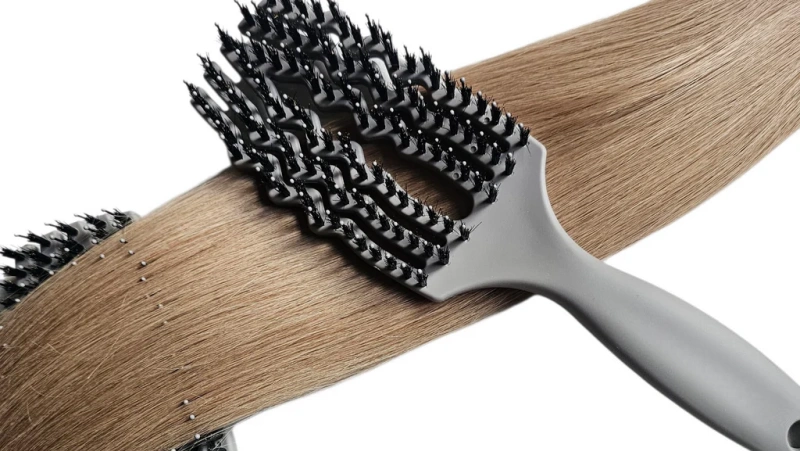
Start by gently detangling your hair. Use a wide-tooth comb or a soft detangling brush. Begin at the tips and work your way up to the roots. This method helps you avoid breakage and keeps your hair smooth.
If you notice any knots left from the nano-ring hair extensions, take your time and use your fingers to loosen them. Patience here pays off, especially if you plan to reuse your extensions.
Tip: Massage your scalp gently with your fingertips. This boosts blood flow and encourages healthy regrowth after removal.
Washing and Conditioning
After you finish detangling, it’s time to wash your hair and the extensions. Stick to sulfate-free shampoo and conditioner. Wash your nano-ring hair extensions two to three times a week.
Always detangle and separate the bonds before washing to prevent matting. For extra care, apply a deep conditioning mask once a week for two to four weeks after removal. This step repairs any damage and restores moisture.
Use nourishing oils like argan or coconut for added shine.
Avoid heat styling for at least a week to let your hair recover.
Preparing Extensions for Reuse
If you want to reuse your nano-ring hair extensions, a little prep goes a long way. Section the hair for easy access to the roots. Position the extension strands carefully and secure them with new nano beads. Always replace the nano rings during reapplication to avoid strain on your natural hair.
Make sure the extensions are clean and in good condition before reinstalling. Schedule regular check-ups with your stylist every six to eight weeks to adjust the nano rings and keep everything looking fresh.
Alpha’s Remy hair extensions blend seamlessly with your natural hair, reduce tangling, and last longer with proper care. With these steps, you keep both your hair and your extensions in top shape for the next wear.
When to Seek Professional Help for Removal?
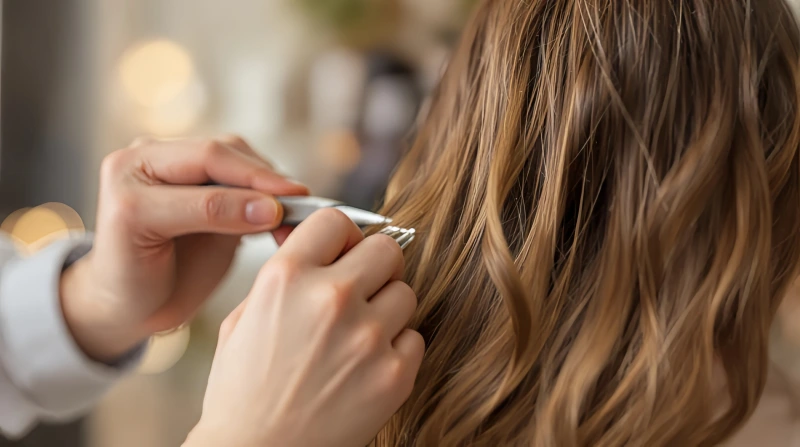
Sometimes, you need a stylist to help with nano-ring hair extensions. You might feel confident doing it yourself, but certain signs tell you it’s time to call a pro.
Signs You Need a Stylist
Check for these signs before you continue with removal:
Sign of Concern | Implication |
|---|---|
Discomfort | Indicates potential damage or improper fitting. |
Excessive tangling | Suggests that the extensions may be too tight or improperly maintained. |
Extensions becoming loose | A sign that the extensions need professional attention to avoid damage to natural hair. |
If you notice discomfort, your scalp might need extra care. Excessive tangling means the nano-ring hair extensions could be too tight. Loose extensions can pull on your natural hair and cause breakage. When you see any of these signs, a stylist can help you avoid bigger problems.
Stylists use special techniques to protect your hair during removal. Here’s a quick look at what they do:
Dos | Don’ts |
|---|---|
Do Test Products First | Don’t Use Sulfates Frequently |
Do Use Low Heat | Don’t Use Pure Alcohol |
Do Use a Fine-Tooth Comb | Don’t Apply Too Much Product |
Do Be Gentle | Don’t Pull or Tug |
Risks of DIY Removal
Trying to remove nano-ring hair extensions at home can lead to trouble. You might think you can handle it, but mistakes happen easily.
Removing nano tip hair extensions requires professional removal to prevent damage to your natural hair. Stylists use tools like extension pliers to carefully open the nano beads. This process avoids unnecessary pulling and breakage.
Common mistakes include:
Excessive Force during Styling: You might pull too hard and damage your hair.
Neglecting Hair Needs: Ignoring care can cause buildup and discomfort.
Safe Removal Practices: Professional removal is recommended to avoid damage to natural hair.
If you remove micro-ring hair extensions or nano-ring hair extensions incorrectly, you risk long-term effects:
Breakage of natural hair
Traction alopecia
Damaged cuticles
Scalp irritation
Potential for permanent hair loss
When you see these risks, you know it’s smart to ask for help. A stylist keeps your hair healthy and your nano-ring hair extensions ready for reuse.
Conclusion
You can safely remove nano-ring hair extensions at home if you follow the right steps. Start by sectioning your hair, open each ring with special pliers, and gently slide out the extensions. Always clean your natural hair after removal.
If you feel unsure or notice any issues, reach out to a professional. Choosing high-quality nano-ring hair extensions, like those from Alpha, makes the process easier and keeps your hair healthy. Trust brands that use 100% Remy hair for the best results.
FAQ
Can I reuse my nano ring hair extensions after removal?
Yes, you can reuse them if you remove them gently and keep them clean. Alpha’s Remy hair extensions hold up well for multiple uses. Always replace the nano rings before reinstalling for the best results.
How long does it take to remove nano ring hair extensions at home?
Most people finish in 30 to 60 minutes. The time depends on how many extensions you have and how careful you are. Take your time to avoid damage.
Do I need special products to clean my hair after removal?
You do not need anything fancy. Use a gentle, sulfate-free shampoo and a nourishing conditioner. This keeps your hair and scalp healthy after taking out the extensions.
What should I do if a nano ring feels stuck?
Stay calm. Hold the hair close to your scalp and gently wiggle the ring with your pliers. If it still will not move, ask a stylist for help to avoid breakage.
Will removing nano ring hair extensions damage my natural hair?
If you follow the right steps and use the correct tools, you should not see damage. Always work slowly and gently. If you feel pain or see breakage, stop and get professional help.



