

Removing weft hair extensions at home requires care and the right tools to prevent damage to your natural hair. Understanding proper techniques and precautions ensures a safe process. With patience and step-by-step guidance, you can take out extensions efficiently while keeping your hair healthy and strong.
Learning how to remove wefts properly also helps maintain the quality of your extensions if you plan to reuse them. By following safe methods, you minimize tangling, breakage, and unnecessary hair loss. This knowledge allows you to manage your extensions confidently and maintain a polished, natural look at home.
What Time to Remove Weft Extensions?
Knowing the right time to remove weft extensions is essential to maintain healthy natural hair. Leaving them in too long can cause tangling, breakage, and stress on roots. Proper timing ensures your hair remains strong while preserving the extensions for future use.
- Recommended Duration: Weft extensions typically last 6–8 weeks before removal. This timeframe allows the hair to grow naturally while maintaining the integrity of the extensions. Leaving them in longer may cause matting, uneven blending, and increased difficulty during removal.
- Hair Health Considerations: Removing extensions on time prevents excessive tension and damage. Overextended wear can lead to breakage, hair thinning, and scalp irritation. Timely removal ensures natural hair remains healthy, strong, and ready for reinstallation if desired.
- Lifestyle Factors: Active lifestyles, frequent styling, or exposure to heat and chemicals may require earlier removal. Adjusting the removal schedule based on your daily routine helps prevent unnecessary wear on both your natural hair and the extensions.
- Extension Type: Different wefts, such as hand-tied, tape-in, or sew-in, may have slightly varying timelines. Always follow manufacturer or stylist recommendations to avoid damage, ensuring that extensions can be safely removed without pulling or tangling.
- Signs It’s Time to Remove: Extensions showing slippage, tangling, or visible roots indicate it’s time for removal. Recognizing these signs helps maintain hair health, allows proper cleaning of extensions, and ensures a smooth, hassle-free removal process.
How to Remove Weft Extensions at Home?
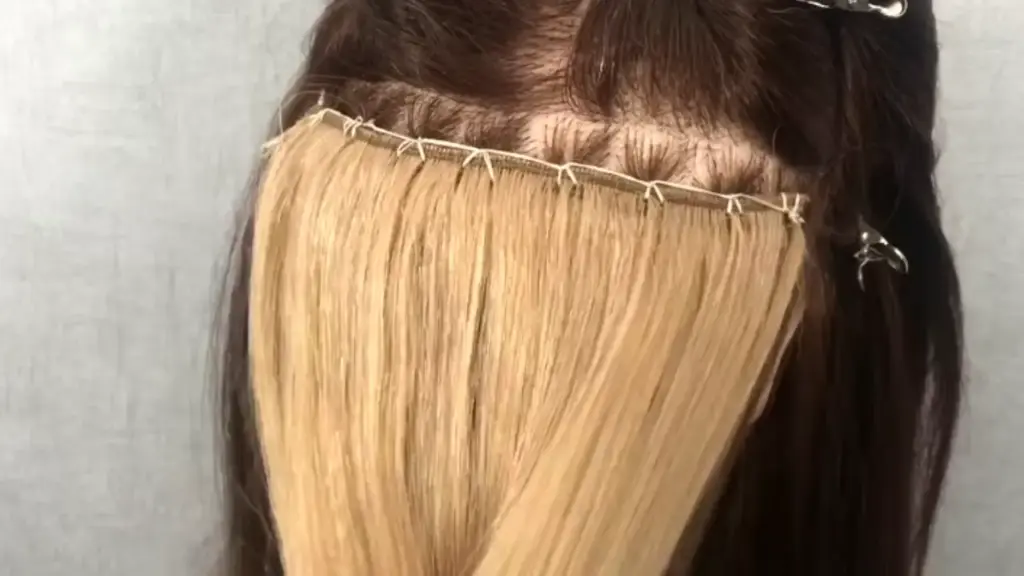
Removing weft hair extensions at home requires patience, proper tools, and careful techniques to protect your natural hair. Doing it incorrectly can cause tangling, breakage, or damage to both your hair and extensions. By following step-by-step guidance, you can safely remove your wefts, maintain hair health, and even preserve extensions for future use.
Tools Needed
Before starting, gather all essential tools to make the removal process safe, efficient, and damage-free:
- Wide-tooth comb to gently detangle hair without pulling
- Hair clips to section hair for better access and organization
- Extension remover or gentle adhesive solvent to loosen tape-in or glue wefts safely
- Hair scissors or seam ripper only for cutting threads, never hair
- Mirror to see all angles and ensure precise removal
- Soft towel or cape to protect shoulders and clothing from adhesive or shedding hair
Proper preparation ensures a smooth, stress-free process. Having all tools ready reduces the risk of accidental damage, tangling, or incomplete removal, allowing you to focus fully on each step.
Step 1: Section Your Hair
Begin by dividing your hair into small, manageable sections using hair clips, starting from the bottom near the nape of the neck and working upwards. Sectioning ensures that each row of wefts is handled individually, preventing tangles and making the process more organized.
Work methodically, lifting each section gently to expose the weft underneath. Avoid pulling or tugging at natural hair. Taking time to carefully separate hair and extensions protects roots from strain and ensures a safe, controlled process.
Step 2: Apply Extension Remover
For tape-in or glue wefts, apply a gentle adhesive remover directly to the bond using a brush, dropper, or cotton swab. Allow the solution to sit for several minutes to soften the adhesive fully, preventing pulling or hair breakage.
Be careful not to apply too much remover to the scalp. Apply only where adhesive contacts the weft. Letting the remover fully penetrate ensures the wefts slide off smoothly and can be reused, minimizing irritation and maintaining hair integrity.
Step 3: Loosen the Wefts
Once adhesive is softened, gently lift the weft using your fingers. For sew-in extensions, carefully unpick stitching with scissors or a seam ripper, avoiding cutting natural hair. Work slowly and deliberately to prevent snagging or pulling on strands.
If a weft resists removal, apply more remover or check for hidden threads. Avoid forcing it, as this can damage both hair and extensions. A cautious approach preserves the extensions for reuse and protects your natural hair.
Step 4: Comb Out Tangled Hair
After removing a weft, gently comb through the section with a wide-tooth comb, starting from the ends and working upwards. This prevents tangles from forming and ensures a smooth finish for both hair and extensions.
Combing helps remove residual adhesive or threads. Working in small sections detangles thoroughly without causing breakage, keeping hair soft, manageable, and ready for styling or washing, while preparing extensions for potential reuse.
Step 5: Clean the Extensions
If you plan to reuse extensions, clean them carefully after removal. Wash gently with sulfate-free shampoo and conditioner, detangle carefully, and air-dry flat or on a hanger. Avoid rubbing or twisting, which can damage the hair cuticles.
Cleaning removes adhesive, oils, and residue accumulated during wear. This preserves softness, shine, and texture, prolonging the life of your extensions. Well-maintained wefts remain manageable, tangle-free, and ready for future applications while looking natural.
Step 6: Care for Your Natural Hair
Once all wefts are removed, treat your natural hair with care. Wash thoroughly with nourishing shampoo and conditioner, and apply a deep-conditioning mask or leave-in treatment to restore moisture and strength.
Avoid heat styling or tight hairstyles immediately. Allow hair time to recover naturally, regaining elasticity and shine. Proper aftercare reduces breakage, prevents damage, and prepares hair for future extensions or natural styling.
Step 7: Store Extensions for Reuse
If reusing wefts, store them properly. Once extensions are clean and dry, place them in a breathable bag, box, or flat container. Keep them flat or gently rolled to prevent tangling and maintain texture and quality.
Proper storage protects extensions from dust, moisture, and knots. Well-cared-for extensions can last multiple applications, saving money and ensuring professional-looking results each time.
Step 8: Inspect and Maintain Hair Health
After removing extensions, inspect hair for damage, dryness, or tangling. Apply a nourishing scalp treatment if needed and trim any split ends to maintain overall health.
Regular inspection prevents long-term damage and keeps hair strong. A proactive approach ensures hair remains healthy, resilient, and ready for future styling or extensions without compromising quality or appearance.
Tips for Removing Bonding Glue From Weft
Removing bonding glue from weft extensions can be tricky, but proper techniques ensure the hair remains intact and reusable. Using the right tools and methods prevents damage, tangling, or breakage, preserving both the quality of the wefts and the natural hair for future styling.
- Use a Professional Adhesive Remover: Apply a gentle, salon-grade glue remover to dissolve the bonding residue. This ensures the adhesive loosens without harsh chemicals that could damage hair fibers or reduce the lifespan of the weft, keeping extensions soft and reusable.
- Soak in Warm Water: Before combing, soak the weft in warm water to soften residual glue. This reduces the risk of pulling, tangling, or breaking strands. Gentle handling during soaking makes it easier to remove sticky residue without compromising the hair’s texture.
- Comb Gently with Wide-Tooth Comb: Start detangling from the ends and work upward. A wide-tooth comb helps separate strands safely, removing glue remnants while minimizing stress on the weft. Avoid forceful combing to maintain the integrity and smoothness of the hair.
- Avoid Heat During Removal: Do not use a blow dryer or iron to loosen glue, as excessive heat can damage hair cuticles. Room-temperature treatments and gentle removal techniques protect the hair’s natural shine and durability, keeping wefts healthy and manageable.
- Repeat if Necessary: Some glue may require multiple applications of remover or soaking. Patience is essential. Repeating the process ensures complete removal without pulling or breaking strands, preserving the weft for multiple uses while maintaining a natural, smooth finish.
Conclusion
Removing weft extensions at home can be safe and effective with the correct tools, patience, and step-by-step techniques. By taking care during removal, you protect your natural hair from damage while preserving the quality of your wefts for future use. Knowledge and caution are key to success.
For high-quality extensions, buying wholesale wefts from Alphahair is a smart choice. Our virgin and remy hair wefts are durable, soft, and reusable, making them ideal for both personal use and salon needs. Alphahair ensures consistent quality and long-lasting performance, giving you value and premium results.
Alphahair wefts are trusted by stylists and customers worldwide for professional-grade quality and reliability. With a wide range of textures, lengths, and colors, you can create custom styles easily. Explore Alphahair’s wholesale options today to get premium weft extensions that blend naturally and maintain their beauty over time.



