

Sewing a weft is a crucial skill for anyone looking to create flawless hair extensions. This guide will walk you through the essential steps, from preparing your wefts to stitching techniques, ensuring your extensions lay naturally and securely. With the right approach, you can achieve professional-quality results at home.
Understanding the process of sewing a weft helps you save time and money while customizing your hair extensions. Whether you’re a beginner or experienced stylist, mastering this technique allows you to create durable, long-lasting extensions that blend seamlessly with natural hair. Tools, patience, and practice are key to perfect results every time.
Why Sewing a Weft?
Sewing a weft allows for a secure, natural-looking hair extension that blends seamlessly with your own hair. This method offers durability, versatility, and professional results. With proper technique, you can achieve long-lasting, tangle-free extensions that maintain volume, style, and shine effortlessly over time.
- Secure Attachment – Sewing a weft ensures hair extensions stay in place for weeks. Proper stitching minimizes slippage, giving you a reliable and long-lasting hold that withstands everyday styling and washing without loosening or falling out unexpectedly.
- Natural Appearance – When sewn correctly, wefts lie flat against the scalp, blending perfectly with natural hair. This creates a seamless, full look that enhances volume and length without showing obvious attachment points or unnatural bulk.
- Customizable Styles – Sewing wefts lets you adjust placement, thickness, and layers to suit any hairstyle. You can tailor extensions to your face shape, hair type, and desired volume, giving you complete control over the final look and feel.
- Cost-Effective – Learning to sew wefts yourself saves money compared to salon installation. You can reuse wefts multiple times with proper care, making it a practical solution for both professionals and at-home users seeking long-term value.
How to Sew a Weft?
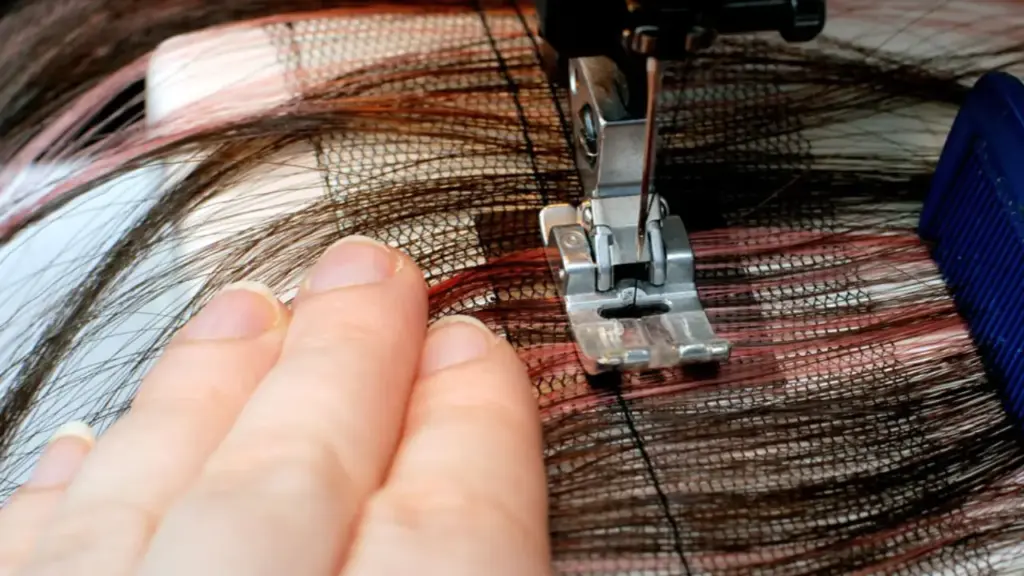
Sewing a weft is a reliable method to add length, volume, and fullness to natural hair. With proper preparation, tools, and technique, you can achieve a professional, natural-looking result. Patience, precision, and care are key to maintaining both your hair and the weft.
Step 1: Gather Tools and Prepare Hair
Start by washing and thoroughly drying your hair. Ensure it’s free of tangles, oils, and products. Section your hair horizontally at the area where the weft will be applied. Clip the top sections out of the way, leaving a clean working area for precise sewing.
Tools Needed:
- Comb
- Hair clips
- Needle and thread (color-matched to hair)
- Weft extension
- Scissors
- Mirror
Prepare your weft and thread. Cut the thread long enough to sew the entire weft with minimal tying. Thread the needle and knot the end securely. Proper preparation at this stage prevents slipping and ensures the weft will hold tightly and blend naturally.
Step 2: Section Hair Accurately
Create clean, even sections of hair to attach your weft. Use a comb to divide your hair precisely, ensuring that the line where the weft will sit is straight. Even sections make sewing easier and the final result more natural.
Pin the upper sections of hair out of the way using clips. This exposes the line for sewing, giving you full visibility. Accurate sectioning prevents the weft from showing and ensures it lies flat against your scalp, creating a seamless look when blended.
Step 3: Position the Weft
Lay the weft carefully along the sectioned hair line. Make sure it is flat and aligned with the shape of your head. Positioning correctly ensures the weft will stay secure and won’t create lumps or uneven areas.
Hold the weft firmly but gently, so it doesn’t move while you start sewing. Ensure the ends extend slightly past the natural hairline at each side. This allows room for secure stitching and avoids visible edges once your hair is styled.
Step 4: Sew the Weft
Use a needle and thread to sew the weft onto the sectioned hair. Take small, tight stitches, moving from one end of the weft to the other. Avoid pulling too tightly, which could damage your natural hair or cause discomfort.
Double back along the weft for extra security. Focus on sewing evenly along the entire length, securing the weft firmly to prevent slippage. Proper stitching is crucial for durability and keeps the weft lying flat for a natural appearance.
Step 5: Secure and Tie Ends
Once the weft is sewn, tie off the thread securely. Extra knots at the ends prevent the thread from unraveling over time. Use scissors to trim excess thread carefully, avoiding cutting your natural hair or damaging the weft.
Check both ends of the weft for loose stitches. Reinforce with a few additional stitches if necessary. Properly secured ends prevent shedding, ensure longevity, and maintain the weft’s integrity through styling, washing, and daily wear.
Step 6: Blend the Weft
Release the clipped hair above the weft and comb it gently over the extension. Use layering or trimming if necessary to integrate the weft seamlessly with your natural hair. Blending ensures there are no visible lines or bulges.
Style small sections at a time, gradually layering your hair over the weft. This process creates a smooth, natural transition between your hair and the extension. Take care not to disturb the stitching while blending to preserve the weft’s placement.
Step 7: Style and Maintain
After blending, style your hair as desired using curling irons, straighteners, or braids. Always use heat protectant to protect both natural hair and extensions. Proper styling enhances the natural look and keeps the weft durable.
For maintenance, wash gently with sulfate-free shampoo and conditioner. Avoid harsh brushing near the weft and sleep on silk or satin pillowcases to reduce friction. Regular care ensures the weft lasts longer while keeping your hair healthy and beautiful.
How to Sew Clips on Weft Hair Extensions?
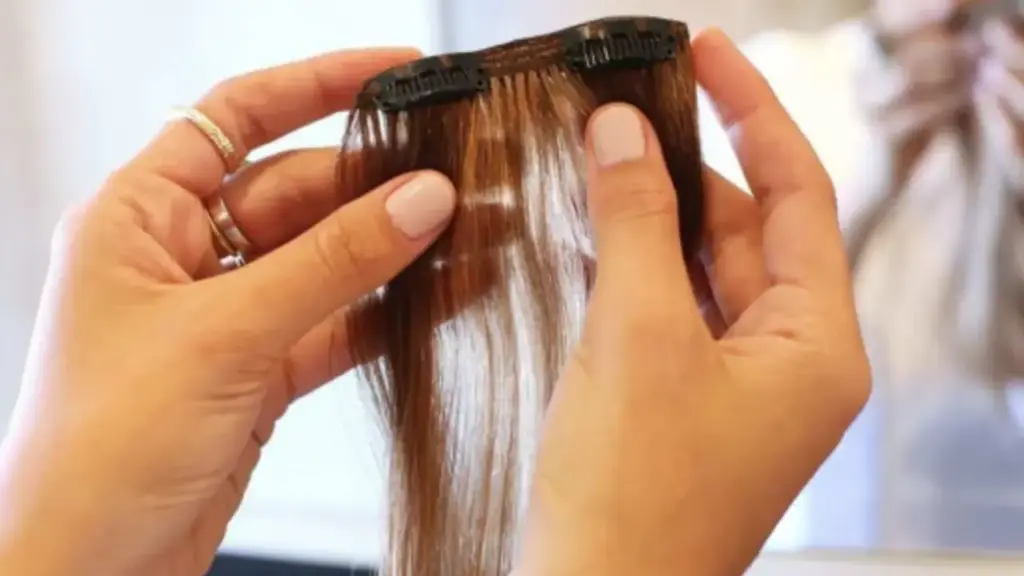
Attaching clips to weft hair extensions allows for easy, temporary application and removal, giving you versatility in styling. With the right technique, tools, and patience, you can securely sew clips to the weft, ensuring durability while keeping your extensions safe and comfortable.
Step 1: Gather Tools and Prepare Materials
Tools Needed:
- Weft hair extension
- Hair extension clips
- Needle and thread (color-matched to hair)
- Scissors
- Comb
Start by laying your weft flat on a clean surface. Ensure the weft is tangle-free and straight. Gather your clips and thread, preparing to sew each clip evenly along the weft. Proper preparation ensures a smooth, professional finish.
Cut a length of thread long enough to secure all clips. Thread the needle and knot one end. Having all tools ready prevents interruptions during sewing, making the process quicker and reducing the risk of uneven placement or weak attachment.
Step 2: Measure and Mark Clip Placement
Lay the weft flat and evenly space where each clip will go. Commonly, two to three clips per weft are enough for a secure hold, but larger wefts may need more. Even spacing prevents the extension from sagging.
Use a comb or fingers to mark clip positions lightly on the weft. Position the clips along the top edge of the weft, ensuring the teeth face the same direction. This alignment is critical for comfort and stability during wear.
Step 3: Position the Clip on the Weft
Open the clip and place it at the marked position along the top edge of the weft. Ensure the clip sits flush against the fabric of the weft without twisting or lifting, so it will hold firmly once sewn.
Hold the clip steady while threading the needle. The teeth of the clip should be aligned with the stitching area. This careful positioning ensures the clip functions properly and the extension remains secure without damaging the hair.
Step 4: Sew the Clip Securely
Use small, tight stitches through the holes in the clip and the weft fabric. Sew back and forth several times to ensure the clip is firmly attached. Avoid pulling too tightly, which could damage the weft or make the clip rigid.
Focus on securing all sides of the clip, especially the ends, to prevent movement. Continue stitching until the clip feels stable and secure. Proper sewing is essential for longevity and ensures the clips can withstand repeated opening and closing.
Step 5: Tie Off and Trim Thread
Once the clip is secure, tie a strong knot in the thread close to the weft to prevent it from unraveling. Trim any excess thread carefully with scissors, avoiding the weft hair and the clip mechanism.
Check the clip by gently opening and closing it. Ensure it does not move or pull on the weft hair. Reinforce with additional stitches if necessary. Proper finishing prevents the clip from loosening and extends the life of your extension.
Step 6: Repeat for Additional Clips
Repeat the sewing process for the remaining clips along the weft. Ensure consistent spacing and alignment to maintain balance and prevent the weft from sagging or twisting during wear. Consistency makes the extension look professional and natural.
After all clips are sewn, inspect the weft from all angles. Make adjustments as needed, reinforcing any loose areas. Evenly attached clips provide maximum security and comfort, allowing the extension to sit naturally against your scalp.
Step 7: Style and Test the Extension
After attaching all clips, try the extension in your hair to check fit and placement. Open and close each clip carefully to test stability. This ensures the extension will hold securely without slipping during daily wear.
Style the hair extension as desired. Gently comb and blend it with your natural hair. Proper testing and styling after attaching clips guarantee comfort, functionality, and a seamless, natural-looking result that enhances your hairstyle.
How to Sew Double Weft Hair Extensions?
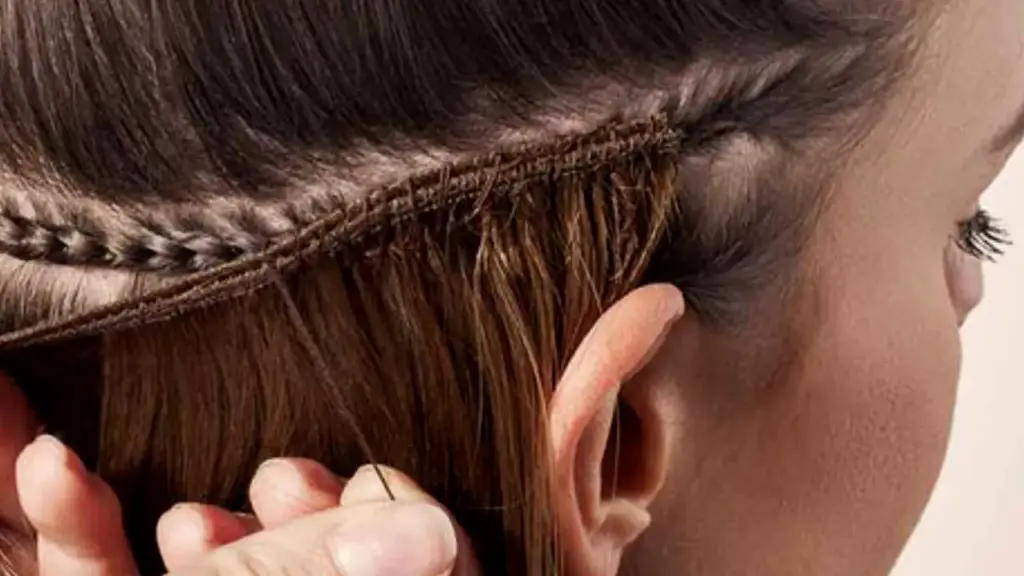
Double weft hair extensions provide extra volume and thickness compared to single wefts. Sewing them properly ensures a secure, natural-looking result that blends seamlessly with your hair. With the right tools, technique, and care, you can achieve long-lasting, beautiful extensions.
Step 1: Gather Tools and Prepare Hair
Tools Needed:
- Double weft hair extension
- Needle and thread (color-matched to hair)
- Comb
- Hair clips
- Scissors
Start by washing and thoroughly drying your hair. Ensure it’s smooth and tangle-free. Section your hair horizontally where the double weft will sit, clipping the upper layers out of the way for clear access and precise sewing.
Prepare the double weft and thread your needle. Knot the end securely. Having everything ready before sewing reduces mistakes, ensures consistent stitching, and allows the weft to lie flat against your scalp for a natural, seamless finish.
Step 2: Section Hair Accurately
Use a comb to create a clean, straight section where the double weft will be attached. Proper sectioning ensures the weft lies flat and looks natural once installed. Even sections prevent bumps or uneven thickness.
Clip the top sections out of the way carefully. This exposes the sewing line and provides visibility for precise stitching. Maintaining clean sections reduces the risk of tangling and allows for secure attachment along the entire weft length.
Step 3: Position the Double Weft
Lay the double weft along the sectioned line, ensuring both layers are aligned and flat. Proper positioning is key to maintaining comfort, natural appearance, and even weight distribution on the scalp.
Hold the weft gently in place. Make sure the ends extend slightly beyond the natural hairline to allow secure stitching. Correct positioning prevents lifting or shifting, ensuring the double weft blends seamlessly with your hair.
Step 4: Sew the Weft Securely
Start stitching along the top edge of the weft using small, even stitches. Secure both layers of the double weft firmly without pulling too tightly, avoiding discomfort or hair damage.
Sew back and forth across the entire length of the weft. Pay extra attention to the ends and middle, reinforcing these areas for durability. Proper stitching prevents slippage and ensures the double weft maintains volume and structure.
Step 5: Tie Off and Trim Thread
Once the weft is secure, tie a strong knot near the weft to prevent unraveling. Trim excess thread carefully to avoid cutting the hair or compromising the weft.
Check the weft’s stability by gently tugging on different areas. Reinforce any loose spots with additional stitching if necessary. Secure finishing ensures the double weft stays in place and maintains its thick, full appearance.
Step 6: Blend and Layer Hair
Release the clipped sections above the weft and comb hair over it. Trim or layer the hair as needed to blend the weft with your natural hair, creating a seamless finish.
Work in small sections, layering gradually over the weft to hide the stitching line. Proper blending prevents visible edges and ensures the double weft looks naturally integrated with your hair, giving the appearance of fuller, voluminous locks.
Step 7: Style and Maintain
Style your hair extensions gently using heat protectant products to avoid damage. Curling, straightening, or braiding helps integrate the double weft naturally with your hair.
For long-lasting wear, wash with sulfate-free products, detangle carefully, and avoid sleeping with wet hair. Regular maintenance prolongs the lifespan of the extensions and keeps both the weft and your natural hair healthy.
How Long Do Sew in Weft Extensions Last?
Sew-in weft extensions can last anywhere from six to eight weeks when installed correctly and cared for properly. The longevity depends on hair growth, natural hair health, and how well you maintain your extensions. Regular maintenance and gentle handling help preserve the weft’s integrity and appearance.
Proper washing, conditioning, and avoiding excessive heat or tension on the extensions can significantly extend their lifespan. Additionally, professional removal and reinstallation allow the extensions to be reused, making them a cost-effective option for long-term hair enhancement.
- Avoid pulling or tugging on the weft
- Use sulfate-free shampoo and conditioner
- Sleep on a silk or satin pillowcase
- Schedule regular maintenance appointments
- Limit heat styling and chemical treatments
Conclusion
Mastering how to sew a weft opens up endless possibilities for styling and customizing hair extensions. By following the right steps and using quality materials, you ensure a secure, natural look that lasts. For professional-grade results, sourcing premium wefts is essential to achieving a flawless finish.
At Alphahair, we provide high-quality wholesale weft extensions perfect for salons, stylists, and enthusiasts. Our wefts are durable, tangle-free, and designed for easy sewing, helping you save time while creating beautiful, natural-looking extensions. Choosing reliable wefts makes all the difference in your final hairstyle outcomes.
Get your wholesale weft extensions from Alphahair today and elevate your hair extension game. Whether you are customizing, styling, or expanding your salon offerings, our wefts offer unmatched quality and consistency. Start creating stunning, professional-quality hair extensions that clients and friends will love.



