

To blend clip-in extensions with short hair, you need to control three things that matter less with long hair: the blunt bottom edge, the gap between natural and extension length, and the limited amount of hair available to cover the clips.
Tuck or soften the lowest visible section, keep wefts inside the available cover zone, add density where the bob creates a shelf, and cut the finished shape to create a gradual transition.
This guide is for short cuts, bobs, lobs, and blunt ends. If your hair is already medium or long and you need the standard installation sequence, use the complete clip-in blending guide instead.
Why Clip-Ins Are Harder to Blend With Short Hair?
A short haircut creates a visible edge. When that edge sits over longer extensions, your eye sees two shapes: a solid upper layer and a thinner lower layer. Short hair also leaves less crown and side coverage, so clips can appear if you place rows too high or too close to the hairline.
| Short-hair challenge | Why it shows | What the blend needs |
| Blunt bottom line | Natural ends form one solid shelf | Tuck the lowest section and add connection layers |
| Large length jump | The eye cannot follow a gradual transition | Choose a realistic finished length and preserve enough density |
| Thin-looking sides | Bob density stays above the extension length | Smaller side pieces and face-framing connection |
| Exposed clips | There is less cover hair at the crown and temples | Lower placement and flatter, smaller pieces |
| Bulky head shape | Too many pieces are stacked in limited space | Distribute density and stop before the crown becomes crowded |
Choose a Workable Length and Density
The more length you add, the more extension hair and cutting work you need to connect the shape. A moderate change is easier to blend than taking a chin-length bob directly to very long hair. Think about the finished outline first: it should look full through the middle and ends, not heavy at the shoulders and transparent below them.
Fine Short Hair
Use discreet bases, narrow side pieces, and conservative row height. Leave more hair over the highest row than you think you need, especially near the part. Too much weight can flatten the cover layer and make the clips easier to see.
Thick or Blunt Short Hair
You usually need more lower density and more connection cutting. Do not place every wide weft at the back; the sides must also carry enough hair to connect the bob to the extension length. If the finished ends look thin, shortening the extensions can create a fuller, more believable shape.
If you are still choosing between methods rather than solving a blending problem, compare the options in our guide to the best extensions for short hair.
How to Hide Blunt Ends Before Installing Clip-Ins?
- Section off the lowest natural layer that creates the most obvious short line.
- Make a small, flat braid, twist, or low pin-curl across that section. Keep tension gentle.
- Secure it close to the head with flat pins so it does not create a bump.
- Place the first weft directly above the tucked section, not on top of the pins.
- Release the remaining hair and check that you still have enough top and side coverage.
Use the smallest effective tuck: Hiding every short layer can leave too little natural hair to cover the wefts. Tuck only the section that creates the visible bottom shelf, then use placement and cutting to connect the rest.
Where to Place Wefts on a Bob or Lob?
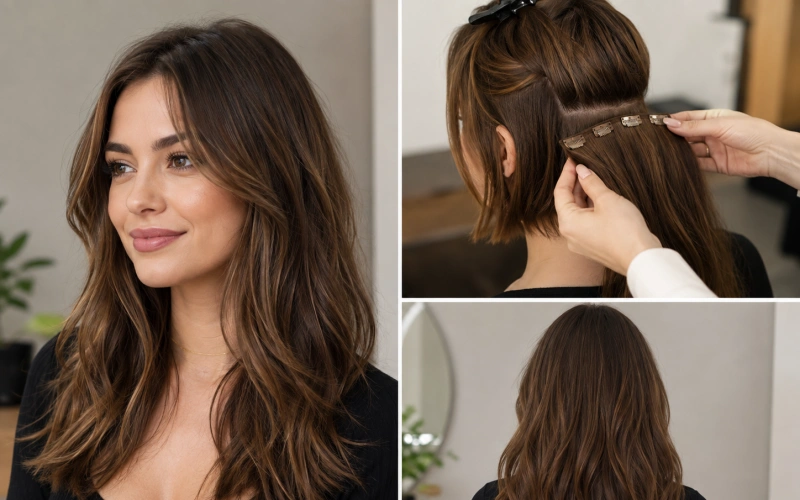
Start above the tucked lower section with a narrow or medium weft. Add wider pieces through the broadest part of the back, but keep enough distance between rows for the bases to lie flat. Stop below any area where the crown separates or the clips become visible.
| Cut | Placement priority | Avoid |
| Chin-length bob | Strong lower and side density; conservative finished length | A few long, thin pieces hanging below a solid bob |
| Shoulder-length lob | Connect the shoulder line with staggered back and side pieces | Placing all wide wefts at one height |
| Layered short cut | Follow existing layers and use smaller pieces where the cut is light | Creating a new heavy shelf below the shortest layer |
| Very short or pixie areas | Use only where there is safe coverage; consider another method | Clipping into exposed crown, hairline, or fragile sections |
A phone photo of the back is useful because short layers can hide the top of a weft in the mirror while exposing its ends when you move. Once you find a successful map, photograph each row and number the pieces.
How to Blend the Sides and Temple Area?
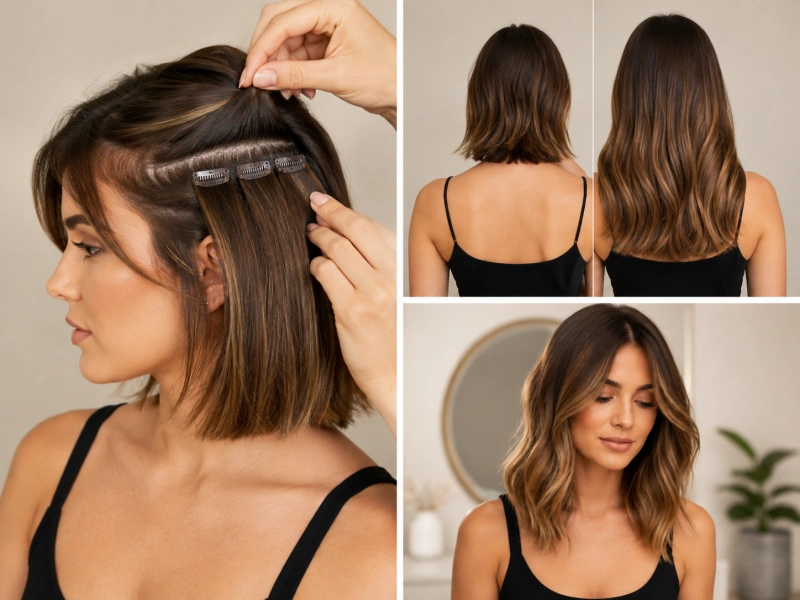
The side profile is where many short-hair blends fail. A bob carries weight near the jaw, but a back-heavy extension layout leaves the front looking disconnected. Place narrow pieces behind the temple and away from the visible hairline. Angle them slightly with the natural fall, then release the side layers and check that the clip remains hidden when you tuck hair behind your ear.
Use the same amount of attention on both sides, but do not assume they need identical placement. Your part, hairline, and natural density may be different from left to right.
How to Cut and Layer Clip-Ins for Short Hair?
Clip in every piece in its repeatable position before cutting. The stylist should first choose a full finished length, then add soft connection layers beginning near the natural ends. Point cutting and subtle face framing can break up the bob line without making the extension ends stringy.
- Cut less than you think you need, then reassess from the back and both profiles.
- Keep enough fullness at the perimeter; over-thinning creates a new density mismatch.
- Number each weft after cutting so it returns to the same position.
- Do not cut a stacked set as one solid block unless the pieces will always be worn together.
For tool choice and detailed cutting steps, use our guide to cutting and layering clip-in extensions.
How to Style Short Hair and Extensions Together?
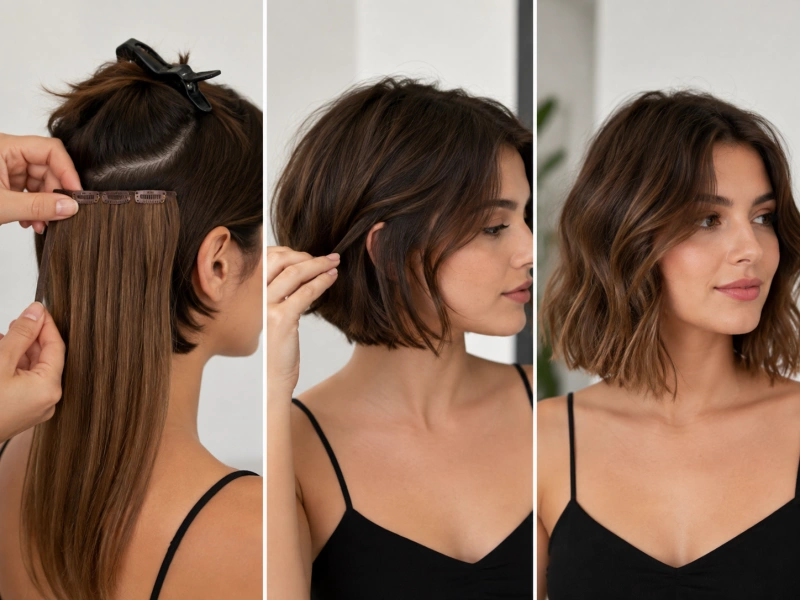
Apply heat protectant and take small sections that include both natural hair and extension hair. A loose wave is forgiving because it redirects the blunt ends and creates shared movement. If you prefer straight hair, curve the short natural ends slightly inward and smooth them into the longer layer instead of flattening each layer separately.
Let the hair cool before brushing. Then use your fingers or a soft brush to open the shape. Heavy oils can separate short natural pieces from the extensions, so keep finishing product light and concentrate it away from the clip bases.
Troubleshooting Short-Hair Clip-In Blending
| Problem | Why it happens | Short-hair fix |
| Bob shelf is still visible | Natural perimeter is too blunt or extension density is too low | Increase connection layers, reassess finished length, or add suitable density |
| Short pieces poke through underneath | Lowest layer was not contained | Tuck only the problem section and place the first weft above it |
| Clips show at the crown | Highest row exceeds the available cover zone | Move it lower or remove that row; use a flatter piece |
| Sides look empty | Back pieces do not connect the face frame | Add small diagonal side pieces behind the hairline |
| Top looks bulky | Too many rows are crowded into short vertical space | Spread or remove pieces; use slimmer bases; shorten the final length |
| Extensions slip from short hair | Roots are too smooth or clips lack a stable base | Add light texture, adjust the row, and review secure clip-in techniques |
| Straight style separates | Blunt ends remain flat against a separate lower layer | Curve the natural ends inward or add a soft bend to mixed sections |
For slippage that continues after placement changes, see how to secure clip-in hair extensions.
When to Use the Complete Clip-In Guide?
The short-hair steps above assume you already understand basic sectioning and clip operation. For the complete sequence—including color and density checks, the standard placement map, side balancing, finishing, and generic troubleshooting—read the complete clip-in blending guide.
FAQ for Short-Hair Clip-In Blending
Can clip-in extensions blend with a blunt bob?
Yes, but a blunt bob normally needs a controlled lower tuck, enough side and lower density, and connection cutting. A very large length jump is harder to disguise than a moderate one.
How short is too short for clip-ins?
The practical limit is not one universal measurement. You need enough healthy hair to hold the clips and enough hair above them to cover the base. Exposed crown or hairline areas may need a different extension method or a shorter finished result.
Do I need more clip-ins for thick short hair?
Often you need more density than someone with fine hair, but distribution matters as much as quantity. Add hair where the short perimeter needs connection, especially at the sides, instead of stacking everything at the back.
Should I braid all of my short hair underneath?
No. Braid or pin only the lowest section that creates the visible shelf. You still need loose natural hair to cover the clips and blend through the upper layers.
Can I wear the extensions straight with a bob?
Yes, but a straight finish exposes shape and density differences more clearly. Use precise placement, a well-connected cut, and a slight inward curve at the natural ends.
Conclusion
Short hair can blend with clip-ins when you design the result around the haircut. Control the blunt bottom line, protect the cover zone, balance the sides, choose a believable finished length, and cut the extensions in their permanent positions. Once those pieces are right, styling becomes the finishing step instead of a disguise.



