

You want longer, fuller hair without the fuss. I-tip hair extensions might catch your eye, but you probably wonder if they’re worth it. Many people love these extensions for their natural look, lasting results, and volume boost—especially if you have medium-to-thick hair.
Still, you should know the pros and cons before you commit. These extensions need time, money, and regular care. Think about your hair type and how much effort you want to put in before taking the plunge.
Key Takeaways
I-tip hair extensions provide a natural look and blend seamlessly with your hair, making them ideal for those seeking a fuller style.
The installation method is gentle, using microbeads instead of heat or glue to help protect your natural hair from damage.
These extensions are reusable and can last up to a year with proper care, making them a cost-effective choice for long-term use.
Regular maintenance is essential; plan for salon visits every 6 to 8 weeks to keep your extensions looking their best.
Consult a professional stylist to ensure the right fit for your hair type and to avoid potential damage from improper installation.
What Are I-Tip Hair Extensions?
Definition and Features
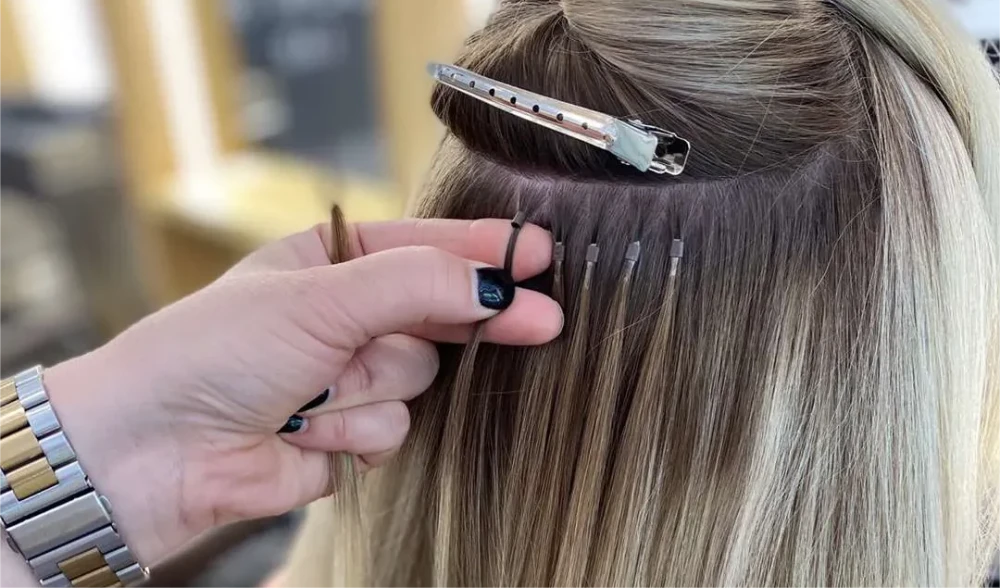
If you want a boost in length and volume, i-tip extensions offer a unique solution. These extensions use a strand-by-strand method, which means each piece attaches individually to your natural hair. You get a seamless blend that looks and feels real. Most i-tip extensions use high-quality materials, including:
100% human hair
Keratin bonds
Cuticle-aligned Remy hair for a smooth texture and lasting shine
You might wonder how many i-tips you need. The answer depends on your desired fullness and the thickness of your hair. For a full head, you usually need between 100 and 200 i-tips. If you want just a little extra volume, you can use fewer.
Installation Method
The installation process sets i-tip hair extensions apart from other types. You don’t need glue or heat. Instead, your stylist uses tiny beads to clamp each extension to your hair. This method keeps your hair safe and lets you reuse the extensions if you take care of them. Here’s a quick comparison:
Feature | I-Tip Extensions | |||
|---|---|---|---|---|
Attachment Method | Bead-like structure clamped to natural hair | Clips attached to the weft | Pre-taped wefts sandwiched around natural hair | Sewn into braided hair or attached with beads/glue |
Application Time | Longer due to careful threading and clamping | Quick and can be done at home | Faster than I-tips, larger sections applied | Varies, generally between I-tips and tape-ins |
Reusability | Can be reused if well-maintained | Reusable multiple times | Semi-permanent, can be reapplied | Reusable, frequency varies based on the method |
Comfort | Natural feel, lightweight, individual strand method | Flexible, ideal for occasional use | Flexible and comfortable once applied | Comfort varies based on technique and weight |
You might ask, how long do I-tip extensions last? With proper care, they can last up to six months.
Alpha’s Quality and Options
Alpha stands out in the world of i-tip extensions. You get products made from 100% cuticle-intact Remy human hair. Alpha offers a wide range of extension types, including i-tip, tape-ins, clip-ins, wefts, and pre-bonded options. We uses advanced butterfly weft and flat weft technologies for extra durability.
You can choose OEM/ODM services if you want to develop your own line. Alpha’s in-house production and strict quality control mean you get reliable extensions every time. You also benefit from a 6-month warranty and rapid stock delivery. Alpha commits to ethical sourcing, so you can feel good about your choice.
Tip: If you’re unsure how many i-tips you need, ask your stylist for a personalized recommendation.
Pros of I-Tip Extensions
Natural Look and Blend
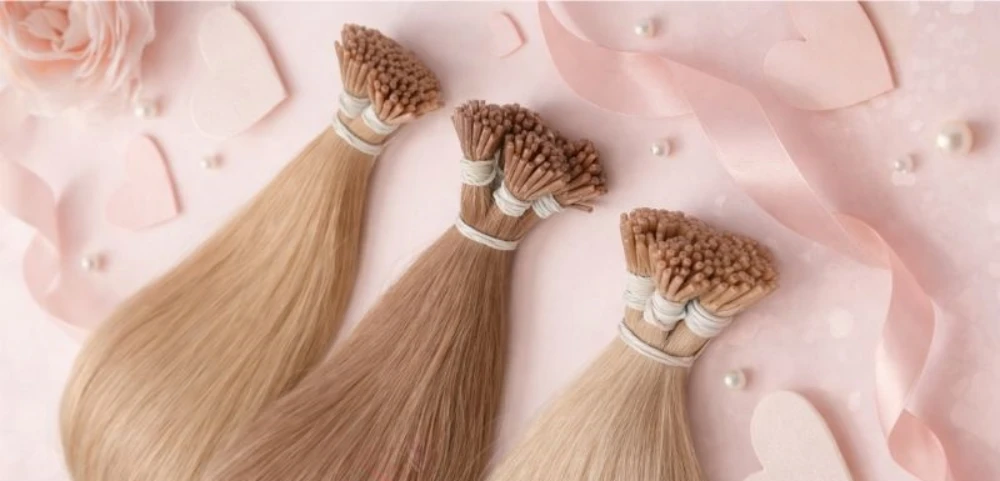
You want your extensions to look like your real hair. I-tip extensions deliver a natural look that blends seamlessly with your own strands. Each extension attaches to small sections of your hair, so you get movement and flow that feels just like your own.
When you choose high-quality options like Alpha’s 100% Remy human hair, you get a soft texture and shine that match your natural hair perfectly. You can wear your hair up, down, or in a ponytail, and no one will spot the difference. This makes i-tip hair extensions a top pick for everyday use for a natural look.
No Heat or Glue
You might worry about damage from heat or sticky glue. With i-tip extensions, you can relax. The installation uses a cold-fusion method. Your stylist threads a small section of your hair through a microbead, inserts the i-tip, and clamps the bead shut. No heat touches your hair.
No glue sticks to your scalp. This gentle process keeps your natural hair safe and healthy. You avoid the risks that come with other types of hair extensions.
Tip: If you have a sensitive scalp or want to avoid harsh chemicals, this method is a smart choice.
Lightweight and Comfortable
You don’t want heavy extensions weighing you down. I-tip extensions feel lightweight and comfortable because each strand attaches individually. You can move, style, and even sleep without feeling bulky or stiff. The beads are tiny and sit close to your scalp, so you forget you’re even wearing extensions.
Many people say they feel just like their own hair.
Styling Versatility
You love to change your hairstyle. I-tip extensions give you styling versatility that fits your mood and plans. You can:
Curl, straighten, or wave your hair with heat tools.
Tie your hair up in a ponytail, bun, or braid.
Enjoy natural movement, thanks to the individual strand attachment.
You don’t have to limit your creativity. These extensions move and style just like your real hair, so you can try new looks whenever you want.
Reusable and Cost-Effective
You want value for your money. I-tip extensions offer reusability, which means you can use them again and again with proper care. Most people find that these extensions last between 9 and 12 months, and sometimes up to a year. If you take good care of them, they can even last up to three years.
You’ll need maintenance every 10 to 12 weeks, but you won’t have to buy new extensions each time. This makes i-tip extensions great for those seeking long-term extensions and long-lasting durability.
Gentle on Hair
You care about the health of your natural hair. I-tip extensions are designed to be gentle. The installation skips heat and chemicals, so your hair stays strong and healthy. The removal process is simple, too. Your stylist just opens the bead and slides the extension out.
This method reduces the risk of breakage or damage. You get fuller, longer hair without sacrificing the health of your own strands. Many users report high satisfaction with how gentle this method feels.
Note: Alpha’s extensions use only ethically sourced, cuticle-intact hair, so you can trust the quality and safety of your hair.
Cons of I-Tip Hair Extensions
When you look at the pros and cons of i-tip hair extensions, you’ll see that they offer many benefits, but there are some drawbacks you should know before you decide. Let’s break down the main cons so you can make an informed choice.
High Cost and Maintenance
You might love the look, but I-tip extensions come with a price tag. The initial application usually costs between $300 and $900. That’s just to get started. You also need regular maintenance visits, which can run from $100 to $300 each time. Most people go back to the salon about five times a year for upkeep.
That means you could spend anywhere from $800 to $2,400 a year just to keep your extensions looking fresh.
Cost Type | Price Range |
|---|---|
Initial Application | $300 – $900 |
Maintenance Cost (per visit) | $100 – $300 |
Estimated Annual Maintenance (5 visits) | $800 – $2,400 |
If you want beautiful hair, you need to budget for both the upfront cost and the ongoing upkeep. Skipping maintenance can lead to tangling, matting, and less satisfaction with your look.
Time-Consuming Application
Getting i-tip hair extensions isn’t a quick process. You’ll need to set aside a big chunk of your day for the first appointment. Most full-head applications take between 2 and 4 hours. If you want extra volume or have thick hair, it could take even longer—sometimes up to 5 hours.
That’s a lot of time in the chair, especially if you’re busy or don’t like sitting still.
Application Type | Time Estimate |
|---|---|
Average Full Head (100-150 strands) | 2 to 4 hours |
Thicker/More Voluminous Full Head (150-200+ strands) | 3 to 5+ hours |
You’ll also need to plan for regular maintenance appointments, which add more time to your schedule.
Professional Required
You can’t install i-tip extensions at home. You need a trained stylist who knows how to attach each strand with care. Proper application is key for a natural look and to avoiding hair damage. Most users get better satisfaction when they trust a professional.
If you try to do it yourself, you risk uneven results or even hurting your hair. Always book with someone experienced for the best outcome.
Tip: Ask your stylist about their experience with i-tip extensions before you book your appointment.
Not for Very Fine Hair
I-tip extensions may not suit very fine or fragile hair. If your hair is thin, the beads can put stress on your strands. Over-tightening can lead to breakage. If you skip maintenance, you might see tangling or matting at the roots.
Using the wrong bead size can also cause slipping or pinching, which lowers satisfaction and can damage your hair. If you have delicate hair, talk to your stylist before choosing this method.
Discomfort and Damage Risks
Some people feel discomfort after getting extensions. You might notice itchiness, pain, or even headaches, especially in the first few days. The beads can create pressure points that feel uncomfortable. In rare cases, you could have contact dermatitis or an allergic reaction.
If you wear the extensions too long or skip maintenance, you risk hair tangling, matting, and loss of shine. Prolonged wear can also lead to breakage and hair damage. Always listen to your scalp and let your stylist know if you feel pain.
Common complaints include:
Itchy scalp
Headaches
Uncomfortable attachment points
Tangling and matting
Complex Care Routine
I-tip extensions need a special care routine. You can’t just wash and go. You’ll need to use sulfate-free shampoo, gently wash your hair, and condition only the ends. Detangle carefully and avoid pulling on the beads. Use heat tools sparingly and style only when your hair is dry.
At night, braid your hair or use a silk pillowcase to prevent tangling. You should also avoid putting products near the bones. Plan to visit your stylist every 6 to 8 weeks for check-ups and repositioning. This routine takes time and effort, but it helps you get the most satisfaction from your extensions.
Maintenance Routine | Description |
|---|---|
Washing and Conditioning | Use sulfate-free shampoo, gently wash extensions, condition ends, detangle carefully, air dry or use low heat, avoid overwashing. |
Styling Tips | Use heat styling sparingly, style when dry, braid for bedtime, protect during exercise, avoid products near bonds. |
Regular Maintenance | Attend check-ups every 6-8 weeks, reposition extensions if needed, trim and blend for a natural look. |
If you want extensions that are easy to manage, you might find this routine a bit much. But if you love the look and don’t mind the upkeep, you’ll enjoy the results.
Knowing the cons helps you balance the pros and cons of i-tip hair extensions. Think about your hair type, budget, and how much time you want to spend on upkeep before you decide. Your satisfaction depends on making the right choice for your lifestyle.
I-Tip Extensions vs Other Methods
When you start looking at hair extensions, you’ll see a lot of choices. Let’s break down how i-tip hair extensions stack up against other popular methods. This way, you can pick what fits your style, budget, and routine.
I-Tip Extensions vs Tape-In Extensions
Tape-ins are a favorite for quick makeovers. Your stylist sandwiches your hair between two adhesive strips. You get a flat, natural look that works well for thin or fine hair. Here’s how they compare to micro-links:
I-tip extensions (micro-links) last longer with proper care. The bead attachment keeps them secure during daily activities.
Tape-ins usually last 6–8 weeks before you need to reapply them. You can reuse them 3–4 times with new tape.
Tape-ins need gentle washing and styling. If you use harsh products, the adhesive can loosen.
You’ll visit the salon every few weeks for maintenance with tape-ins.
If you want something you can reuse and wear for months, micro-links might be your pick. If you want a fast, low-profile option, tape-ins work well.
Clip-In Extensions
Clip-ins give you instant length and volume. You can put them in and take them out at home. No salon visit needed. They’re perfect for special events or when you want a change for a day. You don’t need to commit to long-term wear.
If you want flexibility and zero maintenance, clip-ins are a great choice. Alpha offers high-quality clip-in options for every hair type.
Sew-In Extensions
Sew-ins, also called weaves, work best for thick or coarse hair. Your stylist braids your natural hair, then sews the extensions onto the braids. This method gives you a secure hold and lots of volume.
Sew-ins can feel heavy and need regular tightening. If you have fine hair, this method might not suit you. Micro-links offer a lighter, more flexible feel.
Keratin Bond Extensions
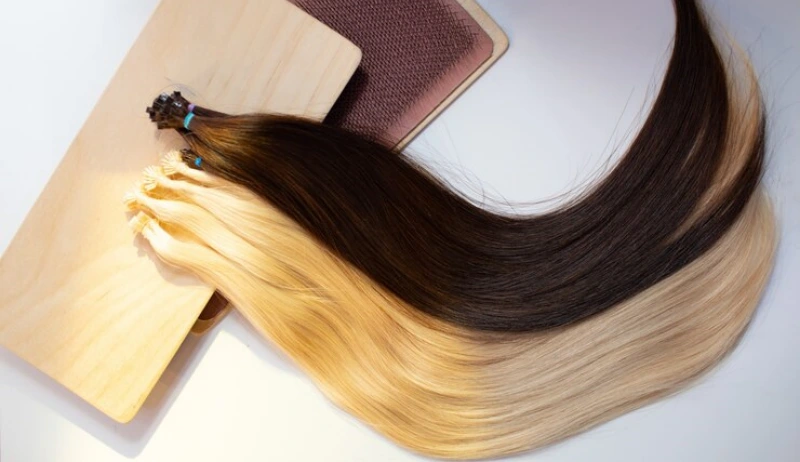
Keratin bonds, or K-tips, use heat to fuse each extension to your hair. Here’s a quick look at how they compare to micro-links:
Feature | K Tips (Keratin Bonds) | I Tips (Micro-links) |
|---|---|---|
Application | Heat-fused keratin bond | Bead clamping method |
Lifespan per Install | 3–4 months | 6–8 weeks before move-up |
Reusability | No | Yes, up to 1 year |
Damage Risk | Slightly higher | Lower if installed well |
You get a strong hold with keratin bonds, but you can’t reuse the hair. Micro-links let you reuse the extensions, which saves money over time. If you want less risk of damage and more flexibility, i-tip extensions are a smart choice.
Tip: Alpha offers all these methods, so you can find the perfect match for your hair goals.
Suitability and Lifestyle Fit
Best Hair Types
You want your extensions to look natural and feel comfortable. So, who are i-tips best for? Professional stylists agree that i-tip hair extensions are best for medium to thick hair. If your hair is healthy and has even length, you’ll get a seamless blend and extra volume. Take a look at this table to see which hair types work best:
Hair Type | Suitability for I-Tip Extensions |
|---|---|
Medium to Thick | Best suited; blends well, feels natural, and enhances volume and length. |
Healthy Hair | Works well on healthy, even-length hair that hasn’t been chemically treated. |
Very Fine or Fragile | Not suitable; may lead to breakage and beads can be noticeable, affecting the look. |
If you have strong, healthy hair, you’ll love the results. You’ll notice the extensions blend right in and boost your confidence.
Who Should Avoid?
Not everyone gets the same experience with i-tip hair extensions. If your hair is very fine, fragile, or has been chemically treated, you might want to skip this method. The beads can put stress on delicate strands and cause breakage.
People with unhealthy scalps or relaxed hair also risk damage from the added weight. If your hair is shorter than four inches or you don’t have enough natural hair to cover the attachment points, you won’t get the seamless look you want.
Tip: Always talk to your stylist before making a decision. They can check your hair’s health and help you choose the best option.
Lifestyle Considerations
Your daily routine matters when choosing extensions. If you want a semi-permanent solution that lasts up to three years with proper care, i-tip hair extensions fit your lifestyle. You need healthy, even-length hair and a scalp that can handle the beads.
Avoid chemical treatments like relaxers or perms before installation. Make sure you have enough natural hair to cover the attachment points. If you’re active or love changing your hairstyle, these extensions give you flexibility and durability.
Healthy hair and scalp are essential.
Avoid chemical treatments before installation.
Installation must match your hair’s texture, density, and length.
If you have fine or unhealthy hair, you risk damage.
You get the best results when you match your hair type and lifestyle to the right extension method.
Installation and Removal
Application Steps
Getting I-tip hair extensions starts with a plan. You want your hair to look natural and feel comfortable. Here’s how the process usually goes:
Consultation: You meet with a stylist. They check your hair’s density and texture. You talk about your goals and decide how many strands you need.
Sectioning: The stylist divides your hair into neat layers. This keeps everything organized and helps the extensions blend in.
Threading & Beading: Your stylist threads a small section of your hair through a tiny bead. They add the I-tip strand right after.
Securing the Microbead: The bead gets clamped shut. No heat, glue, or keratin is needed. This keeps your hair safe.
Blending Cut and Style: Your stylist trims and blends the extensions. You get a seamless finish that matches your natural hair.
Tip: Always ask your stylist about their experience with I-tip extensions. Skilled hands make a big difference.
Importance of Professionals
You might think about doing extensions at home. It’s tempting, but you should always trust a specialist. Professional stylists know how to install I-tip extensions without causing tension or breakage. They use the right tools and techniques. You get a better look and healthier hair.
Consult a specialist for your first appointment.
Choose a stylist who has experience with I-tip extensions.
Professional care helps your extensions last longer and look better.
Removal Process
When it’s time to remove your I-tip extensions, don’t try it yourself. You risk damaging your natural hair. A professional stylist opens the beads gently and slides the extensions out. This prevents unwanted tension and breakage. You keep your hair healthy and ready for your next style.
Note: Professional maintenance and removal are crucial for keeping your hair strong and your extensions looking their best.
Maintenance and Care
Daily Care Tips
You want your extensions to look great every day. Start with daily care guidelines that keep your hair healthy and your style fresh. Always brush your hair gently with a loop brush or a wide-tooth comb. Begin at the ends and work your way up. This helps prevent tangles and protects the beads.
Wash your hair with sulfate-free products, focusing on your scalp and letting the suds run through the ends. Avoid rubbing or twisting the hair. Use lightweight, leave-in products to keep your extensions soft and manageable. Try to let your hair air dry when possible. If you use heat tools, apply a heat protectant first.
Tip: Sleep with your hair in a loose braid or ponytail to reduce tangling and make morning upkeep easier.
Salon Visits
Regular care from a professional keeps your extensions looking their best. Plan to schedule upkeep every 3–4 weeks for a quick check-in. Most stylists recommend a full maintenance visit every 6-8 weeks to adjust the beads as your natural hair grows. You should also consider a full reinstallation every 10-12 weeks.
These visits help your extensions blend seamlessly and stay secure. Your stylist will check for any slipping or matting and give you advice on the best products for your hair type.
Schedule quick check-ins every 3–4 weeks.
Book full maintenance every 6-8 weeks.
Plan for reinstallation every 10-12 weeks.
Preventing Issues
You can avoid most problems with regular care and the right products. Never use heavy oils or silicone-based products near the beads. These can cause slipping and buildup. Stick to lightweight, extension-safe products. Always dry your roots thoroughly after you wash your hair.
Moisture left near the beads can lead to irritation or mildew. If you notice any discomfort or see beads slipping, contact your stylist right away. The table below shows some simple ways to prevent common issues:
Issue | Prevention Tip |
|---|---|
Tangling | Brush daily, braid at night |
Slipping Beads | Avoid oily products near roots |
Matting | Schedule regular care appointments |
Irritation | Dry roots completely after washing |
Stay consistent with your upkeep and regular care routine. You’ll enjoy beautiful, long-lasting extensions with less hassle.
Choosing and Caring Tips
Selecting Quality Extensions
You want your hair to look amazing, so picking the right i-tip extensions matters. Start by checking the hair quality. Look for 100% Remy human hair with the cuticle intact. This gives you a soft feel and a natural shine.
Make sure the color matches your own hair. If you want a perfect blend, ask for a sample before you buy. Always choose extensions from a trusted brand that uses ethical sourcing and strict quality checks.
Tip: High-quality extensions last longer and need less care in the long run.
Questions for Your Stylist
Before you get extensions, talk with your stylist. Ask these questions to make sure you get the best results:
How much experience do you have with i-tip extensions?
Will these extensions work with my hair type and lifestyle?
How many strands do I need for my desired look?
What care routine should I follow at home?
How often should I come back for maintenance?
Your stylist can help you avoid mistakes and keep your hair healthy.
Buying Checklist
When you shop for extensions, use this checklist to make smart choices:
Check your hair health. If your hair is fragile or damaged, wait until it gets stronger.
Match the texture of the extensions to your own hair.
Make sure your hair is at least shoulder-length.
Count your hair’s thickness. You may need more or fewer strands based on your density.
Pick a color that blends perfectly with your natural hair.
Match the texture for a seamless look.
Why Choose Alpha?
Alpha stands out for quality and support. You get 100% Remy human hair that feels soft and blends well. Alpha offers many colors and textures, so you can find your perfect match.
We use ethical sourcing and strict quality checks. You can customize your order and get expert advice. Alpha’s team helps you with every step, from choosing to care to even after your purchase. You get peace of mind and beautiful results.
Remember: Good extensions and proper care give you confidence every day. Always brush gently, wash with sulfate-free products, and follow your stylist’s advice for the best results.
Conclusion
You’ve seen the ups and downs of i-tip hair extensions. They give you a natural look, flexibility, and long-lasting results. You need to invest time and money in upkeep. Always trust a pro for installation and regular check-ins.
Think about your hair type, daily routine, and budget before you decide. Chat with your stylist for advice. If you want top-quality hair, check out Alpha’s options.
FAQ
How long do I-tip hair extensions last?
You can expect your I-tip extensions to last up to six months with proper care. If you follow your stylist’s advice and schedule regular maintenance, you’ll enjoy longer-lasting results.
Can I wash my hair with I-tip extensions?
Yes, you can wash your hair. Use sulfate-free shampoo and conditioner. Always brush gently before washing. Avoid rubbing or twisting the extensions. Let your hair air dry or use low heat.
Will I-tip extensions damage my natural hair?
If you get professional installation and follow a good care routine, you lower the risk of damage. Don’t skip maintenance appointments. Listen to your stylist’s advice for healthy hair.
Can I style my hair with heat tools?
You can use heat tools like curling irons or straighteners. Always apply a heat protectant first. Style your hair only when it’s dry. Avoid using heat near the beads.
How many I-tip extensions do I need for a full head?
Most people need between 100 and 200 strands for a full head. Your stylist will check your hair’s thickness and help you decide the right amount for your desired look.



