

Removing hair extensions safely is crucial to protect your natural hair from damage. Whether using clip-ins, tape-ins, or nano extensions, the right techniques and tools ensure a smooth, effortless removal process. Understanding the proper methods prevents breakage and keeps your hair healthy and strong.
Knowing how to remove extensions correctly also helps preserve their longevity for reuse. Different extension types require specific approaches, so following step-by-step instructions is essential. With proper removal, you can maintain your natural hair’s integrity while keeping your extensions in great condition for future styling.
What Time to Remove Hair Extensions?
Knowing when to remove hair extensions is essential for maintaining healthy hair and prolonging the life of your extensions. Removing them at the right time prevents tangling, breakage, and damage, ensuring both your natural hair and the extensions stay in optimal condition for future use.
- After Recommended Wear Time – Follow the manufacturer’s or stylist’s guidance for each extension type. Clip-ins, tape-ins, and keratin bonds have specific wear durations, and exceeding these times can compromise hair health and extension quality.
- When Hair Feels Tangled or Matted – Extensions that become tangled, matted, or difficult to style should be removed promptly. Waiting too long can cause breakage, damage to natural hair, and make the removal process more challenging.
- Before Chemical Treatments – Always remove extensions before coloring, perming, or other chemical treatments. Chemicals can weaken bonds or adhesives and damage both natural hair and extensions, so timely removal is necessary for safety and hair integrity.
- When Preparing for a New Style – If changing hairstyles or replacing old extensions, remove them in advance. This ensures a clean base for new extensions, smooth installation, and consistent results without stress on your natural hair.
- If Extensions Cause Discomfort – Any pain, itching, or scalp irritation is a sign to remove extensions. Prompt removal prevents scalp damage, hair loss, or breakage, keeping your hair healthy while addressing the issue early.
How to Remove Hair Extensions?
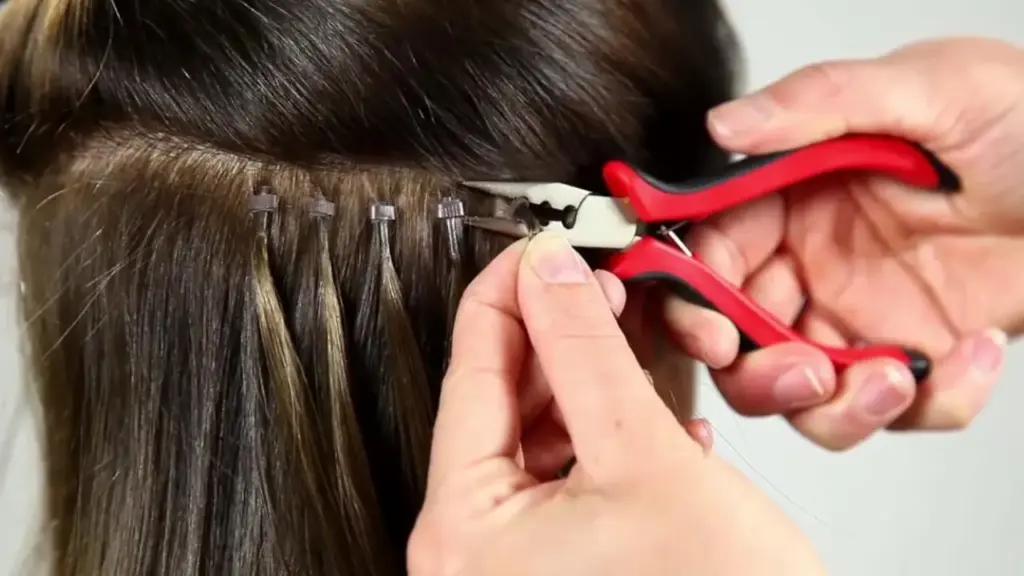
Removing hair extensions safely is essential to protect your natural hair and maintain the quality of your extensions. Using the correct tools and techniques ensures a smooth, damage-free process. Different extension types, like clip-ins, tape-ins, and keratin bonds, require specific steps to remove them efficiently.
Following proper removal methods prevents breakage, tangling, and scalp irritation. By taking a careful, step-by-step approach, you can extend the lifespan of both your natural hair and extensions. This guide walks you through six essential steps to remove extensions safely and professionally.
Tools Needed
- Extension remover (for tape-ins or keratin bonds)
- Hair clips
- Comb or brush
- Heat source (if required for certain bonds)
- Scissors (for emergency removal only)
- Gloves (optional for protection)
Step 1: Section Your Hair
Begin by parting your hair into manageable sections using clips. Sectioning ensures easier access to the extensions and prevents tangling. Working methodically allows you to focus on each area, making the removal process smoother, faster, and safer for your natural hair.
Check each section carefully before proceeding. Proper sectioning reduces stress on your hair and prevents accidental pulling or breakage. By isolating smaller areas, you maintain better control over the extensions and create an organized approach for complete removal.
Step 2: Identify the Type of Extensions
Determine the type of extensions installed—clip-in, tape-in, keratin, or nano. Each type requires a different removal technique and tools. Knowing the extension type ensures that you use the correct method to prevent damage to both your hair and the extensions.
Pay close attention to how extensions are attached. Observing the bonding or adhesive points helps you plan the removal process efficiently. Accurate identification allows you to apply the right products, such as bond remover or heat, to loosen attachments safely.
Step 3: Loosen the Extensions
Use the appropriate remover for your extension type. For tape-ins, apply tape remover; for keratin bonds, use a bond dissolver or heat. Clip-ins can simply be unclipped. Loosening the attachments carefully prevents pulling on natural hair and reduces the risk of breakage.
Work gradually on one extension at a time. Ensure the remover fully penetrates or softens the adhesive before gently sliding or detaching the extension. Patience during this step ensures the hair remains intact and healthy throughout the process.
Step 4: Gently Remove Extensions
After loosening, carefully slide or detach the extension from your natural hair. For keratin bonds, hold the natural hair close to the bond while gently pulling. For tape-ins, peel slowly from the root to tip to avoid hair damage or excessive tension.
Work slowly and avoid forceful tugging. Taking your time prevents unnecessary hair loss and ensures that the extensions come out smoothly. Proper handling maintains your hair’s integrity and minimizes discomfort during removal.
Step 5: Remove Residue
Clean any leftover adhesive, glue, or bonding product using an appropriate remover. Residue can make reinstallation difficult and may cause tangling or matting if left on natural hair. Proper cleaning prepares your hair for styling or future extensions.
Use a comb or soft brush to carefully remove residue without pulling hair. Ensuring your scalp and hair are free of adhesives prevents irritation, protects hair health, and maintains a clean, smooth base for subsequent styling or extension application.
Step 6: Wash and Condition Hair
After removing all extensions, wash your hair with a gentle shampoo and apply deep conditioner. This step restores moisture, smooths any areas stressed during removal, and strengthens your natural hair, keeping it healthy and resilient.
Massage conditioner thoroughly into your hair and leave it for several minutes before rinsing. Proper post-removal care replenishes hydration, repairs minor stress points, and ensures your hair is soft, shiny, and ready for future styling or extensions.
Best Way to Remove Hair Extensions
Removing hair extensions correctly is essential for maintaining healthy, strong hair and preserving the quality of your extensions. Using the proper tools and techniques ensures a smooth, damage-free process, preventing breakage, tangling, or scalp irritation while keeping extensions reusable for future styling.
The best removal methods vary depending on the type of extensions you have. Clip-ins, tape-ins, keratin bonds, and nano extensions all require specific approaches. Following the right steps helps you safely detach extensions, maintain hair integrity, and achieve a professional, polished result every time.
- Use Appropriate Tools – Always use products and tools designed for your extension type. Tape-in removers, keratin bond dissolvers, or heat sources prevent pulling and breakage while ensuring a smooth, safe removal process.
- Work in Sections – Section your hair into small, manageable portions before removal. This ensures better control, prevents tangling, and allows you to focus on one area at a time for a thorough, careful process.
- Loosen Gently – Apply remover, heat, or bond dissolver slowly and carefully. Avoid pulling or tugging, which can cause breakage or hair loss. Patience during this step ensures the extensions slide out smoothly and safely.
- Handle Extensions with Care – Hold natural hair close to the attachment while removing extensions. This prevents stress on your strands and reduces the risk of hair damage or unnecessary tension during the process.
- Remove Adhesive Residue – After detaching extensions, clean any leftover glue, tape, or keratin residue. Residue-free hair is easier to style, reduces tangling, and allows for future extension use without issues.
- Wash and Condition – Finish by washing and deep conditioning your hair. This restores moisture, smooths stressed strands, and strengthens hair, ensuring it remains healthy, shiny, and ready for styling or reapplication of extensions.
How to Remove Beads From Hair Extensions?
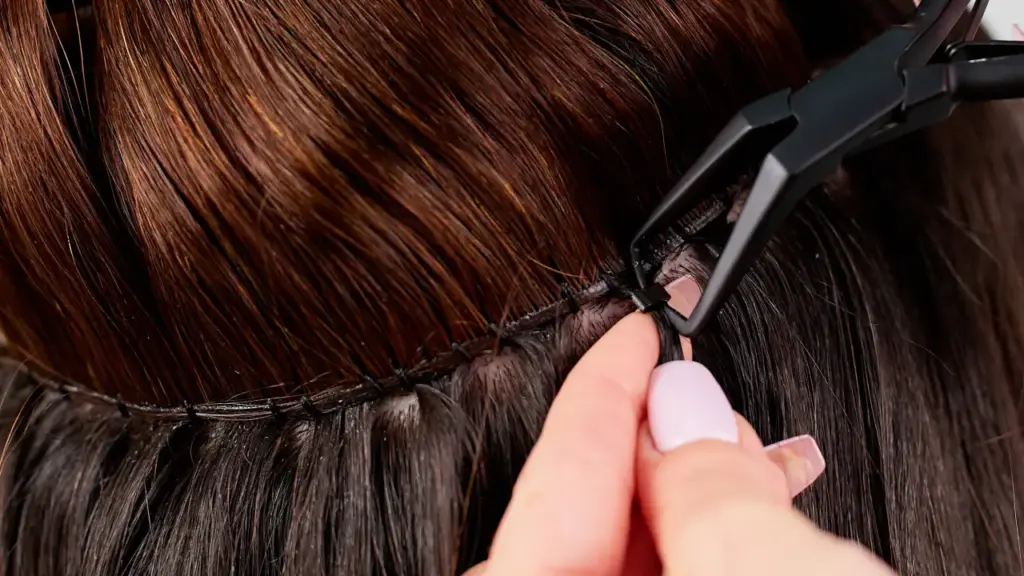
Removing beads from hair extensions is essential to protect your natural hair and maintain the quality of your extensions. Using the correct tools and techniques ensures a smooth, damage-free process. Bead extensions can be tricky, so following careful steps helps prevent breakage and keeps your hair healthy.
Proper removal of beads also allows extensions to be reused safely. By understanding the right method, you can detach extensions without causing tangling, matting, or scalp irritation. Patience and precision are key to preserving both your natural hair and the beads for future styling.
Tools Needed
- Bead or loop remover tool
- Nano pliers
- Comb or brush
- Hair clips
- Mirror
Step 1: Section Your Hair
Divide your hair into small, manageable sections and secure with clips. Sectioning provides better control over each bead, reduces tangling, and makes it easier to focus on one extension at a time. Proper organization ensures a safer and smoother removal process.
Step 2: Locate the Beads
Identify the beads holding the extensions to your natural hair. Examine each one carefully to determine the best way to open or loosen it without pulling on your hair. Accurate identification prevents unnecessary strain and ensures proper handling during removal.
Step 3: Open the Beads
Use nano pliers or a bead remover tool to gently open each bead. Position the tool carefully to avoid pinching or damaging the hair. Opening beads slowly ensures the extension slides out smoothly without stressing the natural strands.
Step 4: Slide Out the Extensions
After loosening the beads, carefully slide the extension strand out of your natural hair. Hold your hair close to the bead to prevent pulling and breakage. Work methodically, one bead at a time, for safe and effective removal.
Step 5: Remove Residue and Check Hair
Once all beads are removed, comb through your hair to eliminate any tangles or leftover residue. Ensure each strand is smooth and untangled. Proper checking helps maintain healthy, damage-free hair and prepares it for future styling or reinstallation of extensions.
Step 6: Wash and Condition Hair
Wash and condition your hair to restore moisture and strengthen strands. This step replenishes nutrients lost during bead removal, keeps hair soft and healthy, and ensures it is ready for styling or new extensions. Regular care preserves the integrity of your natural hair.
How to Remove I Tip Hair Extensions?
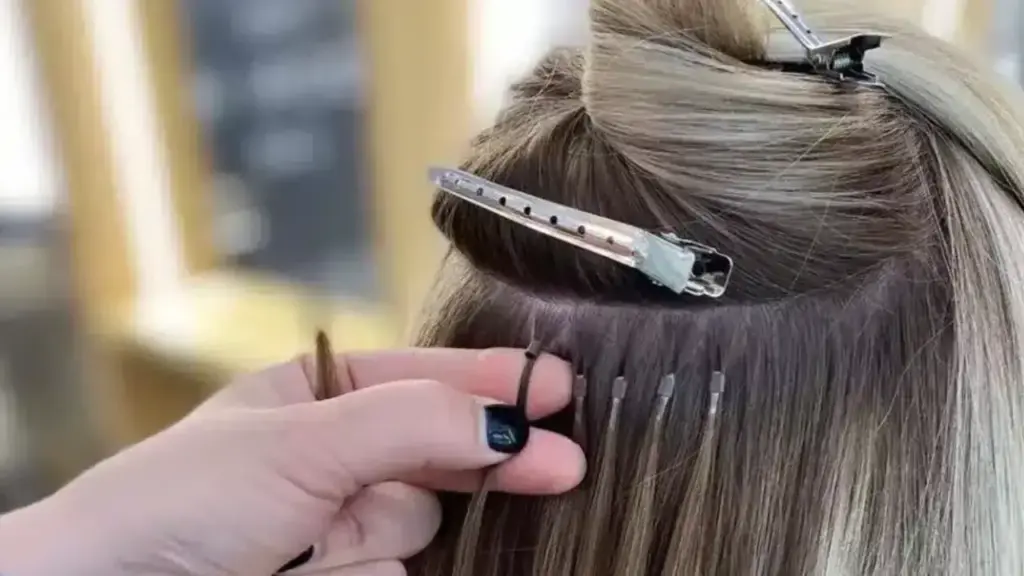
Removing I-tip hair extensions correctly is essential to protect your natural hair and preserve the extensions for reuse. These extensions use tiny keratin-coated tips or beads that attach to natural hair, so careful removal prevents breakage, tangling, and scalp irritation. Proper technique ensures a smooth, damage-free process.
Correct removal also allows the I-tip extensions to be reused safely. By following the right method and using appropriate tools, you can detach each extension strand without stressing your natural hair, keeping it healthy and ready for future styling or reinstallation of extensions.
Tools Needed
- I-tip or loop remover tool
- Nano or extension pliers
- Comb or brush
- Hair clips
- Mirror
Step 1: Section Your Hair
Divide your hair into small, manageable sections and secure with clips. Sectioning provides control over each I-tip extension and reduces tangling. Working systematically allows you to focus on one strand at a time, ensuring a safer and smoother removal process.
Step 2: Locate the I-Tips
Identify the keratin-coated tips attached to your natural hair. Examine each one carefully to determine the proper method for loosening it. Accurate identification prevents unnecessary pulling and ensures proper handling during the removal process.
Step 3: Loosen the I-Tips
Use a loop remover or pliers to gently slide the I-tip off the natural hair. Position the tool carefully to avoid pinching or pulling. Gradual loosening ensures the extension comes out smoothly without stressing your natural strands.
Step 4: Slide Out the Extensions
After loosening, carefully slide the extension strand from your hair. Hold your hair close to the tip to prevent breakage. Remove one strand at a time to maintain control and minimize stress on your hair and scalp.
Step 5: Remove Residue and Check Hair
Comb through your hair to remove any leftover keratin residue or tangles. Ensure all strands are smooth and undamaged. Checking your hair thoroughly maintains its health and prepares it for styling or reinstallation of I-tip extensions.
Step 6: Wash and Condition Hair
After removal, wash and condition your hair to restore moisture and strengthen the strands. Deep conditioning replenishes nutrients lost during removal, keeps hair soft, and ensures it is ready for styling or applying new extensions.
How to Remove Bonded Hair Extensions?
Removing bonded hair extensions safely is crucial to protect your natural hair and preserve the extensions for reuse. Bonded extensions, often attached with keratin, glue, or fusion tips, require careful handling. Proper removal prevents breakage, tangling, and scalp irritation while ensuring a smooth, damage-free process.
Correct removal also allows bonded extensions to be reused safely if handled properly. Using the right tools and step-by-step techniques ensures your natural hair remains healthy, and the extensions maintain their quality, making future styling or reapplication easier and safer.
Tools Needed
- Bond remover solution or adhesive dissolver
- Heat source (if required for keratin bonds)
- Nano or extension pliers
- Comb or brush
- Hair clips
- Gloves (optional)
Step 1: Section Your Hair
Divide your hair into small, manageable sections and secure with clips. Sectioning provides better control over each bonded extension, reduces tangling, and allows you to focus on one area at a time for safe and organized removal.
Step 2: Identify the Bonded Extensions
Locate the keratin, glue, or fusion points attaching the extensions to your natural hair. Examining each bond carefully ensures you know the proper removal technique and helps prevent accidental pulling or breakage during the process.
Step 3: Soften the Bonds
Apply a bond remover or adhesive dissolver according to the product instructions. For keratin bonds, gentle heat may be used to soften the adhesive. Softening the bonds ensures the extensions slide out smoothly without stressing your natural hair.
Step 4: Detach the Extensions
Using pliers or your fingers, carefully slide the extension away from your hair once the bond is softened. Work methodically, strand by strand, to prevent tangling or hair breakage, ensuring a clean and safe removal process.
Step 5: Remove Residue
Comb through your hair to remove any leftover adhesive, keratin, or glue residue. Ensuring residue-free hair prevents tangling, irritation, and difficulty when styling or reapplying extensions, keeping your hair smooth and healthy.
Step 6: Wash and Condition Hair
Wash and condition your hair thoroughly to restore moisture and strengthen strands. Deep conditioning repairs stress caused during removal, keeps hair soft, and prepares it for future styling or reapplication of bonded extensions.
How to Remove Clip in Hair Extensions?
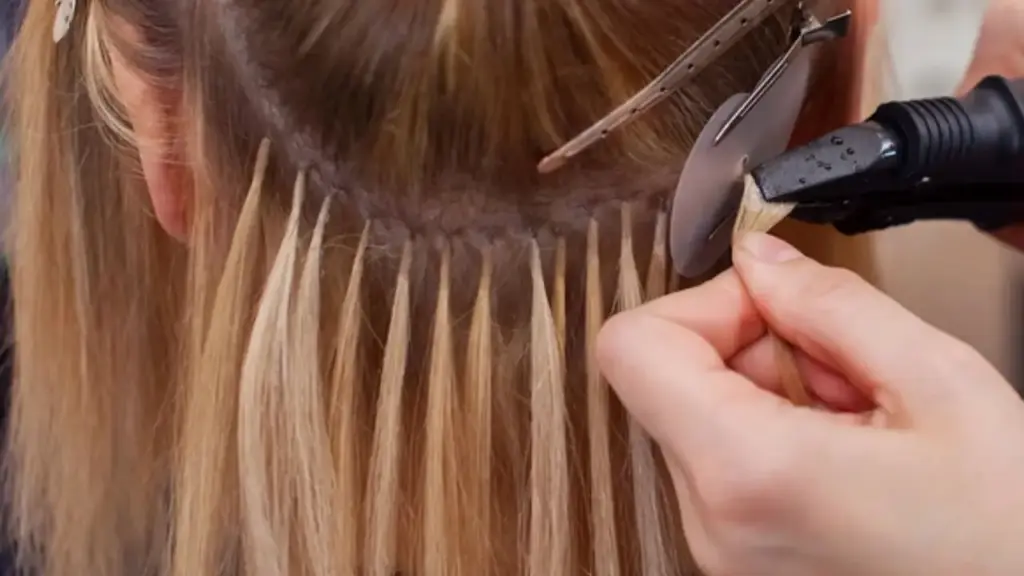
Removing clip-in hair extensions is quick and simple when done correctly. Proper removal ensures your natural hair stays healthy, prevents breakage, and preserves the extensions for future use. Following careful steps helps you detach each clip safely and maintain your hair’s integrity.
Clip-in extensions are easy to remove compared to bonded or tape-in types, but proper technique still matters. By following a step-by-step approach, you can safely remove all clips without tangling or damaging your natural hair, keeping it smooth, strong, and ready for styling or reapplication.
Tools Needed
- Comb or brush
- Hair clips (to section hair if needed)
- Mirror
- Optional: Detangling spray
Step 1: Section Your Hair
Divide your hair into manageable sections using clips. Sectioning ensures that you can easily access each clip without pulling on other strands. Working in small portions makes the removal process faster, safer, and reduces the risk of tangling or breakage.
Step 2: Locate the Clips
Identify all the clip-in extensions in each section. Check the top, sides, and back of your head to ensure no clips are missed. Properly locating each clip allows for a smoother removal process and prevents accidental pulling.
Step 3: Open the Clips
Gently press the clip’s top to open it. Avoid tugging on your hair when releasing the clip. Opening clips carefully ensures the extensions slide out without putting tension on your natural hair or causing damage.
Step 4: Remove the Extensions
Slide the clip out slowly, holding your natural hair close to the clip to prevent pulling. Work section by section, removing each clip-in extension methodically. This prevents tangling and keeps your hair smooth and intact throughout the process.
Step 5: Detangle Your Hair
Once all clips are removed, comb through your hair gently to remove any tangles. Detangling prevents knots and ensures your hair is smooth and ready for styling, washing, or reapplying extensions in the future.
Step 6: Wash and Condition Hair
After removal, wash and condition your hair to restore moisture and maintain hair health. Proper post-removal care keeps strands soft, strong, and ready for future styling or extension reinstallation, ensuring your hair remains shiny and manageable.
How to Remove Tape in Hair Extensions?
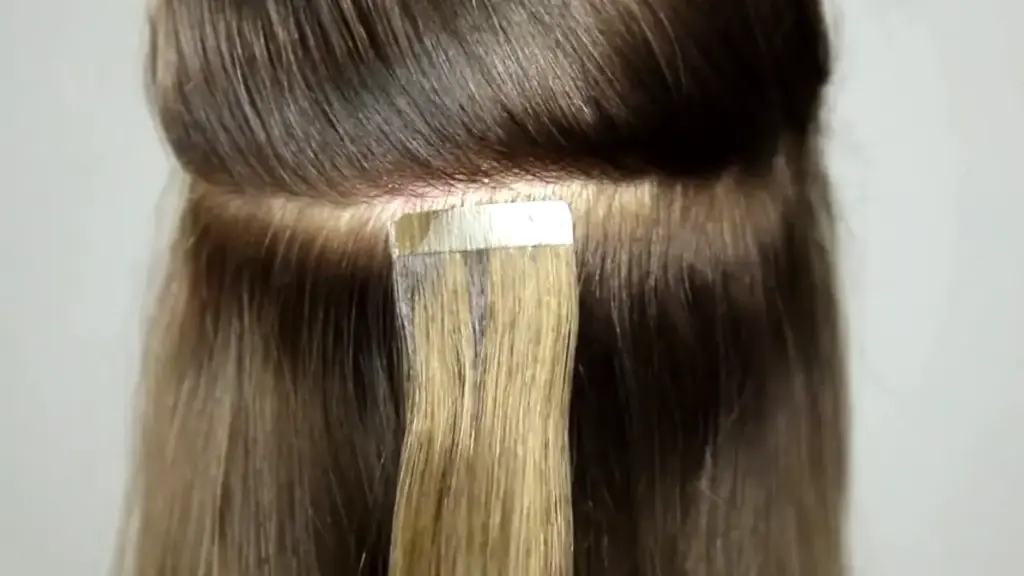
Removing tape-in hair extensions correctly is essential to protect your natural hair and maintain the extensions for future use. Using proper tools and techniques ensures a smooth, damage-free process. Incorrect removal can cause breakage, tangling, or adhesive residue, so careful handling is critical.
Proper removal also ensures that the tape-in extensions can be reused. Following the right method prevents damage to your natural hair, keeps the extensions intact, and makes the removal process easier and more efficient, saving time and preserving hair health.
Tools Needed
- Tape-in extension remover solution
- Comb or brush
- Hair clips
- Mirror
- Gloves (optional)
Step 1: Section Your Hair
Divide your hair into small, manageable sections using clips. Sectioning allows you to access each tape easily, prevents tangling, and helps you work methodically. This organized approach ensures safer, more efficient removal of the extensions without stressing your natural hair.
Step 2: Locate the Tape Extensions
Identify the tape-in extensions in each section of your hair. Properly locating the adhesive points ensures that you can apply the remover solution accurately and avoid accidentally pulling on your natural hair during removal.
Step 3: Apply Tape Remover
Use a tape-in extension remover solution at the adhesive area. Allow it to penetrate and loosen the glue for the recommended time. Proper application softens the adhesive, making it easier to slide the extensions off without tugging or causing damage.
Step 4: Gently Remove Extensions
Once the adhesive is loosened, slowly peel the tape away from your natural hair. Hold your hair close to the adhesive to reduce tension and prevent breakage. Work carefully to remove each extension one at a time for safe and effective results.
Step 5: Remove Residue
Comb through your hair and use the remover solution to eliminate any leftover adhesive. Removing residue ensures your hair is smooth, prevents matting, and prepares it for future styling or reapplication of tape-in extensions.
Step 6: Wash and Condition Hair
After all extensions are removed, wash and condition your hair to restore moisture and strengthen strands. Proper post-removal care keeps your hair soft, healthy, and ready for styling or future tape-in extensions without damage.
How to Remove Nano Hair Extensions?

Removing nano hair extensions safely is essential to protect your natural hair and preserve the extensions for future use. Nano extensions are attached using tiny beads or rings, so careful removal prevents breakage, tangling, and scalp irritation. Proper techniques ensure a smooth, damage-free process.
Correct removal also allows nano extensions to be reused safely. By following the right method and using the proper tools, you can detach each extension strand without stressing your natural hair, keeping it healthy and ready for future styling or reapplication.
Tools Needed
- Nano loop or removal tool
- Nano pliers
- Comb or brush
- Hair clips
- Mirror
Step 1: Section Your Hair
Divide your hair into small, manageable sections and secure with clips. Sectioning allows you to work on one area at a time, reducing tangling and ensuring better control over each nano bead, making the removal process safer and more organized.
Step 2: Locate the Nano Beads
Identify each nano bead that attaches the extensions to your hair. Carefully examine how the bead is positioned and how it clamps the hair. Accurate identification ensures you know how to safely loosen it without pulling or damaging your natural strands.
Step 3: Loosen the Beads
Use nano pliers or a loop tool to gently open the bead. Apply pressure carefully to avoid pinching or pulling your hair. Gradually loosening each bead ensures the extension slides out smoothly without stressing your natural strands.
Step 4: Slide Out the Extensions
After loosening, gently slide the extension strand out of your hair. Hold your natural hair close to the bead to prevent tension or breakage. Remove one strand at a time to maintain control and protect your hair’s integrity.
Step 5: Remove Residue and Check Hair
Comb through your hair to remove any leftover adhesive or residue from the beads. Ensuring your hair is tangle-free and smooth prevents damage, irritation, and prepares it for future styling or reinstallation of nano extensions.
Step 6: Wash and Condition Hair
After removing all extensions, wash and condition your hair thoroughly to restore moisture and strengthen strands. Proper post-removal care keeps hair soft, healthy, and ready for styling or reapplying new nano extensions.
How to Remove Micro Ring Hair Extensions?
Removing micro ring hair extensions correctly is essential to protect your natural hair and maintain the extensions for future use. Micro rings, also called micro beads, hold extension strands close to your hair, so careful removal prevents breakage, tangling, and scalp irritation while ensuring a smooth, damage-free process.
Proper removal also allows micro ring extensions to be reused safely. Using the right tools and following step-by-step techniques ensures your natural hair remains healthy, and the extensions maintain their quality, making future styling or reapplication easier and safer.
Tools Needed
- Loop or thread tool
- Nano or extension pliers
- Comb or brush
- Hair clips
- Mirror
Step 1: Section Your Hair
Divide your hair into small, manageable sections and secure with clips. Sectioning provides control over each micro ring extension and reduces tangling. Working methodically allows you to focus on one strand at a time, ensuring a safer and smoother removal process.
Step 2: Locate the Micro Rings
Identify the micro rings holding the extensions in place. Examine each one carefully to determine the proper removal technique. Accurate identification prevents unnecessary pulling and ensures proper handling during the removal process.
Step 3: Loosen the Rings
Use a loop tool or pliers to gently open each micro ring. Position the tool carefully to avoid pinching or pulling your natural hair. Gradual loosening ensures the extension slides out smoothly without stressing your strands.
Step 4: Slide Out the Extensions
Once loosened, carefully slide the extension strand out of the micro ring. Hold your natural hair close to the ring to prevent breakage. Remove one strand at a time for controlled and safe extraction of all extensions.
Step 5: Remove Residue and Check Hair
Comb through your hair to remove any leftover residue or tangles. Ensuring your hair is smooth and clean prevents damage, irritation, and prepares it for future styling or reinstallation of micro ring extensions.
Step 6: Wash and Condition Hair
Wash and condition your hair after removal to restore moisture and strengthen strands. Proper post-removal care keeps hair soft, healthy, and ready for styling or applying new micro ring extensions, maintaining hair integrity and overall appearance.
How Much to Remove Hair Extensions?
The cost of removing hair extensions varies depending on the type of extensions, the salon, and your hair length. Understanding the pricing helps you plan ahead and ensures you get professional removal without damaging your natural hair or the extensions themselves.
Factors such as extension type, stylist experience, and location affect the removal cost. Proper removal by a professional may cost more but protects your hair and ensures the extensions can be reused. Budgeting for removal is essential for maintaining healthy hair and achieving optimal results.
- Extension Type – Removal costs differ for clip-ins, tape-ins, keratin bonds, and nano extensions. More permanent or bonded extensions typically require more time and specialized products, increasing the overall cost.
- Salon vs. At-Home – Professional removal at a salon ensures safety and proper technique but may be pricier than DIY methods. At-home removal is cheaper but carries a higher risk of damage if done incorrectly.
- Stylist Experience – Experienced stylists charge more for their expertise. Their skill reduces the risk of breakage, tangling, or scalp damage, ensuring safe and efficient extension removal.
- Number of Extensions – The more extensions you have, the higher the removal cost. Full-head installations require more time, effort, and product, impacting the overall price.
- Additional Treatments – Some salons include hair treatments, conditioning, or residue removal in the cost. These services improve hair health and extend the life of both natural hair and extensions.
Conclusion
Proper removal of hair extensions ensures your natural hair stays healthy, strong, and damage-free. Using the correct techniques and tools prevents breakage, tangling, and unnecessary stress on your strands. Safe removal also allows extensions to be reused, maintaining their quality and lifespan for multiple styles.
Understanding the type of extensions you have is essential for successful removal. Clip-in, tape-in, and nano extensions each require specific methods to detach safely. Following the correct procedure guarantees a seamless, comfortable experience, preserving both your hair and the extensions’ integrity for future use.
For premium wholesale hair extensions, Alphahair offers high-quality, tangle-free options suitable for every hair type and style. Our extensions are durable, soft, and easy to install or remove. Shop with Alphahair to get reliable extensions that make styling simple, safe, and beautiful every day.



