

The safe rule: Dry the installed structure first. Let the free lengths air-dry only after the roots and weft line pass a hands-on moisture check.
When you ask, “Can you air dry hand tied extensions?” the accurate answer is yes—but only for the free lengths. Air-drying should not be your only drying method when the wefts are installed.
An installed hand-tied row creates two very different drying zones. The hair from the mid-lengths to the ends hangs freely and receives airflow from several directions. The root area, beads, stitching, natural hair between the rows, and the top edge of the weft sit close together. Water can remain in that compact area long after the ends feel dry.
That is why the safest routine is a hybrid one. You dry the scalp, natural roots, bead row, stitching, and weft line with cool-to-low heat first. Once those areas are fully dry, you can let the mid-lengths and ends finish naturally if your schedule and climate allow it.
This guide stays with that drying decision. For a complete washing routine, use the separate guide on how to wash hand-tied extensions. For brushing, sleeping, products, and move-up appointments, see how to care for hand-tied extensions.
The Quick Rule: Dry the Structure, Then Choose How to Dry the Lengths
You do not need to blow-dry every inch of extension hair after every wash. You do need to remove trapped moisture from the installed structure.
Use this rule:
- Installed hand-tied extensions: Blow-dry the scalp, natural roots, bead row, stitching, and top of the weft until fully dry. Air-dry the mid-lengths and ends only after that.
- Loose or removed hand-tied wefts: Air-dry them flat or properly supported in a ventilated area. Because no scalp, bead row, or natural-hair section is enclosed, the drying risk is different.
- Before bed, exercise, a hat, or a tight style: Dry the full installed root zone first. Do not trap dampness under pressure.
- In high humidity: Use controlled airflow for a larger portion of the hair because natural evaporation is slower.
The key is not “air-dry versus blow-dry” as a whole-head choice. The key is where moisture is sitting.
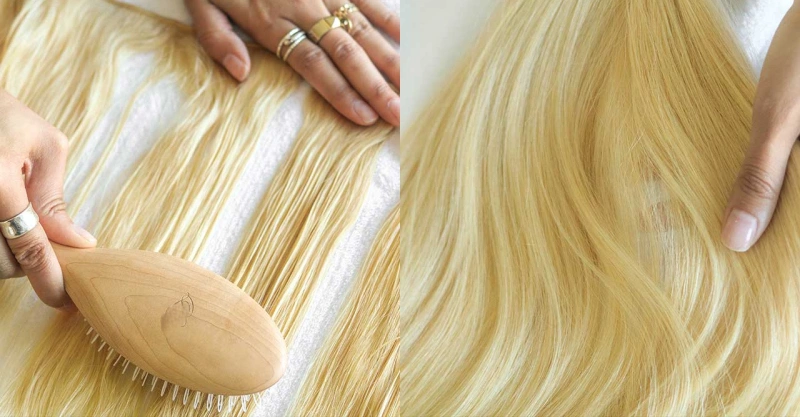
Why Installed Hand-Tied Rows Dry Differently?
A hand-tied weft is thin and flexible, but an installed row is still a layered structure. Depending on the method, you may have natural hair, silicone-lined beads, thread, one or more stacked wefts, and a narrow space between the row and the scalp. You can see how the row is constructed in the guide to hand-tied extension placement.
When water enters those layers, the exposed lengths can dry while the inner row remains damp. This creates three practical problems.
1. The outside can feel dry before the row is dry
Your ends may stop dripping within an hour, especially in a warm room. That does not tell you what is happening underneath the weft. You need to lift each row and check the natural hair above and below it, the top seam, the thread path, and the bead area.
2. Prolonged dampness increases friction and matting risk
Wet natural hair is more vulnerable to stretching and tangling. When damp roots are pressed against a weft or pillow, the movement can compact short regrowth and shed hairs around the row. The problem is not that air itself damages the hair. The problem is leaving a dense attachment area damp for too long while it is being moved, compressed, or slept on.
3. Repeated saturation can affect the weft structure
A quality hand-tied weft is designed to be lightweight and flexible. However, repeatedly leaving the top seam wet for long periods can encourage swelling, distortion, odor, or premature wear. You protect the row by shortening the time that the seam and attachment area remain saturated.
Alpha’s hand-tied weft extensions use cuticle-intact Remy human hair, but hair quality does not remove the need to dry the installed base correctly.

Know Your Four Drying Zones
You will get a safer, faster result when you stop treating the installation as one mass of hair. Work through four zones instead.
Zone 1: Scalp and natural roots
This is the first area you dry. Part the hair between rows and direct airflow along the scalp rather than blasting the hair from random angles. Keep the dryer moving. Your goal is dry, comfortable roots—not a hot scalp.
Zone 2: Bead row, stitching, and weft line
Lift each row so air reaches above and below it. Use your free hand to separate the natural hair from the weft. Follow the row from one side of the head to the other. The top edge, ends of the row, and areas behind the ears often hold moisture longer than the center.
Zone 3: Mid-lengths
Once Zones 1 and 2 are dry, you can decide whether to continue blow-drying. Mid-lengths can usually air-dry safely when they hang freely, remain detangled, and are not pressed into clothing or furniture for hours.
Zone 4: Ends
The ends are the easiest area to air-dry. They are exposed, easy to separate, and not part of the attachment structure. If you want to reduce heat exposure, this is where you gain the most benefit with the least risk.
Safe Home Protocol for Installed Hand-Tied Extensions
Use this protocol after washing, swimming, heavy sweating, or any situation that leaves the row wet. It is deliberately narrower than a full care routine: the goal is to move moisture out of the installation efficiently without rough handling.
Step 1: Remove dripping water without compressing the rows
Stand upright and let the hair fall in its natural direction. Use a microfiber towel to squeeze the lengths gently. Around the rows, press the towel against the hair instead of wrapping the whole head in a tight turban.
A tightly wrapped towel can fold the rows, hold damp hair against the scalp, and delay evaporation. You want the hair damp but no longer dripping before you turn on the dryer.
Step 2: Create airflow channels
Separate the installation row by row. Clip the upper hair away so the lowest row is visible. If you have stacked wefts, lift the stack gently rather than trying to force air through all layers at once.
You should be able to touch the natural hair above and below the row. If you cannot reach it, the airflow will not reach it evenly either.
Step 3: Set the dryer for control, not maximum heat
Choose cool or low heat with low-to-medium airflow. A concentrator nozzle helps you aim along the row. Keep the dryer several inches away and keep it moving.
High heat is not necessary for the root protocol. Air movement does most of the work. If you use warm air, apply an extension-safe heat protectant to the exposed hair, but avoid saturating the bead and thread area with product.
Step 4: Dry the natural roots first
Start below the lowest row. Direct airflow downward and use your fingers to open the section. Move across the row slowly, then dry the natural hair above it.
Continue upward, one row at a time. Do not assume the row is dry because the surface hair looks fluffy. Touch the roots with dry fingertips as you work.
Step 5: Trace the full weft line
Lift the weft and follow the top seam from end to end. Pay extra attention to:
- the nape, where airflow is limited;
- the sides behind the ears;
- row endpoints;
- stacked weft areas;
- dense natural-hair sections;
- places where the row sits especially close to the scalp.
The row is ready when it feels room-temperature and dry, not cool and clammy. Damp hair often feels cooler than the surrounding dry hair because moisture is still evaporating.
Step 6: Decide how to finish the lengths
After the root area and weft line pass the touch check, choose one of two finishes:
- Continue with low-heat blow-drying when you need a polished finish, have dense hair, are short on time, or live in a humid climate.
- Air-dry the mid-lengths and ends when they can hang loose in a ventilated room and you have enough time before bed, exercise, or styling.
Keep the rows separated for the first part of air-drying. Do not tie damp lengths into a bun or braid.
Step 7: Perform a final moisture check
Before you sleep, put on a hat, or secure the hair, check every row with your fingertips. Touch above the row, below the row, and at each endpoint. If any area feels cool, heavy, or tacky, use the dryer again.
Your clock is only a guide. Your touch check is the final decision.
Salon Professional Root-Drying Protocol
If you are a stylist, a repeatable drying protocol helps you protect the finish and teach clients what “fully dry” actually feels like. It also prevents mixed messages such as telling a client to “air-dry” without explaining that the attachment area is an exception.
At the shampoo area
Remove excess water while the client is upright. Do not leave the rows folded against the scalp under a towel for an extended period. Blot the lengths and press around each row.
At the chair
Section the installation according to the row map used during fitting. Start at the nape and expose one row at a time. Dry natural hair above and below the row before focusing on the extension lengths.
Airflow sequence
Use the nozzle parallel to the hair direction. Move from scalp to row, then along the top seam. Lift stacked wefts carefully so airflow reaches the inner layers. Avoid directing high heat at beads, thread, or one stationary point.
Verification
Check with clean, dry fingers at the center and both endpoints of each row. Ask the client to feel a properly dried row before leaving. That tactile reference is more useful at home than a fixed number of minutes.
Client handoff
Give the client one clear instruction: you may air-dry the free lengths, but you must dry the roots and weft line first. Link or print your full washing guide separately rather than crowding this instruction with every aftercare rule.
For teams that want to standardize installation and aftercare, Alpha provides professional hand-tied weft extension options for salons, brands, and private-label programs.
Installed Extensions vs. Loose Wefts
The phrase “hand-tied extensions” can refer to hair already installed on a client or to uninstalled wefts being washed, colored, sampled, or prepared in a salon. You should not dry these two situations the same way.
Installed hand-tied extensions
Your priority is the enclosed structure. Dry the scalp, natural roots, bead row, stitching, and top seam with controlled airflow. The mid-lengths and ends may finish in open air only after the structure is dry.
Loose, removed, or uninstalled hand-tied wefts
A loose weft has no scalp or bead row trapping moisture. You can air-dry it completely, provided you support it correctly:
- Blot the hair gently without rubbing or twisting.
- Align the strands and support the top seam so the wet weight does not pull unevenly.
- Lay the weft flat on a clean, dry, absorbent surface or hang it from a purpose-made extension hanger without folding the seam.
- Keep individual wefts separated rather than stacking them while wet.
- Turn or reposition the weft when the underside remains damp.
- Store it only after the seam and hair are fully dry.
Do not place loose wefts on a radiator, in direct high heat, or in strong sunlight. Fast, uneven heating can leave the hair dry at the ends while the seam remains damp.
How Humidity Changes Your Drying Plan?
Humidity does not change the basic rule, but it changes how much you can rely on open-air evaporation.
Low-humidity environment
In a dry, ventilated room, exposed mid-lengths and ends lose moisture relatively quickly. After you dry the installed root zone, you can usually let the rest finish naturally. Check the ends periodically so they do not become rough from repeated handling while damp.
For loose wefts, low humidity supports even air-drying, but keep the hair away from direct heating vents. Extremely dry, hot airflow can make the lengths feel dehydrated before the seam is ready.
High-humidity environment
In humid weather, the moisture gradient between wet hair and surrounding air is smaller, so evaporation takes longer. Dense rows, stacked wefts, long hair, and low room ventilation slow it further.
Use the dryer on the entire root zone and consider taking the mid-lengths to mostly dry as well. Run a fan or dehumidifier in the room if available. Do not rely on a few hours of air-drying when you have an evening deadline; the hair may still feel damp at the inner layers.
After swimming, rinse and dry promptly. The separate guide to swimming with hand-tied extensions covers water exposure in more detail.
Estimated Drying Times
Drying time depends on row count, hair density, length, texture, room humidity, towel blotting, dryer power, and how closely the rows sit to the scalp. Use these ranges for planning, not as proof that the hair is dry.
| Situation | Root and weft-line drying | Lengths and ends | Practical total |
| Installed, 1-2 light rows, low humidity | About 5-10 minutes with controlled airflow | About 1-2 hours to air-dry, or 10-15 minutes with a dryer | About 15-25 minutes with a dryer; longer with air-dried lengths |
| Installed, 2-3 dense or stacked rows | About 10-20 minutes | About 2-4 hours to air-dry, or 15-25 minutes with a dryer | About 25-45 minutes with a dryer |
| Installed, high humidity or weak ventilation | About 15-25 minutes | About 3-6+ hours to air-dry; often faster and safer to blow-dry most lengths | About 35-60 minutes with controlled drying |
| Loose single wefts, separated and laid flat | Not applicable | About 2-4 hours in low humidity | Until the seam and underside are fully dry |
| Loose wefts in humid conditions | Not applicable | About 4-8+ hours | Reposition and verify before storage |
If your installation remains damp far beyond these ranges, check whether the rows are stacked too tightly for your drying method, whether product buildup is slowing evaporation, or whether airflow is failing to reach the inner row. A stylist can inspect the installation if you repeatedly struggle to dry it.
Air-Drying or Low-Heat Blow-Drying: Decision Table
| Your situation | Roots and weft line | Mid-lengths | Ends | Best choice |
| Installed extensions after a normal wash | Blow-dry fully | Air-dry or blow-dry | Air-dry or blow-dry | Hybrid method |
| Installed extensions before bed | Blow-dry fully | Blow-dry until fully dry | Blow-dry until fully dry | Full controlled dry |
| Installed extensions in high humidity | Blow-dry fully | Blow-dry most or all | Air-dry only if time allows | Mostly blow-dry |
| Installed extensions after swimming or heavy sweating | Blow-dry fully after appropriate rinsing | Blow-dry most of the hair | Finish as needed | Controlled dry |
| Installed extensions with dense stacked rows | Blow-dry row by row | Blow-dry to mostly dry | Air-dry if separated | Row-by-row hybrid |
| Loose wefts being prepared or stored | Not applicable | Air-dry supported | Air-dry supported | Full air-dry is acceptable |
| Loose wefts needed quickly for salon use | Not applicable | Low/cool airflow | Low/cool airflow | Controlled low-heat dry |
When You Must Blow-Dry the Roots?
You should treat root drying as non-negotiable when:
- the extensions are installed;
- the bead row, thread, or top seam became wet;
- you have more than one weft stacked on a row;
- your natural hair is dense around the installation;
- the weather is humid;
- you plan to sleep, wear a hat, work out, or tie the hair up;
- the row feels cool or clammy after the lengths look dry;
- you recently swam or sweated heavily;
- you have previously experienced matting or persistent odor near a row.
You do not need high heat. You need access, separation, airflow, and enough time to verify the result.
When You Can Let the Ends Air-Dry
You can usually let the mid-lengths and ends air-dry when:
- the scalp, roots, bead row, stitching, and weft line are already fully dry;
- the hair can hang freely and remain separated;
- the room has good ventilation;
- you have several hours before bed or styling;
- the lengths are not pressed under clothing or tied into a damp style;
- the weather is not so humid that the inner sections remain wet for most of the day.
Air-drying the ends is a heat-management choice. It is not a substitute for drying the installed base.
Signs Your Root-Drying Method Needs Adjustment
Book a stylist check rather than simply increasing the heat if you notice:
- a persistent damp or musty smell around one row;
- recurring matting immediately above or below the weft;
- a seam that looks swollen, wavy, or distorted;
- thread that stays wet much longer than the surrounding hair;
- scalp tenderness caused by repeatedly pulling rows apart to dry them;
- unusual shedding, looseness, or movement at the row;
- an area you cannot expose safely with normal sectioning.
These signs may reflect installation density, row placement, product buildup, or a maintenance issue—not just a slow dryer. Your stylist can compare the drying problem with the original installation and decide whether the row needs cleaning, repositioning, or professional maintenance.
FAQ
Can you air dry hand tied extensions overnight?
You should not use overnight air-drying for installed hand-tied extensions. Pillow pressure holds damp natural hair and the weft line together, while movement increases tangling around the row. Dry the roots, row, and all lengths fully before sleep. Loose, uninstalled wefts may air-dry overnight on a clean, ventilated surface if they are separated and supported.
Can you air-dry only the ends of hand-tied extensions?
Yes. This is often the safest way to reduce heat exposure. Blow-dry the scalp, natural roots, bead row, thread, and top of each weft first. Then allow the free ends to dry naturally.
How do you know whether the weft line is fully dry?
Lift the row and check above it, below it, along the top seam, and at both endpoints with dry fingertips. A fully dry area feels similar to the surrounding room-temperature hair. A cool, heavy, or clammy feeling usually means moisture remains.
Is cool air enough to dry hand-tied extension roots?
Cool air can work if the dryer provides enough airflow and you section each row carefully. It may take longer than low or medium-warm air. The result matters more than the setting: the roots and weft line must be completely dry without overheating the scalp or attachment area.
Can you air-dry hand-tied wefts before installation?
Yes. Loose wefts can be air-dried because there is no enclosed attachment zone. Lay them flat or support them on an extension hanger, keep them separated, and verify that the top seam and underside are dry before installation or storage.
Should a salon use the same drying time for every client?
No. Row count, stack thickness, natural-hair density, length, texture, and humidity all change the time required. A salon should standardize the sequence and the touch-check, not promise one fixed number of minutes.
Final Answer
So, can you air dry hand tied extensions? You can air-dry the free mid-lengths and ends, and you can fully air-dry loose wefts. When the extensions are installed, however, you should first use controlled airflow to dry the scalp, natural roots, bead row, stitching, and entire weft line.
Think of the process as two jobs: protect the installed structure, then choose the finish you want for the lengths. Drying the roots first gives you the flexibility to reduce heat on the ends without leaving hidden moisture around the row.
When you teach or follow that simple protocol—dry the structure, then air-dry the lengths if conditions allow—you get a routine that is safer, easier to repeat, and more precise than a blanket “yes” or “no” answer.
Editorial note: Drying-time ranges are planning estimates. The article correctly makes the row-by-row touch check—not the clock—the final standard.



