

Thinking about U Tip hair extensions on short hair? You can get amazing results if you choose the right approach. Short-haired clients often see the best transformation when they match the extension’s color and texture to their own hair. Volume and length matter, too.
Lighter, chin-length extensions blend better and look more natural. Placement and blending make all the difference. You should always talk to a professional, like the experts at Alpha, to set realistic goals and make sure your new style fits your lifestyle.
Key Takeaways
U-Tip extensions can transform short hair by adding length and volume. Choose extensions that match your hair’s color and texture for a natural look.
Consult a professional stylist for the best results. They can assess your hair type, recommend suitable extensions, and ensure proper placement.
You only need a minimum of two inches of natural hair for U-Tip extensions. This means even short styles like pixie cuts can benefit from extensions.
Proper maintenance is key to keeping U-Tip extensions looking fresh. Brush regularly, use sulfate-free products, and schedule professional checkups every 6-8 weeks.
Consider the number of strands needed based on your hair type. Short hair may require more strands for a seamless blend, so consult your stylist for guidance.
What Are U Tip Hair Extensions?
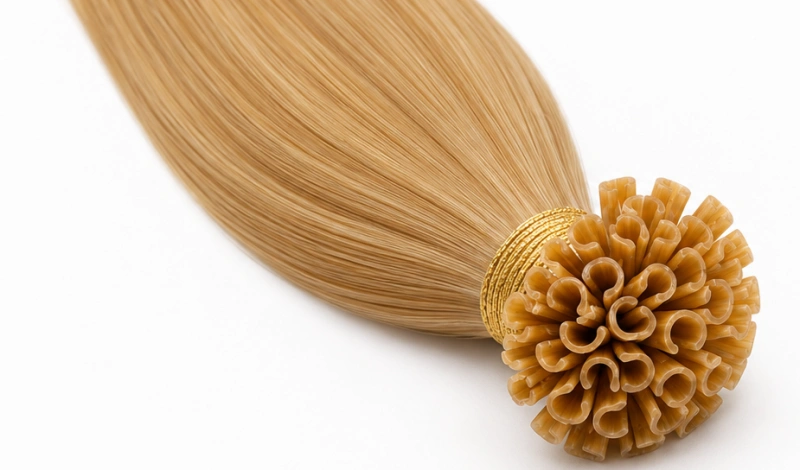
U-Tip Features and Benefits
If you want hair extensions that look and feel natural, U Tip extensions might be your best choice. Alpha’s U Tip Hair Extensions use 100% Remy human hair. This means every strand stays soft, smooth, and full of life. You get a natural shine and movement that blends right in with your own hair.
The secret is in the U-shaped keratin tip. Keratin is a protein that your hair already has. The U-tip holds each extension strand together and helps it bond securely to your hair. This creates a strong, long-lasting hold. You can style, curl, or straighten your extensions just like your own hair.
You can even color them if you want a new look.
Let’s see how U Tip extensions compare to other types:
Feature | U-Tip Extensions | Other Extensions (e.g., Flat Tip) |
|---|---|---|
Bond Type | U-shaped keratin bond | Smaller, flatter bonds |
Application Method | Heat fusion | Varies (e.g., glue, tape) |
Thickness | Thicker and more durable | Thinner, suitable for fine to medium hair |
Best For | Medium to thick hair | Fine to medium hair |
Longevity | Lasts 6-8 months with proper care | Similar, but U-Tip may last longer |
Removal Process | Requires a special tool, may take longer | Generally quicker |
You get durability and a secure fit with U Tip extensions. They work well for medium to thick hair and last for months with the right care.
How Do U-Tip Extensions Work on Short Hair?
You might wonder if U Tip extensions will stay put in short hair. The answer is yes! Here’s how the process works:
A stylist melts the keratin bond with a heat fusion tool.
The melted bond wraps around a small section of your natural hair.
This creates a strong, secure hold that can last for several months.
The bond spreads the weight evenly, so your hair moves naturally and stays healthy.
You get a seamless blend, even if your hair is short. The bonds stay hidden, and your new hair feels comfortable and light. With Alpha’s expertise, you can trust your extensions to look and feel amazing every day.
Are U Tip Hair Extensions Suitable for Short Hair?
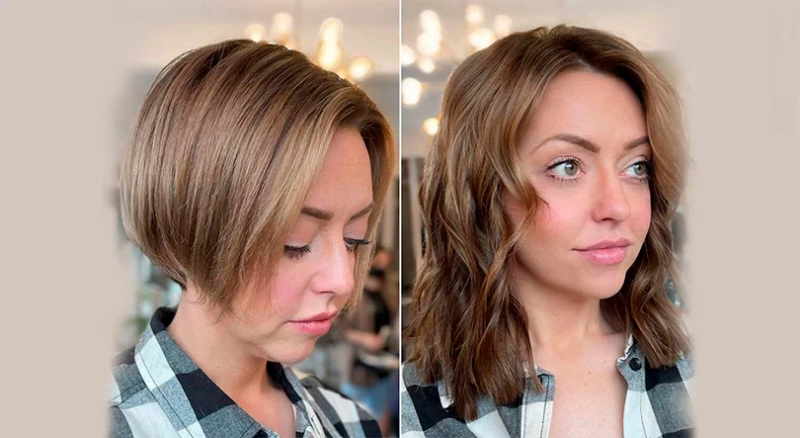
Minimum Hair Length for U-Tip Extensions
You might wonder if your hair is long enough for U-tip hair extensions on short hair. The good news is you only need a minimum of two inches of natural hair for a successful installation. This means even if you have a pixie cut or a bob, you can still enjoy the benefits of added length and volume.
Stylists use small sections of your hair to attach the keratin bonds, so the extensions stay secure and hidden.
Here’s a quick checklist to help you decide if your hair meets the minimum length:
Your hair measures at least two inches from the roots.
You have enough hair to cover the bonds and blend the extensions.
You want to add length or volume without waiting for your hair to grow.
If you check these boxes, you’re ready to explore u tip hair extensions on short hair. You can transform your look and boost your confidence with just a little extra length.
Best Hair Types and Results
Not every hair type responds the same way to extensions. U-tip hair extensions on short hair work best for people with healthy strands. Keratin bonds are lightweight, so they won’t pull or stress fragile hair. You get a comfortable fit that feels natural and looks seamless.
You can customize your extensions to match your hair’s texture and color. This makes blending easier and gives you a more realistic finish. If you have fine hair, the lightweight bonds help prevent damage. If your hair is thick, you can add more strands for extra fullness and length.
Here’s a table showing which hair types get the best results:
Hair Type | Suitability | Customization | Comfort |
|---|---|---|---|
Fine | Excellent | High | High |
Medium | Excellent | High | High |
Thick | Great | High | High |
You can achieve a natural look with U-tip hair extensions on short hair. The extensions blend well, and you can style them just like your own hair. You get more styling options, whether you want to curl, straighten, or add color.
Alpha’s Consultation Checklist
Choosing U-tip hair extensions for short hair is a big decision. You want to make sure you get the best results. Alpha offers a personalized consultation to help you find the right fit. You’ll talk with an expert who understands your hair goals and helps you set realistic expectations.
Here’s what Alpha’s consultation includes:
Hair Length Assessment
The stylist checks if your hair meets the minimum length for installation.Hair Type Evaluation
You discuss your hair’s texture, thickness, and health. The stylist recommends the best extension options.Color and Texture Matching
You choose extensions that match your natural hair color and texture for seamless blending.Placement Planning
The stylist maps out where to place the extensions for a natural look.Lifestyle and Maintenance Review
You talk about your daily routine and how much time you want to spend on hair care. The stylist gives tips for easy maintenance.
Tip: Bring photos of your hair and your dream style to your consultation. This helps the stylist understand your vision and recommend the best U-tip hair extensions for short hair.
You get expert advice and support every step of the way. Alpha’s team makes sure your extensions look natural and feel comfortable. You can enjoy new length and volume without worrying about damage or discomfort.
How to Install U-Tip Hair Extensions on Short Hair
Thinking about how to install U-tip hair extensions on short hair? You want your new look to feel secure, natural, and comfortable. The right technique makes all the difference, especially when your hair is short. Let’s break down the process so you know what to expect and how to get the best results.
Step-by-Step Installation Guide
You can achieve a flawless finish by following these installation steps for secure attachment. Here’s how stylists usually install U-tip hair extensions on short hair:
Wash your hair with a clarifying shampoo. This removes oils and buildup, helping the extensions bond better.
Dry your hair completely. Extensions won’t stick to damp hair.
Section your hair into top, bottom, left, and right parts. Start at the bottom and work your way up.
Take a small section of your natural hair. Place the u-tip extension about half an inch from your scalp.
Use a heat fusion tool to melt the keratin tip. Roll the bond around your hair and let it cool. This creates a strong, secure hold.
Repeat the process, working in neat rows. Make sure each bond sits flat and feels comfortable.
Once all the extensions are in, gently brush and style your hair as you like.
Tip: Always check that the bonds are hidden under your natural hair. This keeps your look seamless and natural.
Placement and Sectioning Tips
Getting the placement right is key when you install U-tip hair extensions on short hair. You want the bonds to stay invisible and the blend to look perfect. Here are some tips to help you out:
Make sure your hair is thick and long enough to cover the bonds. If your hair is very short, ask your stylist about using thicker tip attachments for better blending.
Choose lightweight extensions that match your hair’s length. Chin-length extensions often look the most natural on short hair.
Layering is your best friend. Trim and layer both your natural hair and the extensions for a seamless blend.
Ask a professional stylist to cut the extensions to match your hair. This avoids cutting your real hair by mistake.
If your natural hair is much shorter than the extensions, have the extensions trimmed for a softer transition.
Note: Layering and careful placement help your extensions move naturally and stay hidden, even if you wear your hair up or style it differently.
Professional vs. DIY Application
You might wonder if you should install U-tip hair extensions at home or visit a salon. Let’s compare the two options so you can make the best choice for your hair.
Aspect | DIY Application | |
|---|---|---|
Safety | Ensures proper bead size and tension, reducing the risk of damage | Higher risk of improper application leading to damage |
Appearance | Natural look due to skilled placement | May appear less natural if not done correctly |
Cost | Higher initial cost for professional services | Cost-saving option, but potential for damage |
Maintenance | Regular salon visits recommended for upkeep | Skipping maintenance can lead to matting |
Risk of Damage | Low when installed correctly | High if beads are clamped too tightly or wrong sizes are used |
When you choose a professional application, you get more than just a great look. A skilled stylist knows how to distribute the weight evenly, use protective keratin bonds, and blend the extensions perfectly with your natural hair. This reduces the risk of damage and helps your extensions last longer.
You also get a natural movement and texture that matches your own hair.
DIY application might save you money at first, but it comes with risks. If you use the wrong technique or tools, you could damage your hair or end up with visible bonds. Regular maintenance is also harder to manage at home.
Tip: For the best results, trust the installation of U-tip hair extensions to a professional. You’ll enjoy a seamless blend, less risk of damage, and a style that lasts.
If you want your extensions to look and feel amazing, professional application is the way to go. You’ll love the confidence that comes with a flawless finish.
Blending and Cutting U-Tip Extensions for Short Hair
Blending Techniques for a Seamless Look
You want your extensions to look like your real hair. Stylists often use waves or curls to help hide U-Tip bonds. Adding texture makes the blend less noticeable. If your hair is straight, you can ask your stylist to add soft waves. This trick helps the extensions mix with your natural hair.
You also need a pro to help with blending. Skilled stylists know how to place each strand so the bonds stay hidden. They use layering and careful sectioning to make sure your new hair moves naturally.
Tip: If you have short hair, blending works best when you style your hair with a bit of volume. Try using a curling iron or a texturizing spray for a softer finish.
Cutting and Shaping Extensions
Cutting is a big part of making U-Tip extensions look real. You should never cut your own extensions at home. A stylist will trim the extensions to match your shortest natural strands. This step is important, especially if your natural hair is much shorter than the extensions.
The stylist shapes the extensions without cutting your real hair. They use special scissors and techniques to create layers. Layering helps the extensions blend and gives your hair a natural flow.
Here’s a quick list of what your stylist does:
Identifies the shortest pieces of your natural hair.
Trims the extensions to match those areas.
Adds layers for movement and softness.
Avoids cutting your real hair.
Choosing the Right Color and Thickness
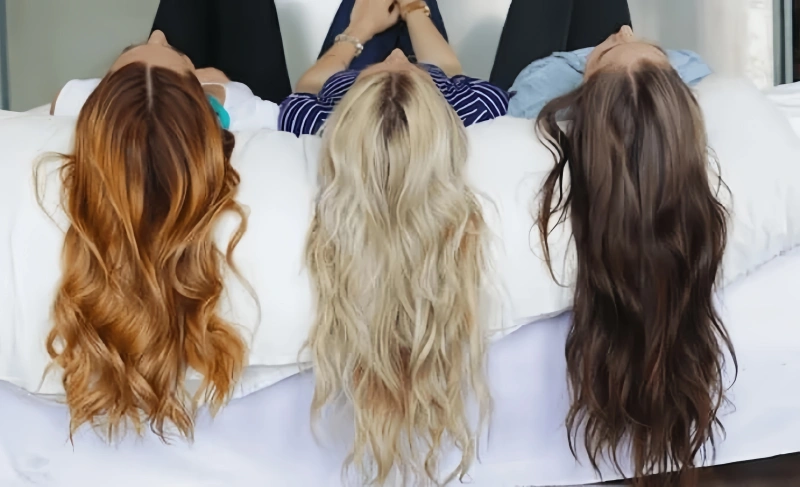
Picking the right color and thickness makes a huge difference. You want your extensions to match your natural hair as closely as possible. Even a small color mismatch can make the bonds stand out. If your hair is thick and short, you need thicker tips for a seamless blend.
Matching the texture is just as important. If your hair is wavy, choose wavy extensions. If your hair is straight, stick with straight extensions.
Hair Type | Recommended Tip Thickness | Color Match Importance | Texture Match |
|---|---|---|---|
Fine | Standard | Very High | High |
Medium | Standard/Thicker | Very High | High |
Thick | Thicker | Critical | Critical |
Note: Always ask your stylist to help you pick the right shade and thickness. This ensures your extensions look natural and feel comfortable.
How many U-tip extensions for a Full Head?
Determining Strands for Different Hair Types
Wondering how many U-tip extensions you’ll need for a full head? The answer depends on your hair type and your goals. If you have short hair, you’ll usually need more strands to get a seamless blend. The shorter your hair, the more coverage you need to hide the bonds and create a natural look.
Here’s a quick guide to help you figure out the right amount:
Hair Type | Number of U-Tip Extensions Needed |
|---|---|
Thin Short Hair | 150–175 |
Medium Thickness | 200–225 |
Thick Hair | 250 or more |
If your hair is fine and short, you can start with 150 to 175 strands. For medium hair, you’ll want 200 to 225 strands. If your hair is thick or you have a blunt bob, you might need 250 or more to get that flawless finish. More strands mean better blending and fuller results.
Tip: Always talk to your stylist before you buy. They can help you decide the exact number based on your hair’s density and your dream style.
Alpha’s Recommendations for Short Hair
Alpha makes it easy to choose the right amount. Each pack of U-tip extensions usually contains 20 to 25 strands. The standard strand weight ranges from 0.8 to 1 gram, so you get a lightweight feel that won’t weigh down your natural hair.
Here’s how you can plan your purchase:
For thin short hair: 7–9 packs (150–175 strands)
For medium hair: 10–12 packs (200–225 strands)
For thick hair: 13+ packs (250+ strands)
Buying the right number of packs saves you money and ensures you don’t run out mid-installation. Alpha’s U-tip extensions offer cost efficiency because you only buy what you need. You get a natural, full look without overspending.
Note: Choosing the right number of strands is key for a seamless blend, especially on short hair. Alpha’s experts can help you customize your order for the best results.
Maintenance and Care for U-Tip Extensions
Taking care of your U-Tip extensions is the secret to keeping them looking fresh and natural. With proper maintenance, you can enjoy beautiful hair for months. Let’s break down the best ways to wash, style, and protect your extensions, especially if you have short hair.
Washing and Styling Tips
You want your extensions to stay soft and shiny. Here are some easy tips for washing and styling:
Brush your hair at least twice a day with a brush made for extensions. Start at the ends and work your way up to avoid tangles.
Use a sulfate-free shampoo and conditioner. Focus on your scalp and gently wash the extensions so you don’t loosen the bonds.
Limit washing to twice a week. Over-washing can dry out your extensions.
Always condition from the mid-shaft to the ends, not the roots.
Add a hair mask once or twice a month instead of conditioner for extra hydration.
Use oil on the extensions from the middle to the ends to keep them smooth.
Limit heat styling. If you use hot tools, always spray on a heat protectant.
Tip: Visit your professional stylist every 6-8 weeks for maintenance. They will check the bonds and keep your hair looking its best.
Longevity and Replacement
With proper maintenance, your U-Tip extensions can last three to six months. You should brush gently and avoid harsh products. Double shampooing helps keep your scalp healthy and your extensions clean. Rinse well to remove all product. If you notice any slipping or tangling, book a professional appointment for a checkup.
When your extensions start to look worn or the bonds feel loose, it’s time for a replacement. Your stylist can help you plan for a fresh set.
Preventing Damage to Short Hair
Short hair needs extra care when you wear extensions. Here’s how you can protect your natural hair:
Use a wide-tooth comb made for extensions. This helps keep the bonds secure.
Wash your hair every three to four days. Dry shampoo is a great option between washes.
Avoid using high heat near the bonds. This keeps them from melting or slipping.
Before bed, tie your hair in a loose ponytail or braid. This stops matting and tangling.
Note: Always ask your professional stylist for advice on proper maintenance and care. They know how to keep your extensions and your short hair healthy.
Common Challenges and Solutions with U-Tip on Short Hair
Visibility and Blending Issues
You might notice that blending U-Tip extensions with short hair takes some skill. Short hair gives you less coverage, so hiding the attachment points can be tricky. Sometimes, the bonds peek through, especially if your hair moves or you style it up. You want your extensions to look natural, not obvious.
Here are the most common challenges you may face:
Blending short natural hair with longer extensions
Hiding attachment points due to less coverage
Managing weight distribution so your hair doesn’t feel heavy
You can solve these problems by working with a professional stylist. They know how to layer and cut both your hair and the extensions. They place the bonds in areas where your hair is thickest. You get a seamless look that feels real.
Tip: Ask your stylist to use waves or curls. Texture helps hide the bonds and makes blending easier.
Comfort and Adjustment
Comfort matters when you wear U-Tip extensions. If the bonds sit too close to your scalp, you might feel tightness or discomfort. Short hair sometimes struggles to support the weight of extensions. You want your new hair to feel light and easy.
You can adjust the placement for better comfort. A stylist spaces the bonds evenly and uses lightweight strands. You get a soft, natural feel. If you notice any pulling or soreness, let your stylist know right away.
Challenge | Solution |
|---|---|
Tight bonds | Adjust placement |
Heavy feeling | Use lighter extensions |
Soreness | Consult your stylist |
Solutions for Everyday Wear
You want your extensions to fit your daily routine. Here’s how you can keep them comfortable and hidden:
Style your hair with volume or waves to cover the bonds.
Use a gentle brush made for extensions.
Tie your hair in a loose braid or ponytail before bed.
Avoid high heat near the bonds.
Note: Regular checkups with your stylist help keep your extensions looking fresh and feeling comfortable. You get advice tailored to your hair and lifestyle.
You can enjoy U-Tip extensions on short hair with the right care and expert help. Your new look stays natural, comfortable, and easy to manage every day.
Pros and Cons of U-Tip Hair Extensions on Short Hair
Benefits for Short Hair Users
You want your short hair to look fuller and longer. U-Tip hair extensions can help you achieve that. These extensions blend well with your natural hair, giving you a seamless finish. You can style, curl, or straighten them just like your own hair. The keratin bonds feel lightweight, so you don’t have to worry about discomfort.
Here are some benefits you’ll notice:
You get instant length and volume.
The extensions look natural and move like real hair.
You can choose from many colors and textures to match your style.
The bonds stay hidden, even with short hair.
You enjoy more styling options for everyday looks or special occasions.
A stylist can customize the placement and cut, making sure your extensions fit your hair perfectly. You gain confidence with a new look that feels soft and smooth.
Tip: If you want a dramatic change, U-Tip extensions offer flexibility and durability. You can wear them for months with proper care.
Considerations and Limitations
Before you decide, you should know a few things about U-Tip extensions for short hair. The process takes time and needs a skilled stylist. You may spend three to six hours in the salon. The heat used to bond the extensions can cause damage if not handled carefully.
Maintenance is important. If you skip regular care, the extensions can tangle or mat.
Here’s what you need to consider:
The application process is lengthy and requires expertise.
Heat bonding may pose risks for fragile hair.
Extensions need regular upkeep to prevent tangling.
You must visit your stylist often for maintenance.
The initial cost is higher than that of other extension types.
Limitation | Impact on Short Hair Users |
|---|---|
Lengthy application | More time in the salon |
Heat risks | Possible damage to natural hair |
Maintenance needs | Frequent salon visits |
Higher cost | Bigger upfront investment |
Note: You should weigh these factors before choosing U-Tip extensions. Talk to your stylist about your hair’s health and your lifestyle. This helps you make the best decision for your short hair.
Conclusion
You can transform your short hair with U Tip extensions when you choose the right approach. Alpha gives you premium, ethically sourced hair that blends naturally and feels comfortable. You get expert support from start to finish. Want a flawless look? Talk to Alpha or a trusted stylist for personalized advice.
Choosing high-quality extensions makes all the difference. You deserve hair that looks amazing and stays healthy.
FAQ
Can you install U-tip extensions on very short cuts?
Yes, you can use U-tip extensions even if you have short cuts. You need at least two inches of hair for secure application. A stylist will help you achieve a natural-looking length and blend the extensions for your desired look.
What should you do for pre-installation preparation?
You should wash your hair with a clarifying shampoo before application. This removes oils and buildup. Clean hair helps the U-tip bonds stick better. Bring photos of your styles and talk to your stylist about your daily care routines and styling goals.
How do you handle immediate care after getting U-tip extensions?
After application, avoid washing your hair for 48 hours. This gives the bonds time to set. Brush gently and follow wearing precautions for U-tip hair extensions. Ask your stylist for styling and longevity tips to keep your extensions looking great.
What are the best daily care routines for U-tip extensions?
Brush your extensions twice a day with a special brush. Use sulfate-free products. Limit heat styling. Tie your hair in a loose braid before bed. Regular post-installation maintenance keeps your extensions healthy and helps you enjoy different styles.
Can you style U-tip extensions like your own hair?
You can style U-tip extensions just like your natural hair. Curl, straighten, or color them. Try micro braids or waves for new styles. Always use heat protectant. If you want a big change, ask for professional help to get the best results.



