

Learning how to install hand tied extensions starts with one principle: plan the row for the client, not for a diagram. In a common professional beaded-row installation, you assess the natural hair and scalp, map each row, build a silicone-lined bead foundation, position the hand-tied wefts, sew them securely, check the end anchors and tension, then blend the finished result.
The exact bead pattern, concealment design, and stitch path vary by education system. This guide explains the core installation logic shared by many hand tied sew in hair extension methods without presenting a proprietary certification technique.
Professional note: Hand-tied weft installation is a skilled salon service. Use your method-specific education, the weft manufacturer’s instructions, sanitation standards, and local licensing requirements as the final authority.
How Hand-Tied Wefts Are Installed: 7 Steps
A professional hand-tied hair extension installation follows seven connected stages. The foundation must be clean and balanced before the first stitch is made.
| Step | Stage | Professional checkpoint |
| 1 | Prepare and section | Detangle the hair, create clean partings, and keep baby hairs and cross hairs outside the working row. |
| 2 | Build the bead foundation | Use consistent natural-hair sections and silicone-lined beads to create a stable, evenly loaded base. |
| 3 | Check shape and anchors | Review row position, bead orientation, concealment, and both end anchors before adding the weft. |
| 4 | Position the wefts | Align each hand-tied seam flat against the foundation; fold or combine pieces as product instructions allow. |
| 5 | Sew the row | Secure the weft with the stitch pattern from your training while maintaining even, controlled tension. |
| 6 | Test tension | Check every completed row for pinching, cross hairs, puckering, unstable anchors, or concentrated load. |
| 7 | Blend and finish | Release the natural hair, refine the haircut, confirm coverage and movement, and give written aftercare. |
What Does a Professional Hand-Tied Installation Involve?
First, separate the product from the method. Hand-tied wefts describe how strands are constructed into a thin, flexible weft. Installation describes how that weft is attached. One widely used professional approach creates a beaded foundation and sews the weft onto it.
If you want the mechanism before the full process, read how hand-tied extensions work. For a comparison of other weft methods, use the general weft installation guide. This page stays focused on the complete hand-tied bead-and-sew sequence.
There is no universal row map for every client. Head shape, density, hair condition, preferred part, daily styling, and the desired change in length or volume all affect the plan. Your training system defines the technical pattern; the consultation tells you how that pattern should be applied to this client.
Client Consultation: Is the Method Suitable?
The consultation decides whether to install, how much extension hair the client can reasonably support, and what result is realistic. Do not treat it as a formality.
- Assess density through the interior and perimeter. The support available in the planned attachment zone matters more than overall ponytail size.
- Check the scalp and natural hair for irritation, unusual shedding, fragile areas, breakage, or previous extension stress. Postpone or change the plan if the attachment area is compromised.
- Define the goal. A volume service and a major length transformation require different weights, colors, and row plans.
- Review lifestyle and maintenance habits, including swimming, workouts, heat styling, preferred hairstyles, and the client’s ability to return for professional maintenance.
- Match color, texture, density, and end profile. A technically clean row still looks obvious when the extension hair does not match.
- Ask about previous extensions: discomfort, slippage, matting, breakage, difficult removals, and styles that exposed the track.
Fine hair is not automatically suitable or unsuitable. Use the guide to hand-tied extensions for thin hair as supporting information, then make a conservative, individualized decision based on the actual attachment area.
Tools You Need for Hand-Tied Weft Installation
Set up the full workstation before you begin. Clean sectioning and controlled handling become harder when you stop mid-service to find a tool or substitute an unsuitable one.
| Tool | Purpose |
| Hand-tied wefts | Verify color, texture, quantity, density, and seam condition before the service. |
| Silicone-lined beads | Create the beaded foundation and add grip around the natural-hair section. |
| Bead threader or loop tool | Pulls a controlled section of natural hair through each bead. |
| Extension pliers | Clamps and later reopens the beads; match the plier profile to the bead. |
| C-curve needle | Supports controlled hand positioning while the weft is sewn to the row. |
| Extension thread | Secures the weft; choose a material and thickness approved for your method. |
| Tail comb and sectioning clips | Create clean partings and keep loose hairs out of beads and stitches. |
| Extension-safe brush or comb | Detangles during preparation, blending, and finishing. |
| Cutting tools | Blend the finished haircut. Do not use them to cut a traditional hand-tied seam unless that product is documented as cuttable. |
Thread thickness, surface, strength, and handling affect the stitch. See Alpha’s guide to the best thread for hand-tied extensions for the dedicated product-selection discussion.
Plan the Placement Before the First Bead
Row placement should keep the attachment concealed during normal movement while leaving fragile perimeter hair outside the load-bearing area. Before you install:
- Leave enough natural hair around the perimeter and common part lines to cover the track when the hair moves or is worn up.
- Keep delicate temple hairs, baby hairs, and visibly compromised areas outside the foundation.
- Follow the head shape rather than forcing a perfectly straight line when a curved row provides better support and coverage.
- Choose the number of rows from natural density and the goal. More rows are not automatically better because every row adds weight and maintenance.
- Decide where the weft will begin and end before placing the anchors. Each end needs both coverage and reliable support.
For row height, perimeter clearance, crown coverage, and concealment details, use the dedicated hand-tied extension placement guide. Use that map to finalize the row plan, then return to the installation sequence below.
How to Install Hand-Tied Weft Extensions Step by Step
The sequence below explains the core logic of a professional beaded-row hand-tied weft installation. Follow your education system wherever its bead direction, anchor design, stitch pattern, row shape, or concealment rules are more specific.
Step 1: Prepare and Section the Hair
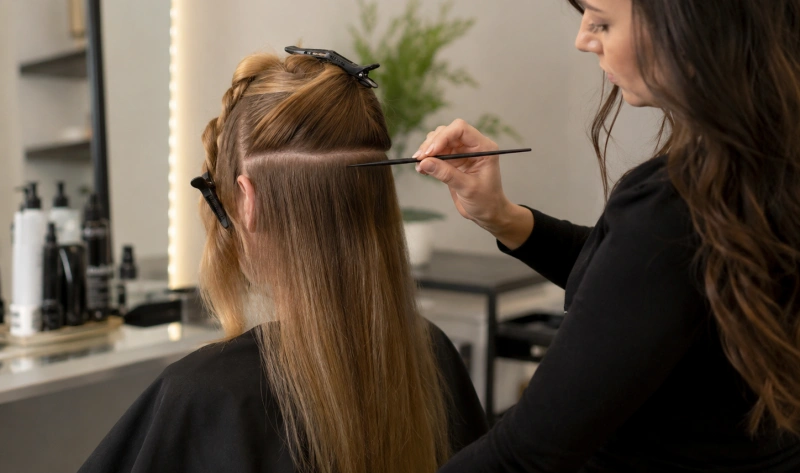
Begin with fully detangled, dry hair and a clean working surface. Follow your method and product instructions for cleansing and pre-service products. Avoid leaving heavy oil or residue around the bead area because it can reduce control.
Create the planned row with a tail comb, then clip away the hair above and below. Check the parting from both sides. Remove short perimeter hairs and any loose strands that do not originate in the intended section.
Tip: Clean sectioning is functional, not cosmetic. It helps prevent cross hairs, pinching, uneven tension, and difficult grow-out.
Step 2: Build the Beaded Foundation
Take consistent sections of natural hair, pull each section through a silicone-lined bead, and place the bead according to your trained spacing and direction. Clamp with controlled pressure using the recommended pliers.
Work across the row while keeping the amount of support hair balanced. A bead should be stable without creating an aggressive scalp pull. Re-section immediately if you see cross hairs, an overloaded bead, or a weak area being forced into the row.
Step 3: Check the Row Shape and End Anchors
Before you add the weft, inspect the foundation as one system. Check its shape, distance from visible perimeter areas, bead orientation, and the stability of both ends.
End anchors need enough support to keep the row stable, but moving them into fragile hair simply to extend the track can create a pressure point. Plan for real wear: head movement, part changes, ponytails, tucking behind the ear, and weeks of grow-out.
Step 4: Position the Hand-Tied Wefts
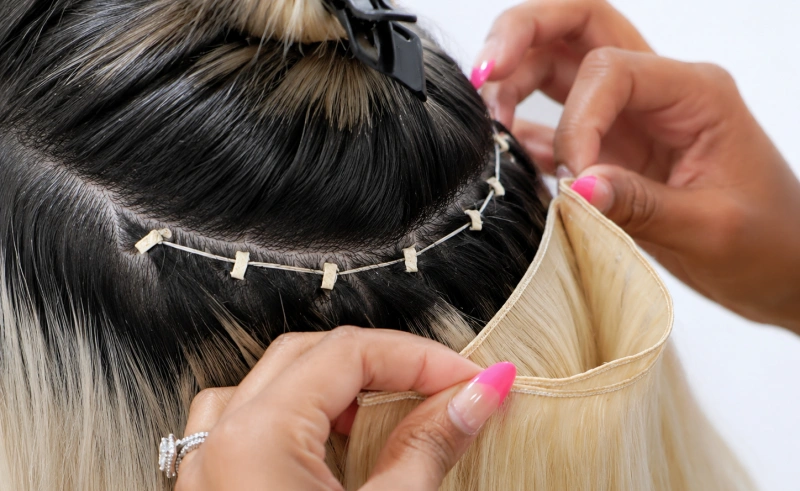
Place the weft along the completed foundation and confirm that the seam sits flat without twisting or rolling. If the row needs multiple wefts, stack only what the natural hair and your trained method can support.
Traditional hand-tied seams generally should not be cut. Fit the row with full pieces, a manufacturer-approved fold, or an appropriate piece length unless the product documentation explicitly says the seam is cuttable. Confirm color placement before stitching; it is easier to correct at this stage.
Step 5: Sew the Wefts to the Foundation
Thread the C-curve needle with the extension thread approved for your method. Secure the starting point and sew the weft to the foundation using the stitch pattern from your training.
Aim for a flat, stable attachment with consistent stitch tension. Keep the needle path controlled so it does not catch loose natural hair outside the row. If the foundation shifts, stop and correct it; extra thread cannot repair poor placement or an unstable anchor.
Tip: Secure does not mean tight. A stable row should still allow comfortable scalp movement.
Step 6: Check Tension Before the Next Row
Do not wait for the final style to ask about comfort. After every completed row, have the client look down, turn side to side, and describe any sharp pull, pinching, or one point that feels tighter than the rest.
- Reopen and re-section a bead that traps cross hairs.
- Adjust a stitch or anchor that creates a localized pressure point.
- Reconsider row weight if the natural hair visibly flexes or shifts under the load.
- Check for puckering, a twisted seam, uneven bead orientation, or a loose endpoint.
- Document corrections so the next appointment can reproduce what worked and improve what did not.
Step 7: Blend, Style, and Finish
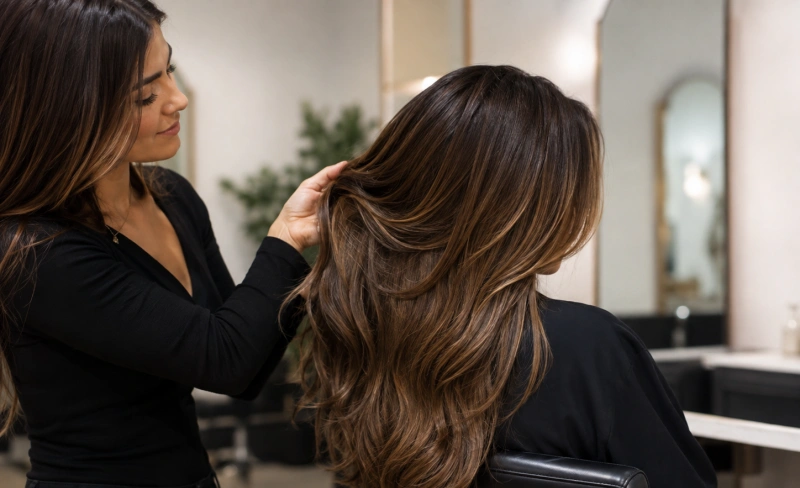
Release the natural hair and review the result from the back, sides, and front. Check the blend in the client’s normal part and in the styles she wears most often.
Cut and layer the loose hair as needed to remove a visible shelf and connect the natural ends with the extension length. Do not cut through the traditional hand-tied seam while blending. Finish by checking track coverage, movement, color balance, end security, and comfort, then provide written aftercare.
How to Tell Whether the Installation Is Correct?
A finished row should not be judged by the front-view photo alone. Check the attachment before the client leaves and again at maintenance.
- The weft lies flat without a rolled or puckered seam.
- Tension feels even across the row; there is no single sharp or pinching point.
- No cross hairs are dragged into beads or stitches from outside the section.
- Both endpoints are stable and remain covered during normal head movement.
- The row carries an appropriate amount of hair for the client’s natural support.
- The track stays concealed at the crown, perimeter, typical part, and tuck-behind-the-ear position.
- The haircut and color placement blend without exposing the attachment or creating an obvious shelf.
Mild awareness of a new attachment may occur, but sharp pain, persistent pulling, pinching, or increasing soreness is a reason to reassess the row. It is not proof that the installation is secure.
Common Hand-Tied Extension Installation Mistakes
- Installing too tight: More pressure does not create a better foundation. Correct the section, anchor, placement, or load instead of relying on excessive tension.
- Leaving cross hairs: Hair pulled from the wrong section can pinch during movement and complicate grow-out, maintenance, and removal.
- Poor row placement: A row that is too close to the crown, hairline, or delicate temples may show or overload weak hair.
- Weak or uneven end anchors: A loose end can destabilize the row; an overly aggressive end can create a concentrated pressure point.
- Uneven weight distribution: Overloading one row or one area can feel heavy even when individual beads appear secure.
- Overstacking on low-density hair: A thin seam does not mean the client can support unlimited extension weight.
- Cutting a traditional hand-tied seam: Cutting can loosen the construction and cause unraveling or shedding unless the product is specifically designed to be cut.
- Mixing installation systems: Do not add glue, tape, or a different anchor method to a bead-and-sew workflow unless your training and product instructions require it.
- Skipping the row-by-row comfort check: A client may not mention discomfort unless you ask and test movement.
- Failing to keep service records: Without photos and notes, maintenance becomes guesswork and recurring problems are harder to diagnose.
After Installation: Records, Care, and Maintenance
Record the number of rows, weft pieces, color placement, bead and thread used, row map, areas of lower density or sensitivity, and any correction made during the service. With consent, photograph the row before releasing the natural hair.
Set the maintenance schedule from the client’s growth rate, installation method, row stability, lifestyle, and the way the attachment is wearing. Do not promise one universal move-up interval. At every appointment, inspect the scalp, natural hair, bead movement, thread wear, matting, shedding, and seam condition before automatically reinstalling the same map.
For the next steps, use Alpha’s guides to professional hand-tied extension removal and hand-tied extension care. They explain safe takedown and the client’s washing, brushing, drying, sleeping, and styling routine in detail.
Hand-Tied Hair Extension Installation FAQ
Can you install hand-tied extensions yourself?
Professional installation is strongly recommended. It is difficult to assess row mapping, bead placement, stitch control, and tension on your own head. A poorly built foundation can create visible tracks, slippage, pinching, or unnecessary stress on natural hair.
Do hand-tied extensions need glue?
Not in the common beaded-row sew-in workflow described here. The stylist builds a bead foundation and sews the hand-tied weft onto it. Other extension systems use different attachments, so do not combine methods unless your training and the product instructions specifically call for it.
How many rows of hand-tied extensions do you need?
There is no universal row count. It depends on natural density, head shape, the goal, the amount and weight of extension hair, and the installation system. Use the fewest rows that can deliver the result with appropriate distribution. See how many rows of hand-tied extensions for the dedicated planning discussion.
Can you cut hand-tied wefts during installation?
Do not assume that you can. Traditional hand-tied seams generally should not be cut because the weft may loosen or unravel. Follow the specific manufacturer instructions and use an approved fold or different piece length when required. Read can you cut hand-tied extensions for the product-specific explanation.
How close should hand-tied extensions be to the scalp?
Close enough to lie flat and move naturally, but not so close or tight that the attachment pinches or restricts comfortable movement. Exact spacing is method-specific. Follow your education system and evaluate the client’s comfort instead of applying one measurement to every head.
How long does hand-tied extension installation take?
Appointment time varies with consultation needs, color preparation, number of rows, weft quantity, the stitch method, blending, and whether more than one professional is working. Quote the service after consultation rather than promising a fixed time for every client.
What should you do if a hand-tied row hurts?
Sharp pain, persistent pulling, pinching, or worsening soreness should be checked by the installing stylist. A bead, stitch, anchor, placement decision, or row weight may need adjustment. For the broader risk discussion, read are hand-tied extensions bad for your hair.
Final Thoughts
A reliable hand tied weft installation is built in layers: assess the client, map the row, create a clean bead foundation, check the anchors, position the weft, sew with controlled tension, test comfort, blend, and document the result. Skipping one stage usually creates more work at maintenance.
Treat every head as a new plan. Use your training system for the exact technical pattern, but let the client’s density, scalp, head shape, desired result, and real-world wear determine how you apply it.
Salon owners, stylists, hair brands, retailers, and wholesalers can review Alpha’s hand-tied weft extensions and request a sample or wholesale quote after confirming the required seam construction, color, texture, length, weight, and packaging.



